Decorate in a Day

Easter is one of my favorite holidays to decorate for. I love its jelly bean colors, pastel patterned eggs and handfuls of chocolates. However, all of a sudden Easter is less than 2 days away and I haven’t had as much as a single jelly bean!

Instead of turning your home into an explosion of Alice & Wonderland whimsy, choose to highlight a few areas that are most visible by guests (ie. kitchen counter).

IMG_0837

Put a spin on your every day flowers with this easy fix – snag a handful of carrots (stem included) and add them to your bouquet!

IMG_0840

IMG_0826


 My all time favorite Easter decoration is this paint chip garland. I love that you can customize the colors to brighten up your space! (Directions to make Easter garland)

DSC_3318


How cute are these bottle toppers?! They don’t take up any display space and are easy to store.

IMG_0838 IMG_0839

Easter Egg Garland

DSC_3318

I originally saw this DIY blow up over Pinterest a few years ago and it’s hands down my favorite Easter decoration. This is one of the few Pinterest posts I’ve tried that actually turned out looking just like the pictures!

1. Using a pencil, outline your cookie cutter or stencil of choice on the paint chip. Carefully cut out the shape using a sharp pair of scissors and repeat with the remaining paper chips.

image

Hint: You can also tilt the stencil to make the white lines diagonal on the egg like the image below.

2. Once the shapes are cut out it’s time to make a hole for the string. I’ve made these 2 different ways and the first way was easier but not as sturdy.

Option 1: Use a mini hole punch to make a hole at the top of the egg. Thread a 2 inch piece of string through the hole. Tie the 2 inch string onto the garland in a knot to secure.

Options 2: To avoid the eggs all sliding to the middle when hung, I used a thick needle [instead of hole punch] to make a hole at the top of the egg. This way, the string wouldn’t have as much room to move around.

image

3. After all the holes are punched, place the eggs in order you would like them to hang. I threaded wax cotton string [from Walgreen’s] through the needle and one by one strung the eggs.

IMG_0856

Now all you have to do is pick the perfect spot to display your work!

IMG_2298

You will need:

– 8+ paper paint chips
– Egg shaped cookie cutter or paper stencil
– String (waxed cotton works best)
– Scissors
– Needle or hole punch

“It wasn’t over.. it still isn’t over!”

[Cue the dramatic music and Ryan Gosling storming through the rain]

Thanks for the early April Fool’s Chicago, that burst of warm weather didn’t last too long.  This never ending winter has my outfit repeats at an all time high and I’ve exhausted each sweater at least 17 times. I’ve been sorting through my closet in search of new layers and came across this little gem. 

IMG_0851

I love blazers not only because they can dress up a pair of jeans but they are a great source of warmth too! It’s a timeless must-have in any wardrobe. You can stay neutral or brighten up the outfit with a colorful scarf or fun jewelry.

IMG_0805IMG_0804

s          f

BCBG blazer, JCrew scarf, DL1961 denim.

Baked Mac & Cheese Rolls

DSC_3301

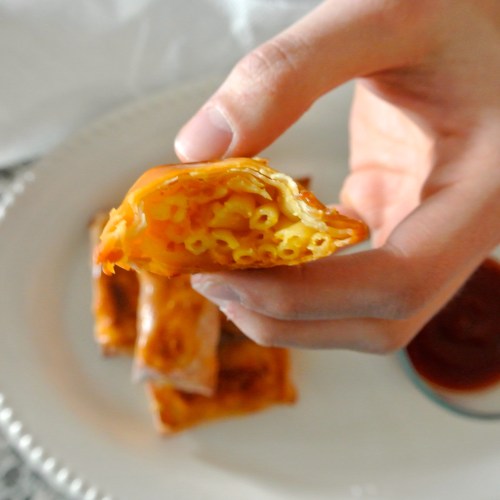
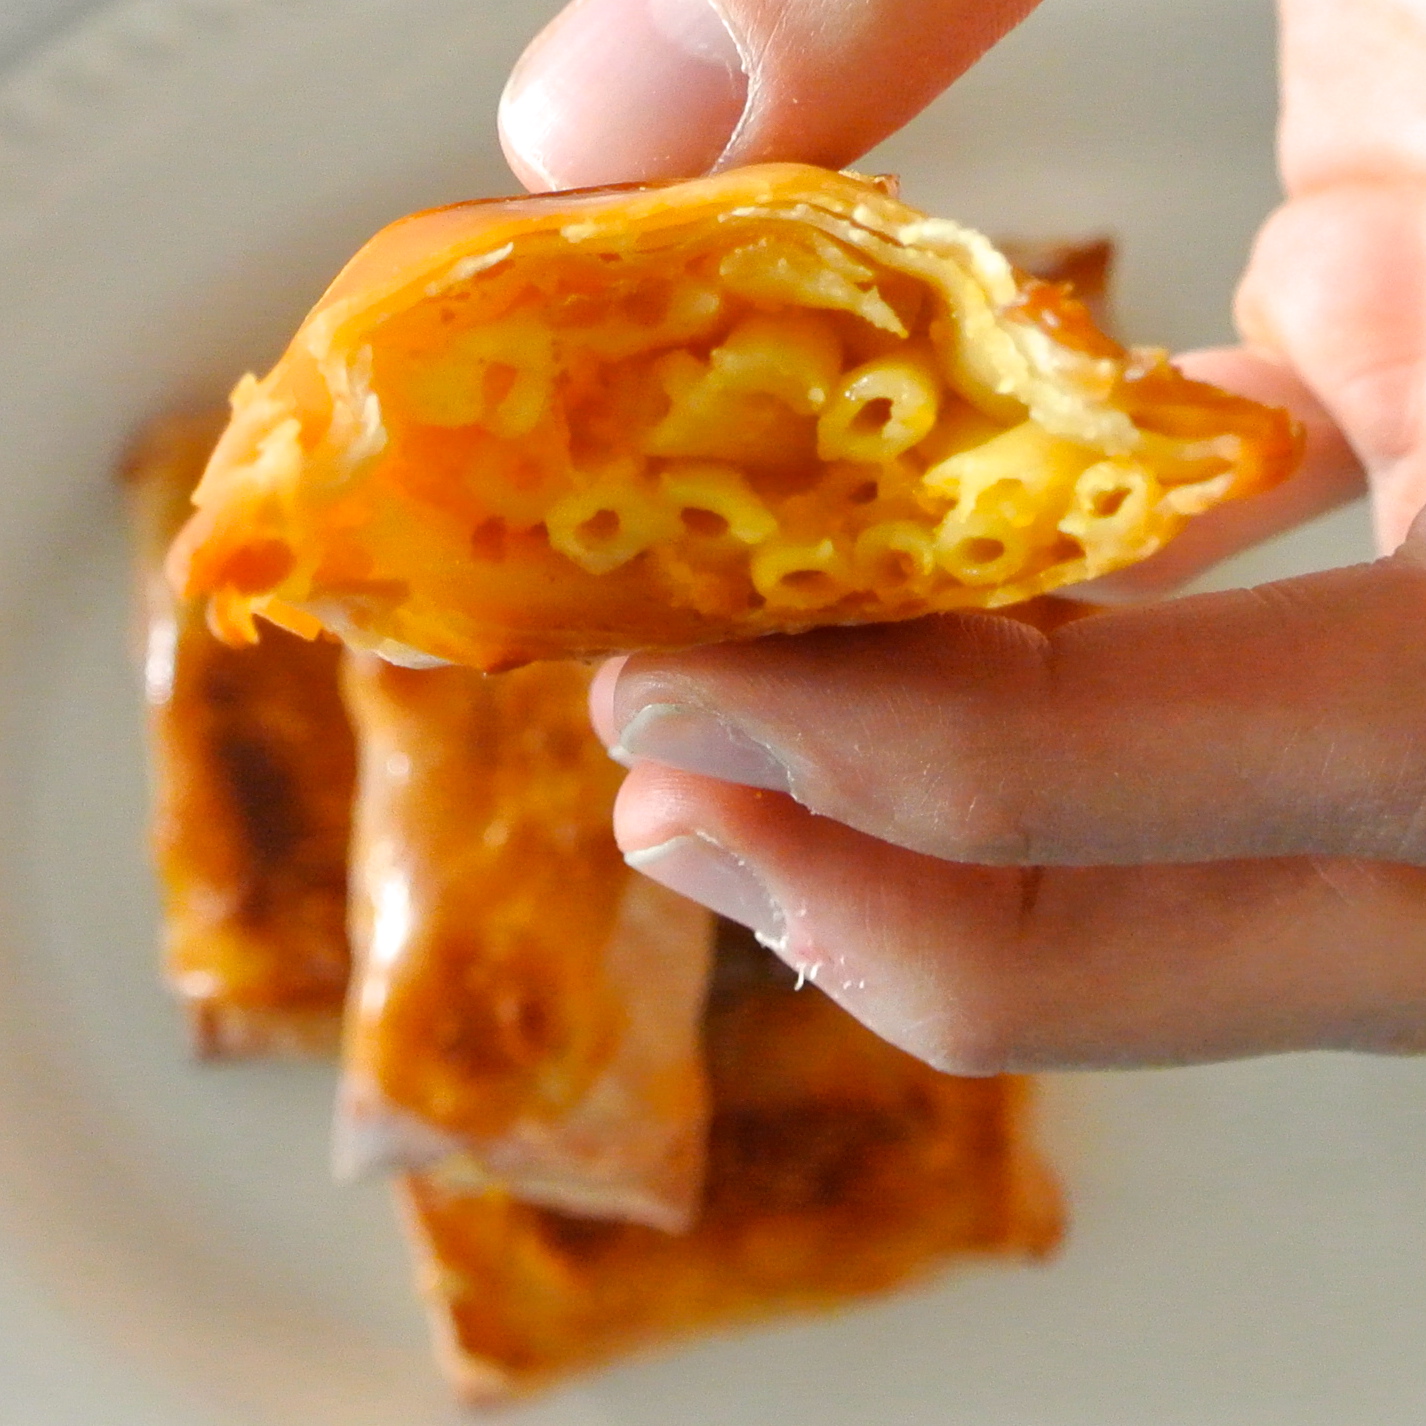
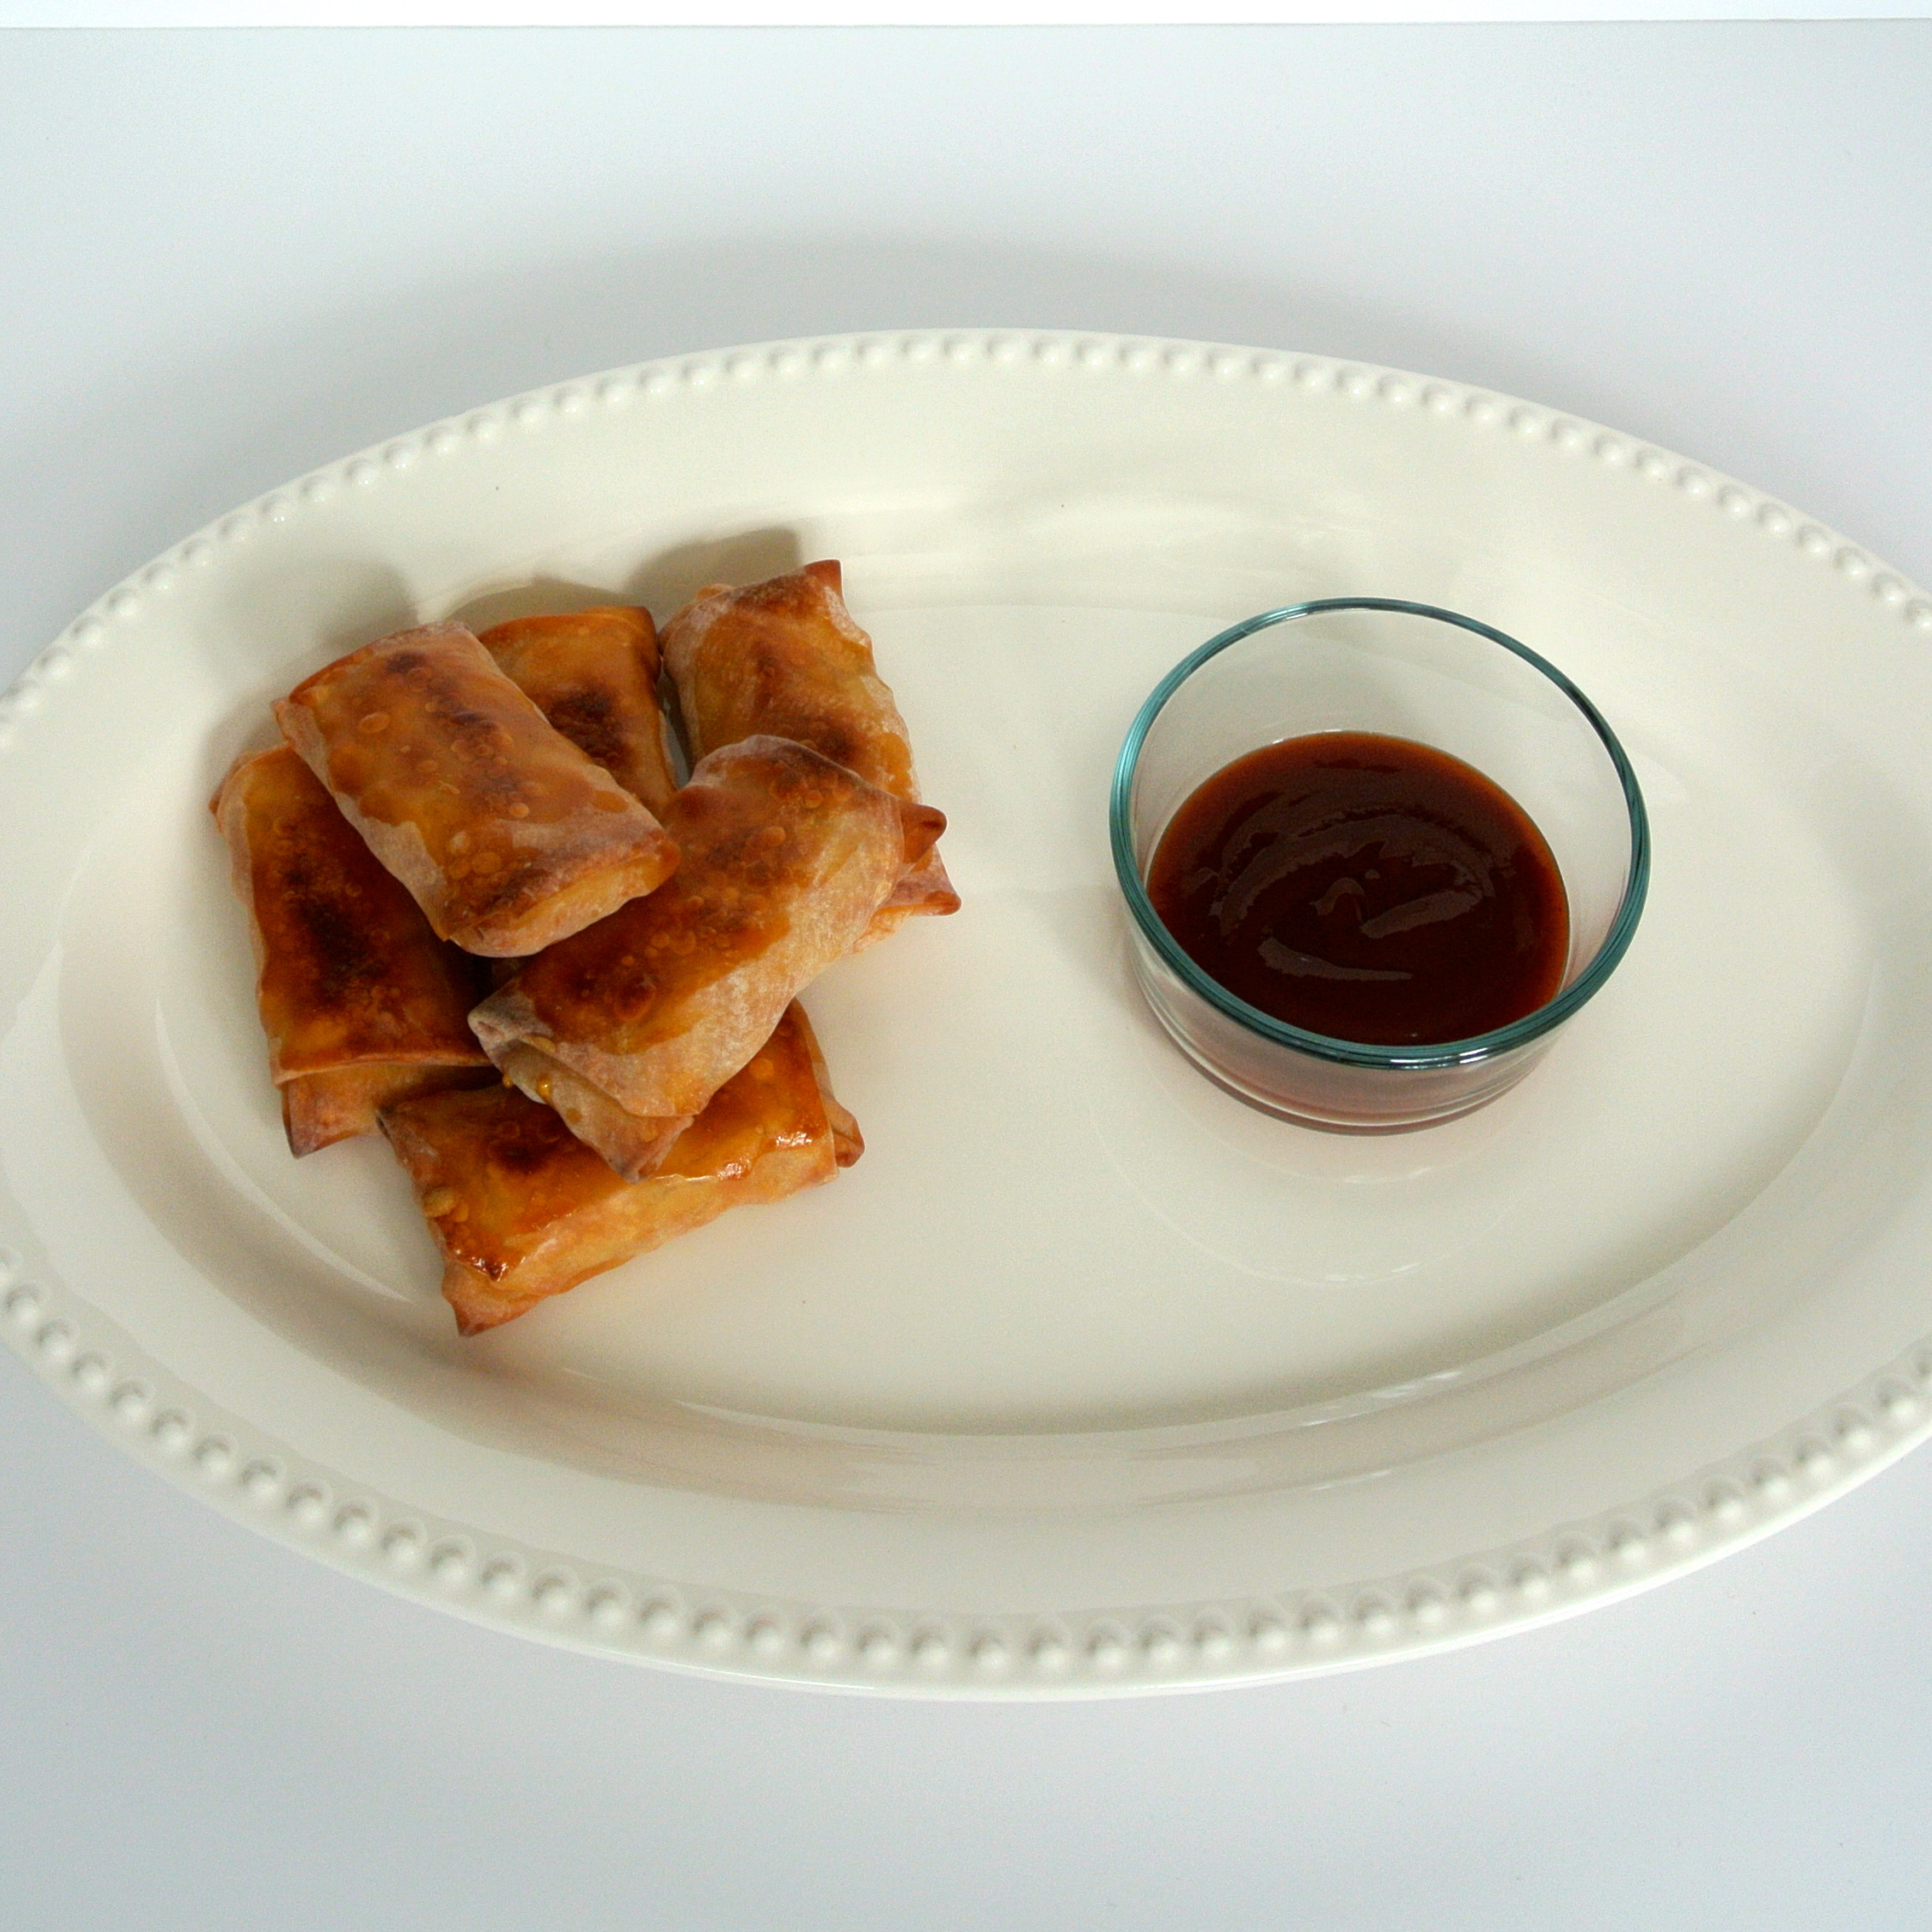
 It’s a Mac & Cheese kind of day. I love a good “finger food” recipe and these are an easy crowd pleaser. As if Mac & Cheese wasn’t good enough already, lets roll it up in a crisp doughy blanket and smother it in BBQ sauce.

Obviously everything is better fried but I needed a “healthy” alternative to make up for my weekend splurges. I only baked about half of the Mac & Cheese rolls and froze the others. I love recipes where I can freeze and easily reheat for those super lazy days or another blizzard rolls through and I have to choose between frostbite or a rumbling tummy.

I’ve never used egg roll wraps before and it was so easy – fill, fold and bake. The options are endless with other ingredients you can fill these with!


1. Prepare your Mac & Cheese of choice and let it slightly cool.

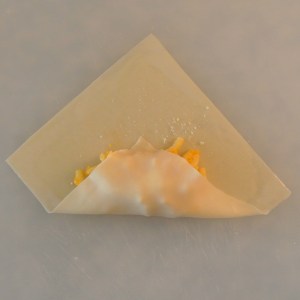
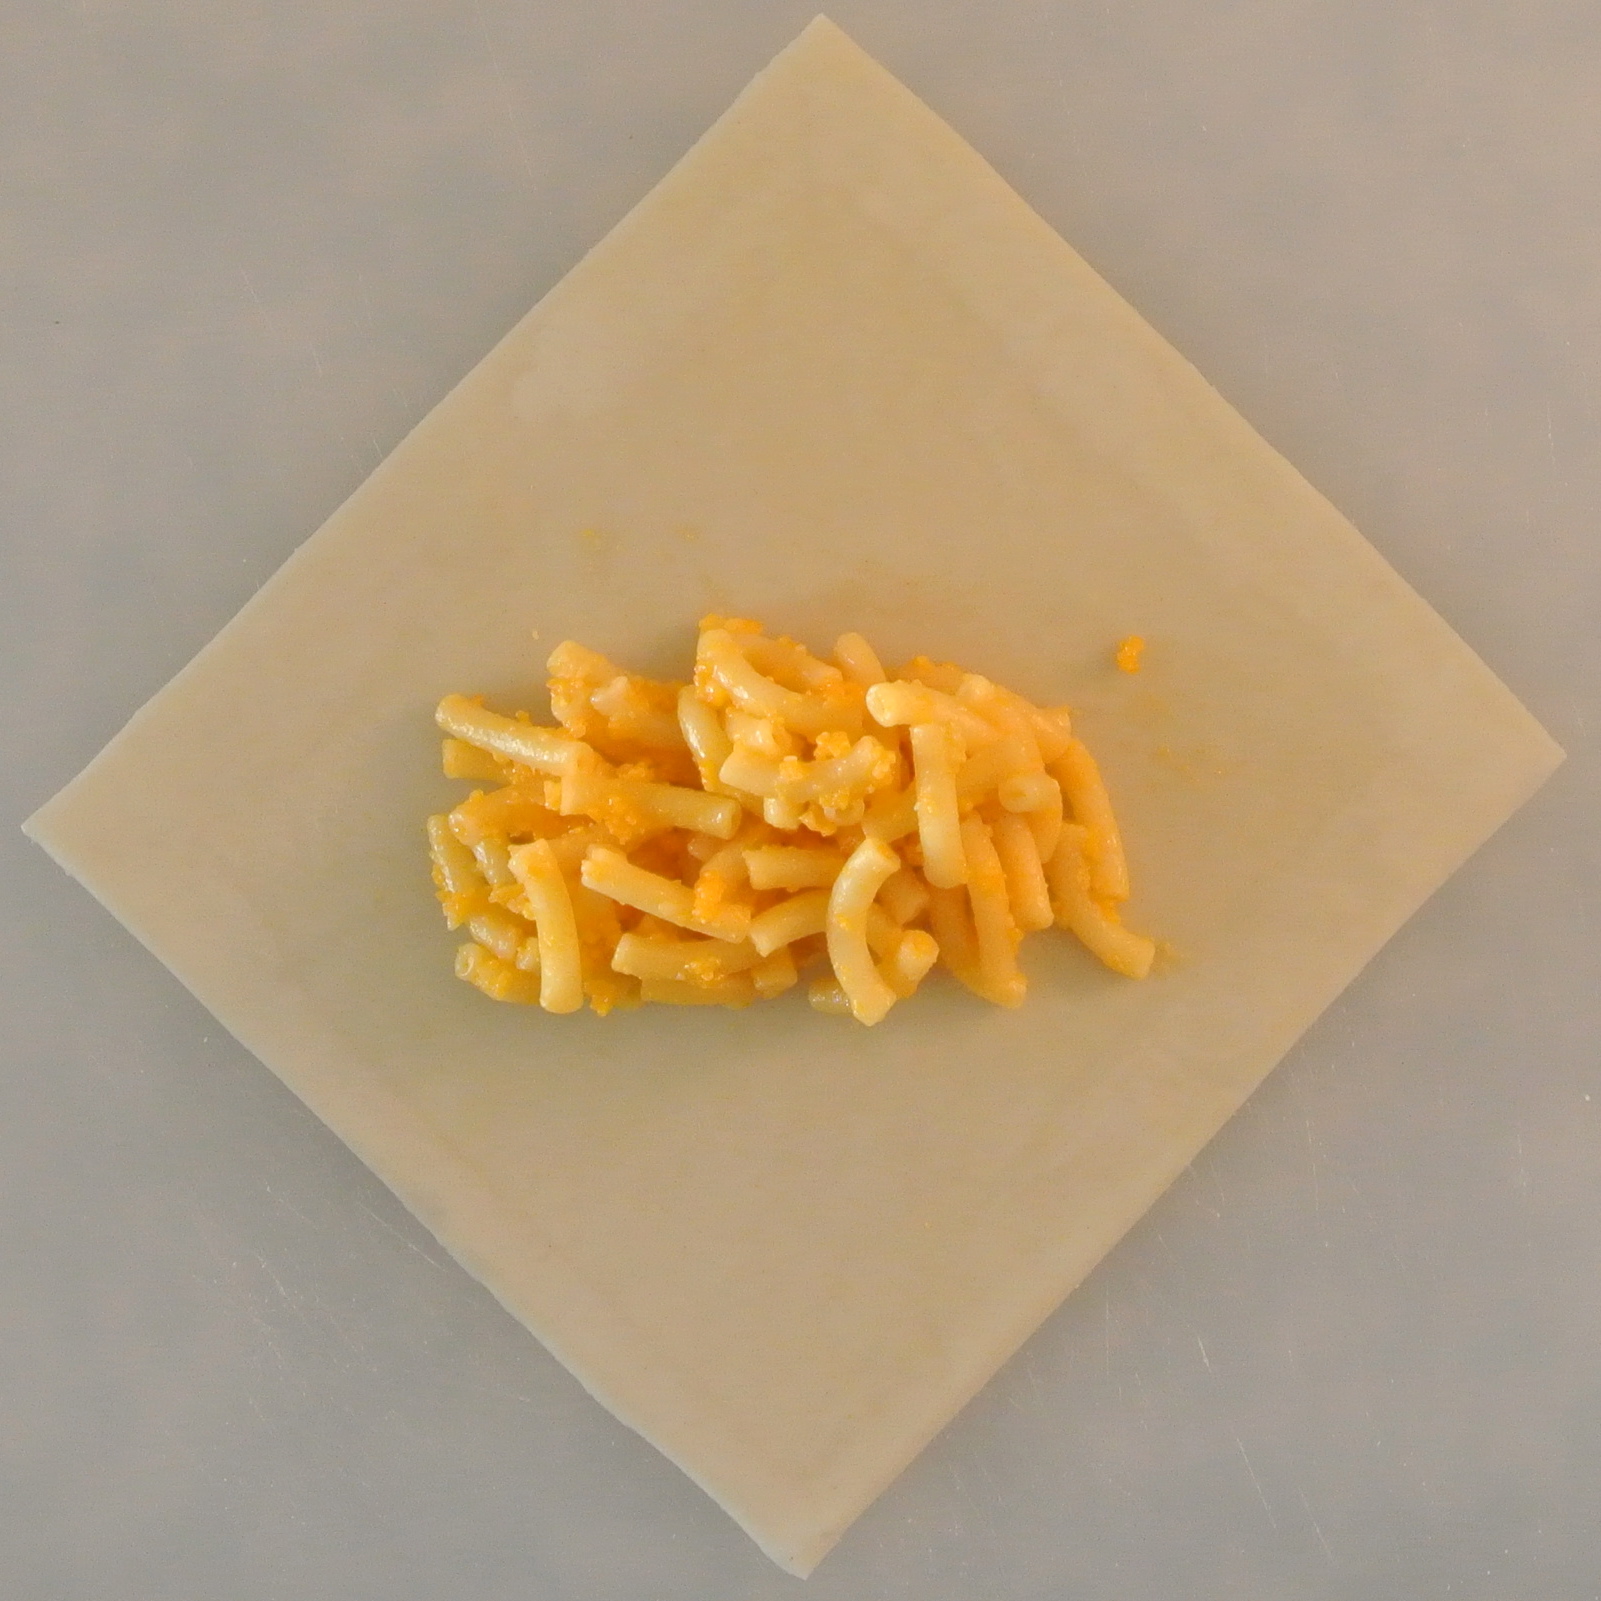
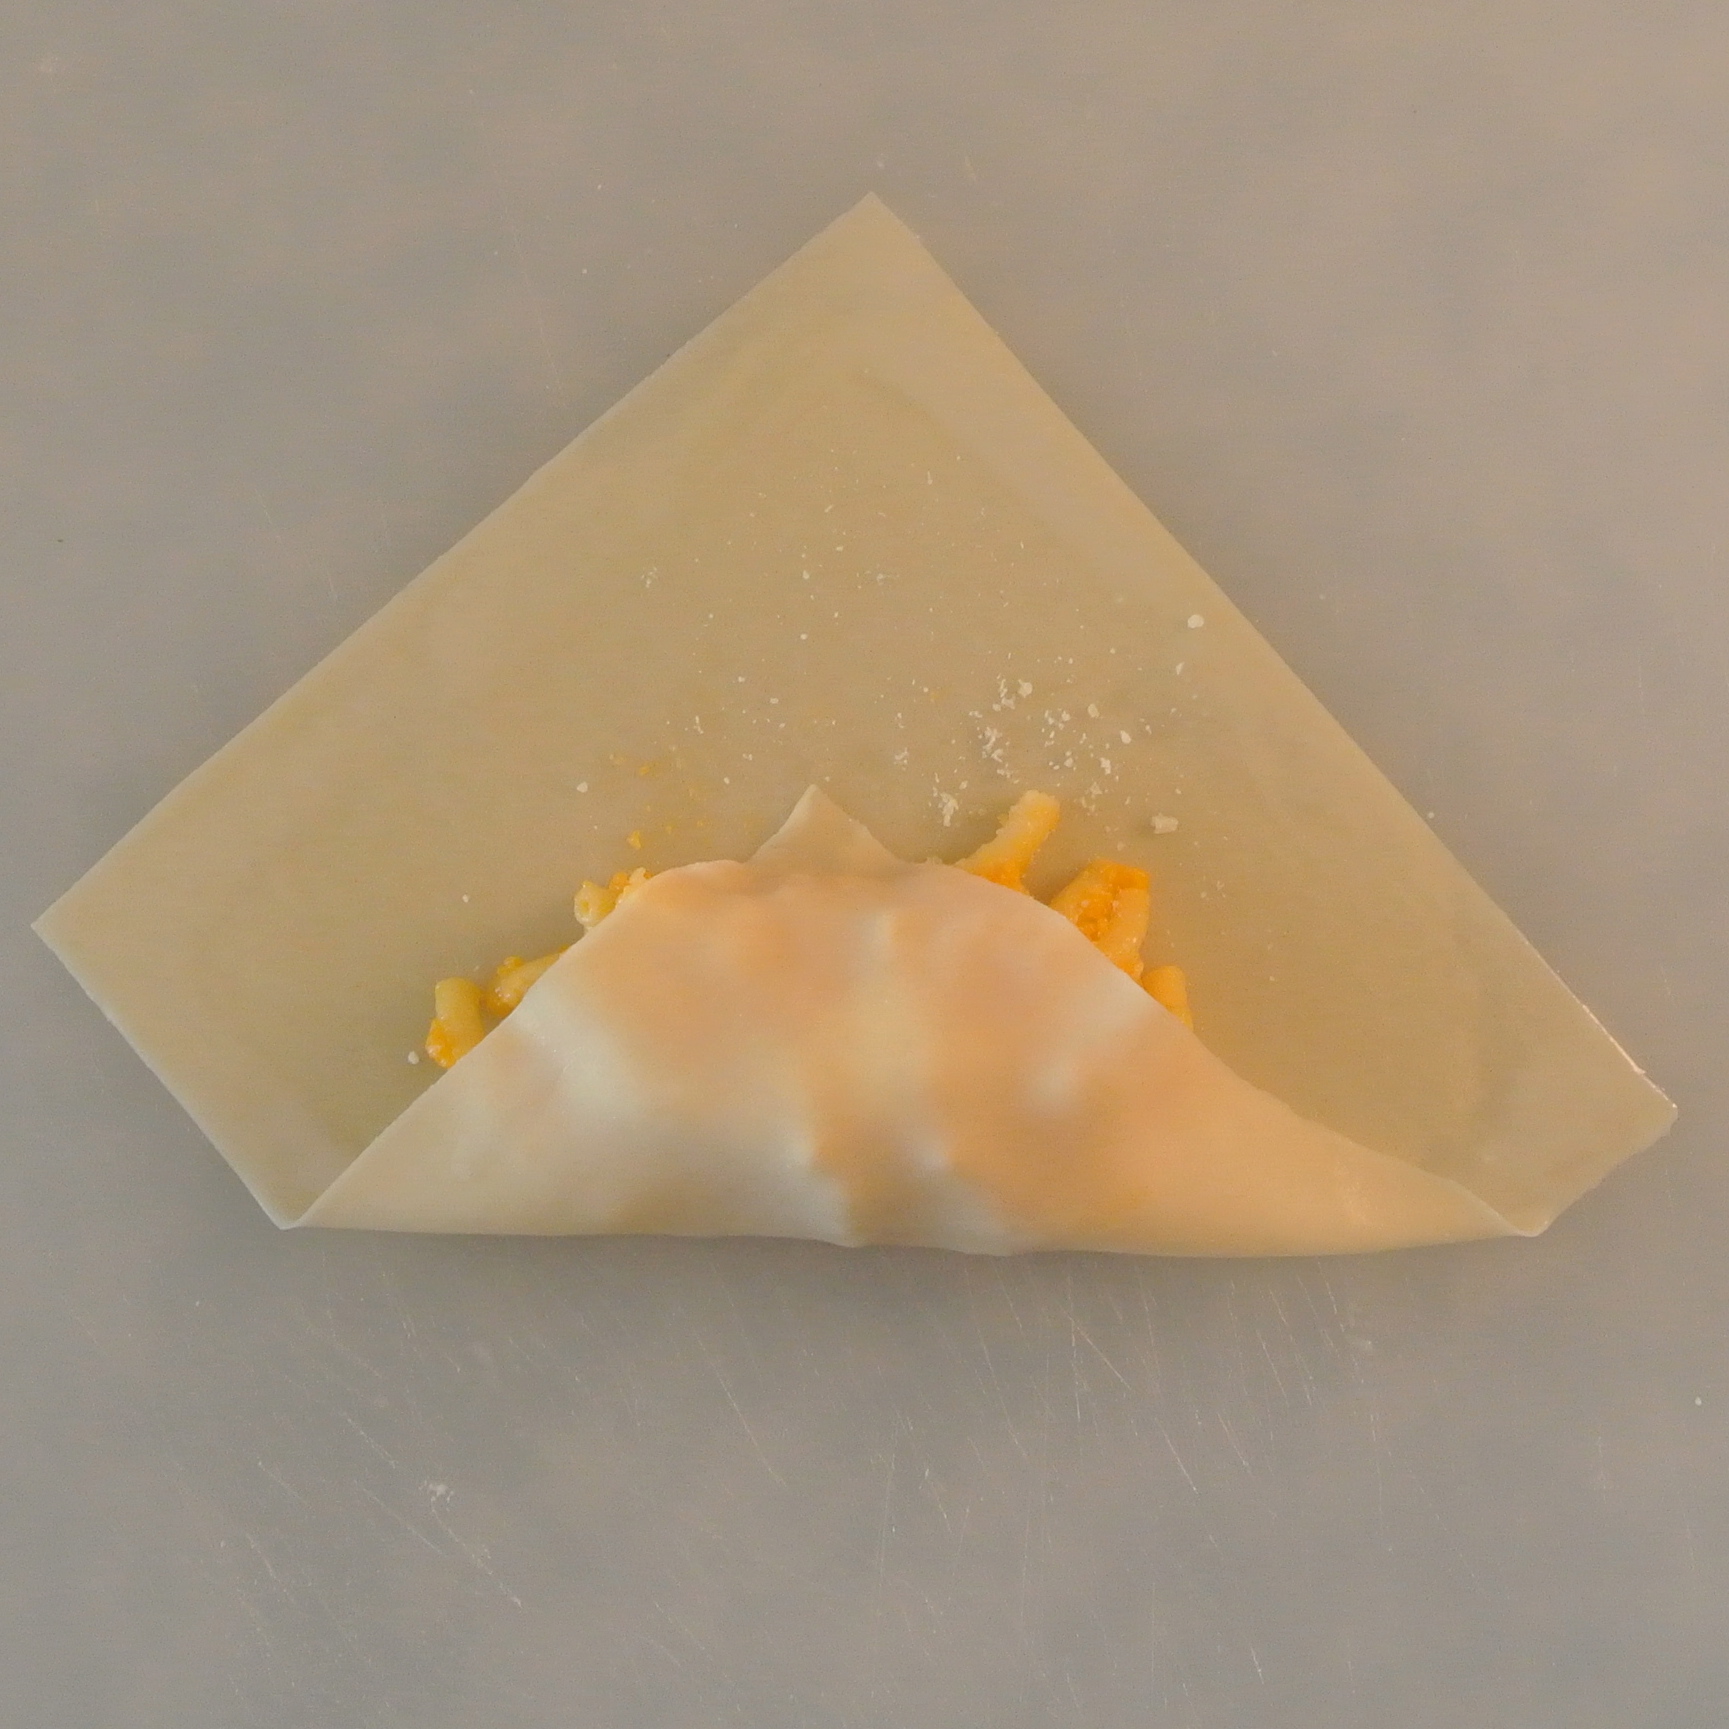
2. Preheat oven to 350°. Place 2 spoonfuls of Mac & Cheese on the center of the egg roll. Lightly brush the edges with water to help the folds stick together.
DSC_3284

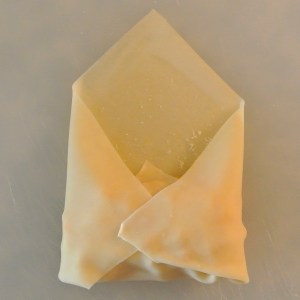
3. Begin by folding the bottom corner to the center then repeat with side corners.

DSC_3287DSC_3289

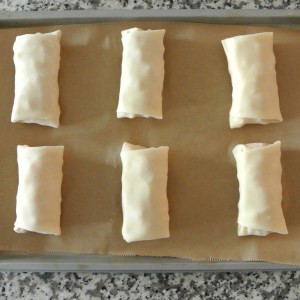
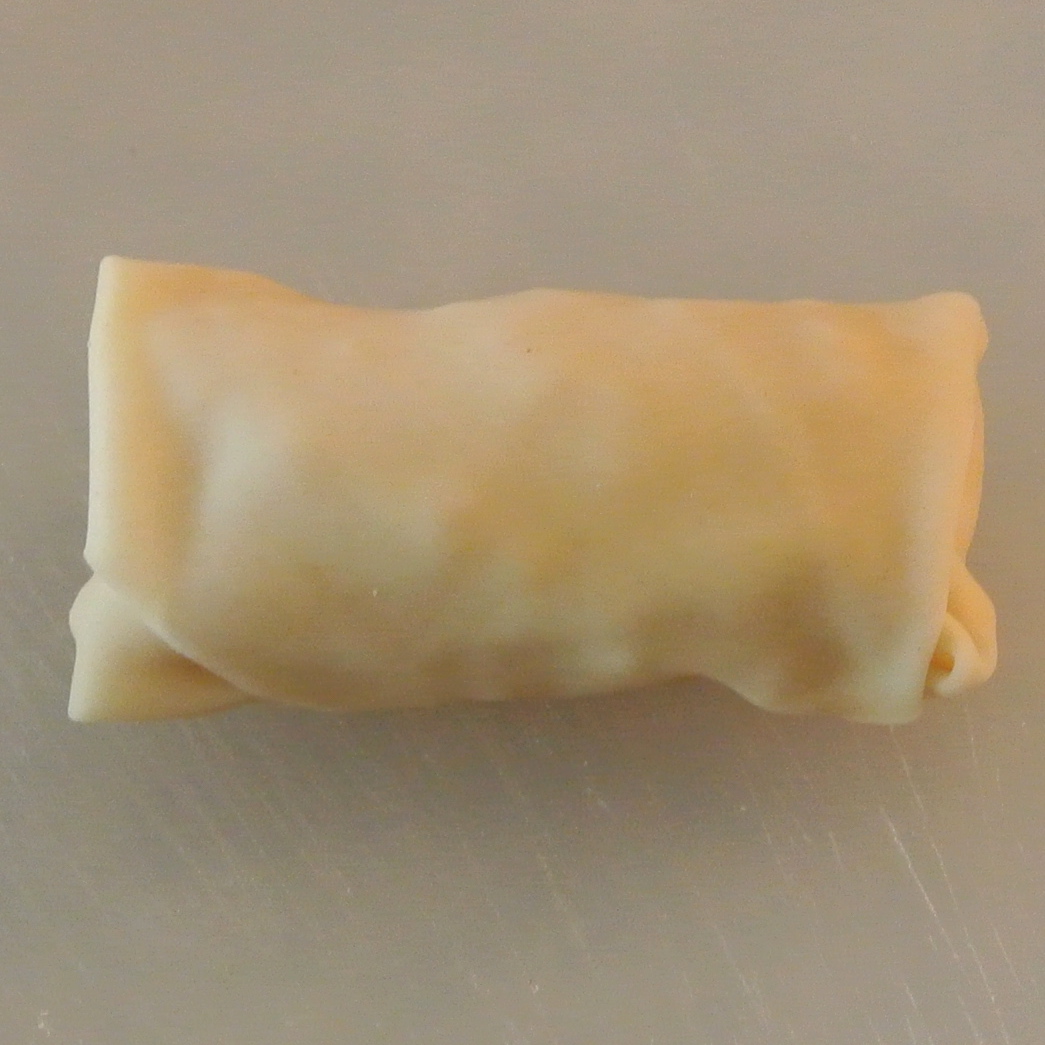
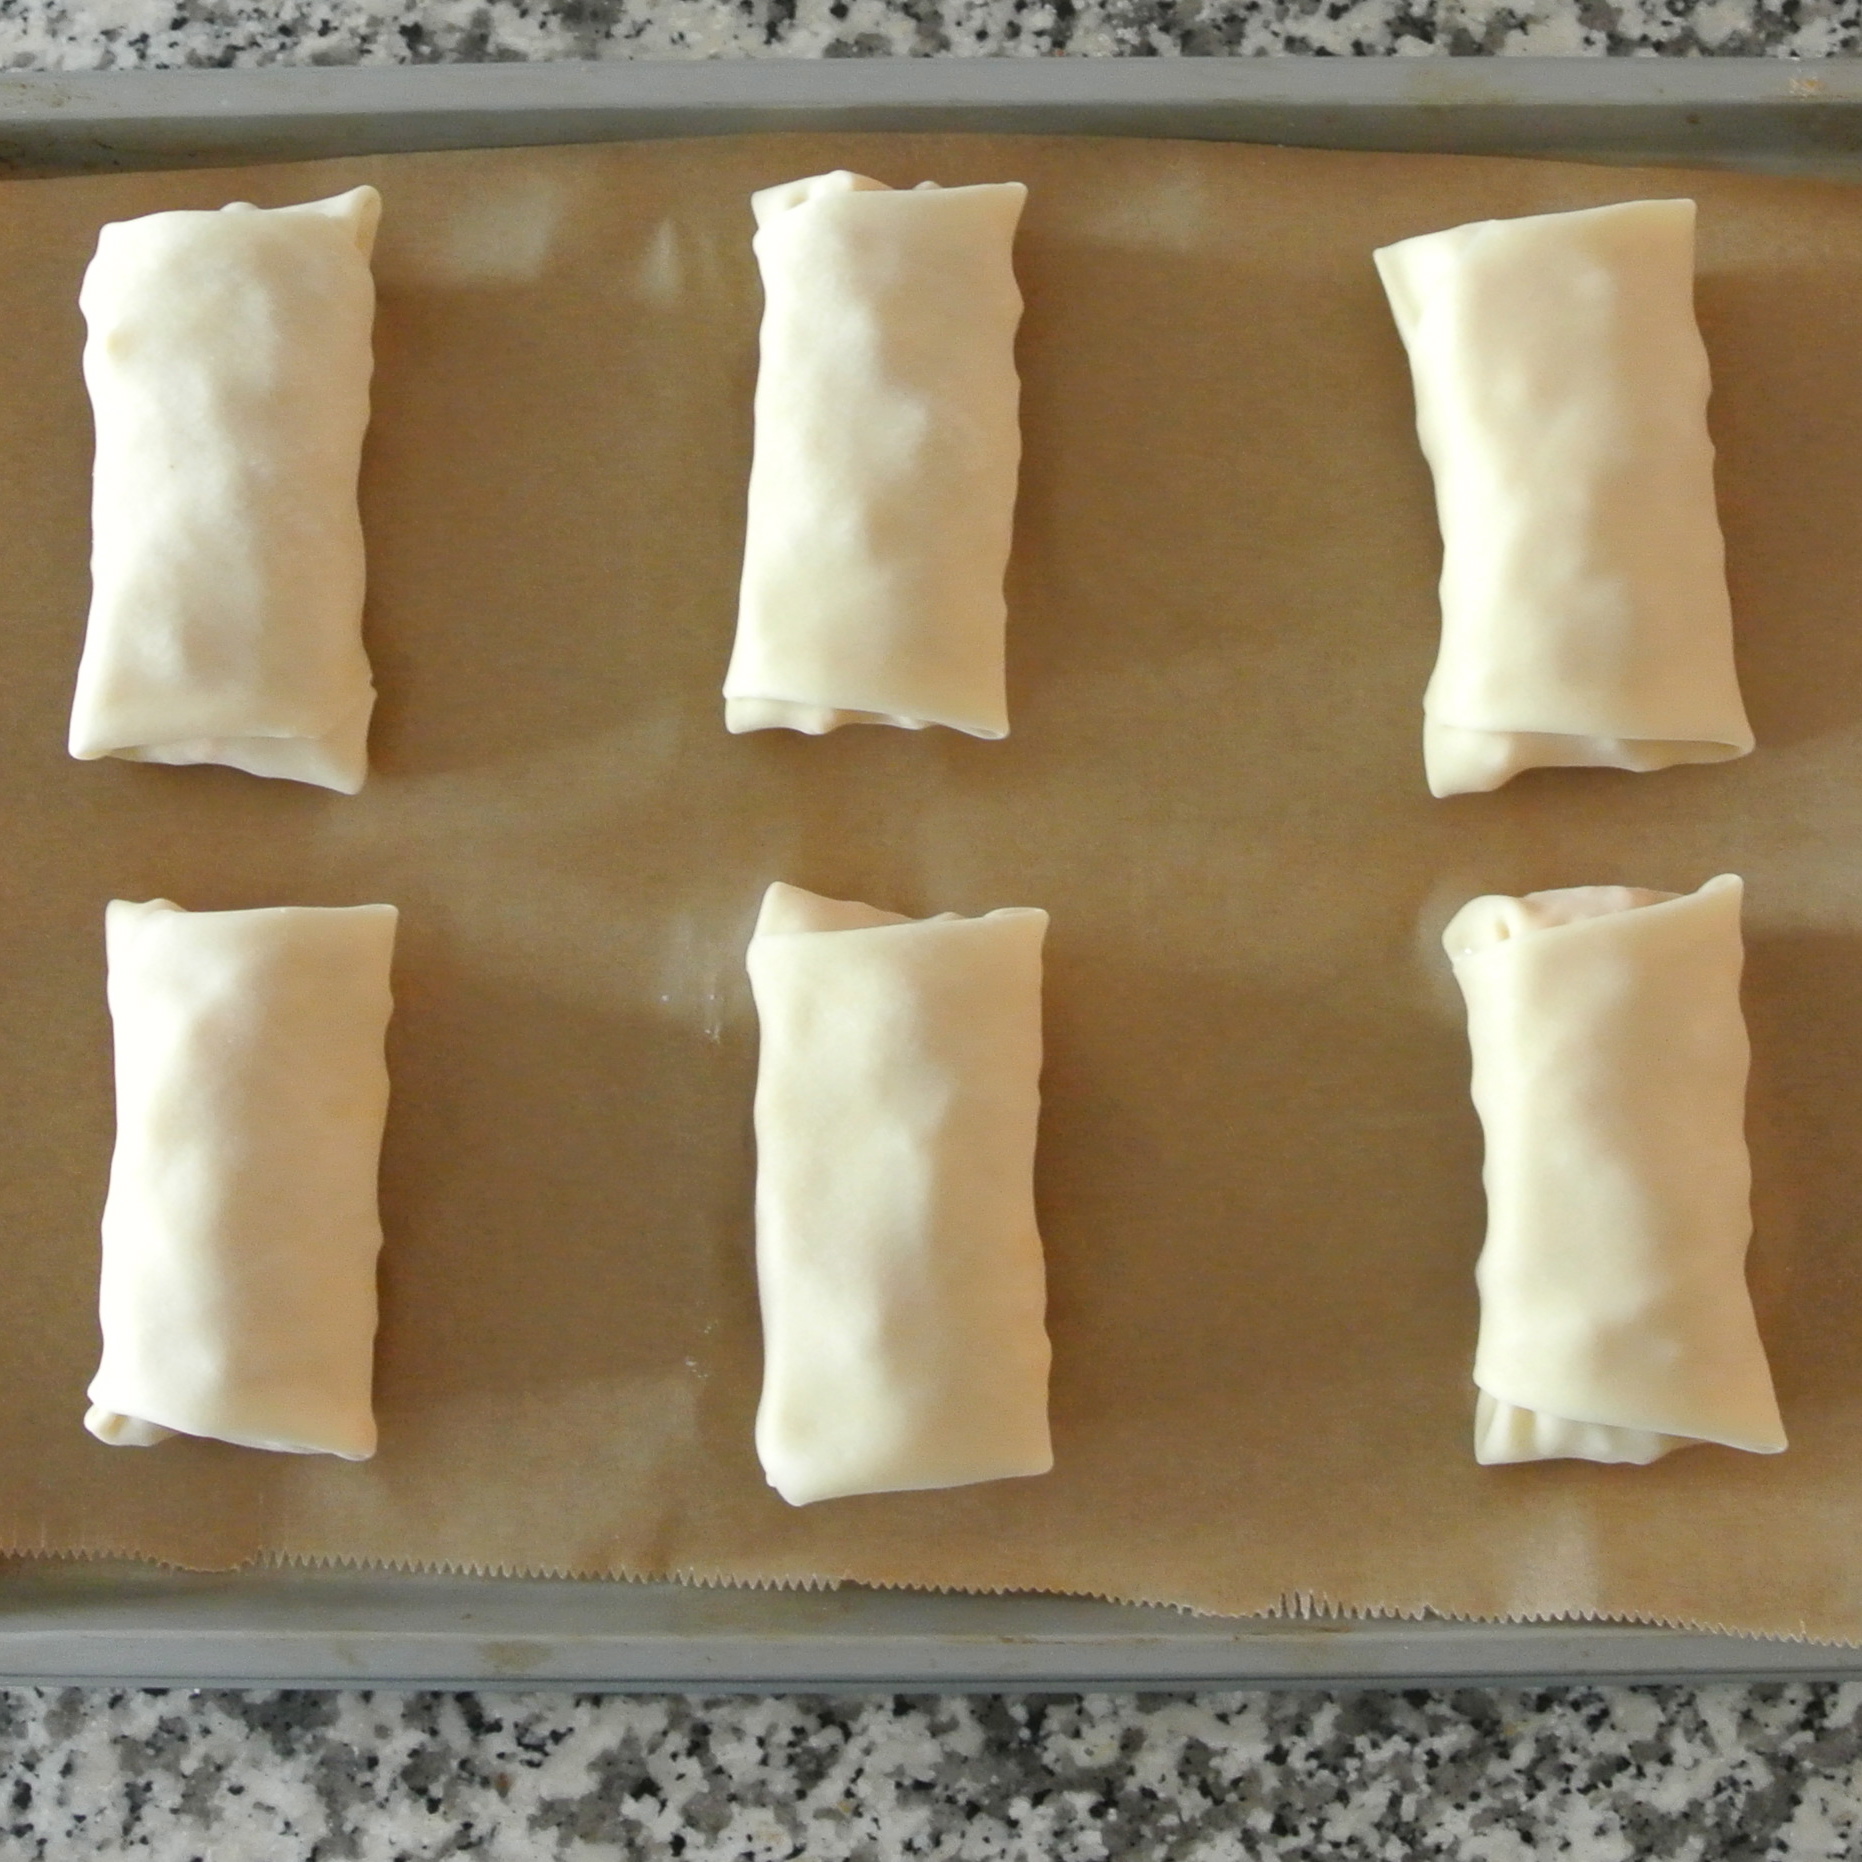
4. Finish by rolling the dough from bottom to top until closed. Place egg rolls on baking sheet with the seam side down. DSC_3285
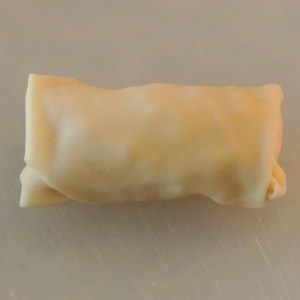
(Note: the egg rolls will not spread so you can place them close to one another on baking sheet)

DSC_3290

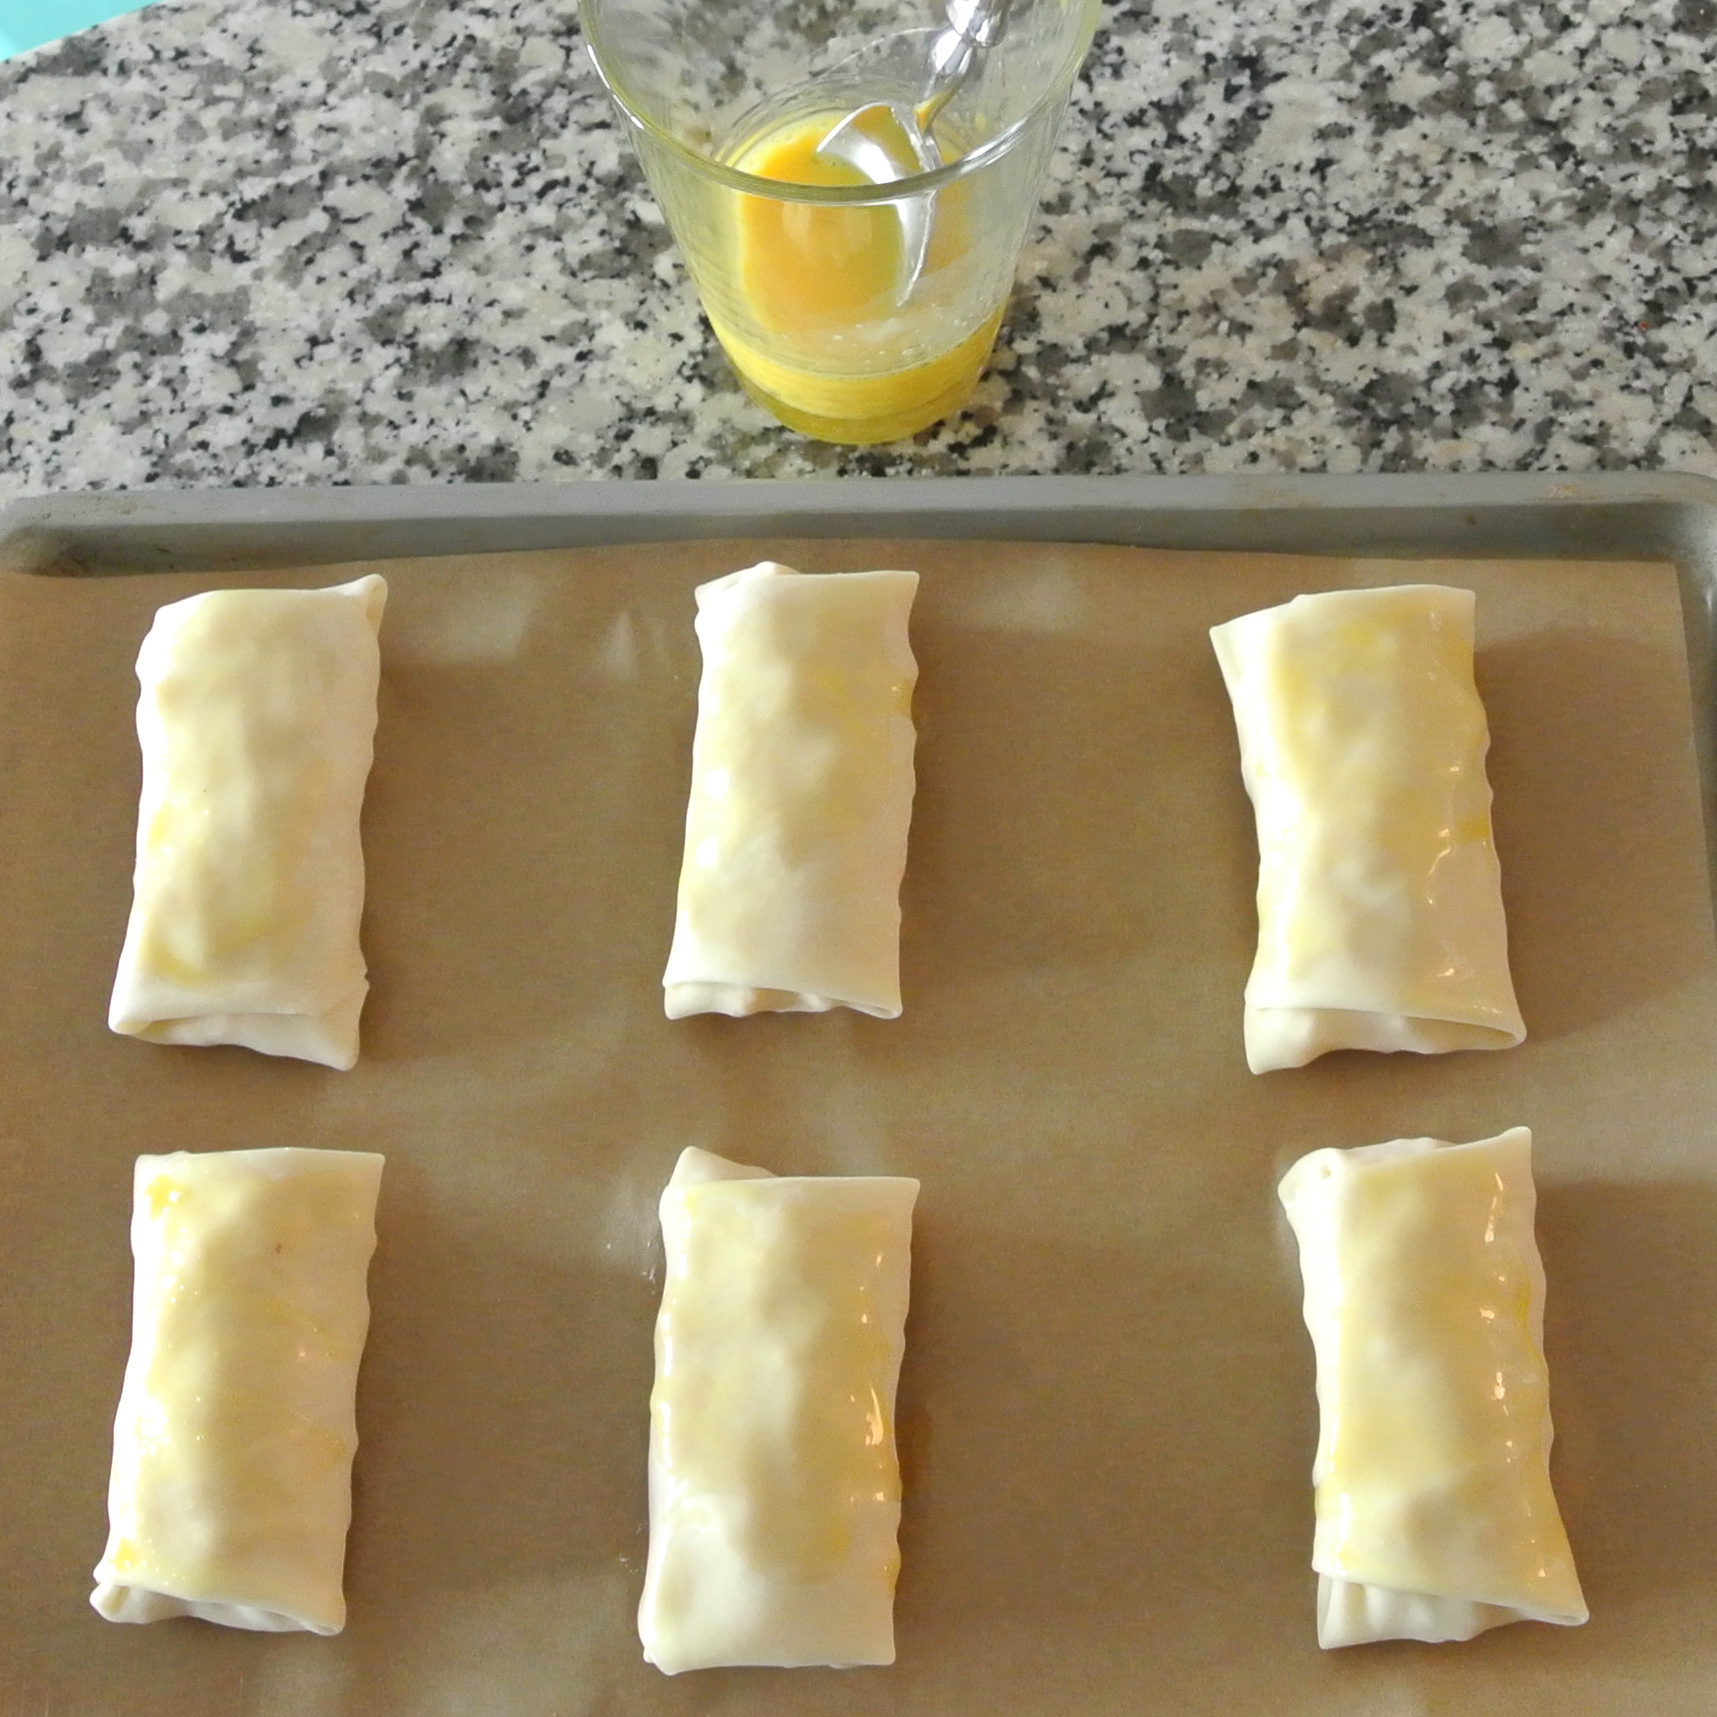
5. Before baking, lightly brush the tops of the rolls with an egg wash – this will give them a deep golden color and that “crunch” you want when you bite into them.DSC_3293

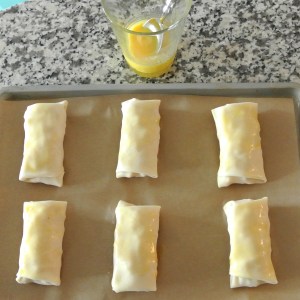
6. Bake for 15 minutes on each side. The Mac & Cheese will be super hot so be sure to let rolls cool 5-10 minutes before serving. DSC_3297

DSC_3300

You will need:

– Mac & Cheese of choice (I used Annie’s Homegrown 6 oz. box)
– Egg roll wraps
– 1 Egg
– BBQ sauce or condiment of choice

Makes 17 Mac & Cheese Rolls

Greek Inspirations

Reminiscing on a trip to the stunning Greek Isle of Santorini. This well known “honeymoon spot” was already on the top of my bucket list but when I heard it hosts one of the best sunsets in the world, I immediately packed my bags.

Santorini did not disappoint. The scenery is remarkable with white washed houses and windmills overlooking the rich blue Aegean Sea.

DSC_2294 - Version 2Even the restaurants are picturesque tucked into the island cliffs. I’m obsessed with the detail inside this little outdoor nook. The drift wood flower pot and mirror reflecting the award winning sunset behind me – um can I go back now?

I might have interrupted a few dining couples to capture these beautiful pops of color but it was well worth it!

Ice Cream Cookie Cups

IMG_0506

Day 1 of a new juice cleanse and I’m drooling looking back on these scrumptious ice cream sundae cups I made last weekend.

Cookie + ice cream + melted chocolate.. I think the mouthwatering picture says it all.

One of the best parts about this dessert is that it’s not supposed to be super “pretty” or clean cut – the messier, the better! So pile on as many marshmallows and M&M’s as your little heart desires.


1. Preheat oven to 350°. Combine 3-4 generous tablespoons of cookie dough into a ball and place into a non-stick muffin tin. Roll the remaining dough and distribute until entire muffin tin is full.*Add more cookie dough for a thicker cookie cup.

2. Bake cookie cups for about 13 minutes or until golden brown. Pull your tray out and immediately take a spice jar and gently press into each cookie. This should form a little “crater” where the ice cream will sit.

IMG_0499

IMG_0498


3. Let the cups cool for 10 minutes. Take your ice cream of choice and place a mini scoop in the cookie cup. My ice cream started to melt pretty fast so after I scooped all the ice cream I stuck the tray in the freezer for about 10 minutes before adding my toppings.

IMG_0502

4. Before taking the tray out of the freezer make sure your chocolate is melted and all toppings are laid out. To make things easier, pull out each cup and set on a flat plate or pan before decorating.

5. Take a spoon and drench your ice cream cookie cups with chocolate and as many toppings as you can find! When finished, place desserts in the freezer for an additional 10 minutes before serving. – that is if you can get that far before sticky little fingers grab them : )

IMG_0507

IMG_0503

Enjoy!IMG_0510

You will need:

– Roll of cookie dough
– Ice cream
– Melting chocolate + toppings of choice

Cook time 13 minutes

Heart Strung Garland

IMG_0485This Valentine’s DIY is super cute and a budget friendly way to add color to any small space.  Very little brain power is required and it’s likely you already have the materials shoved in the back of your junk drawer.

IMG_0418

Start by separating the hearts and diamonds from the rest of the deck. Then use a hole punch or pin to poke 2 holes through the top corners of the cards. IMG_0420

Dip a paint brush in glue and brush over the hearts and diamonds. Make sure to leave room around the hole punches so the string can still get through. Use glitter of your choice to sprinkle over the glue.

Let dry before stringing the cards together. The excess glitter will likely stick to the static on the card so I recommend using a dry paint brush to sweep it off the card.

DSC_3167

Take your thread/string/ribbon and weave it through the cards. Leave a little space between the cards so you can tie extra ribbon on the garland for more color and pazazz.

DSC_3161 DSC_3162

DSC_3168
DSC_3164

You will need:

– 1 deck of cards
– Hole punch or pin
– Glue
– Paintbrush
– Glitter
– String/ribbon