
I lived up to the meaning of “Fat Tuesday” and have been in a sugar coma all afternoon.
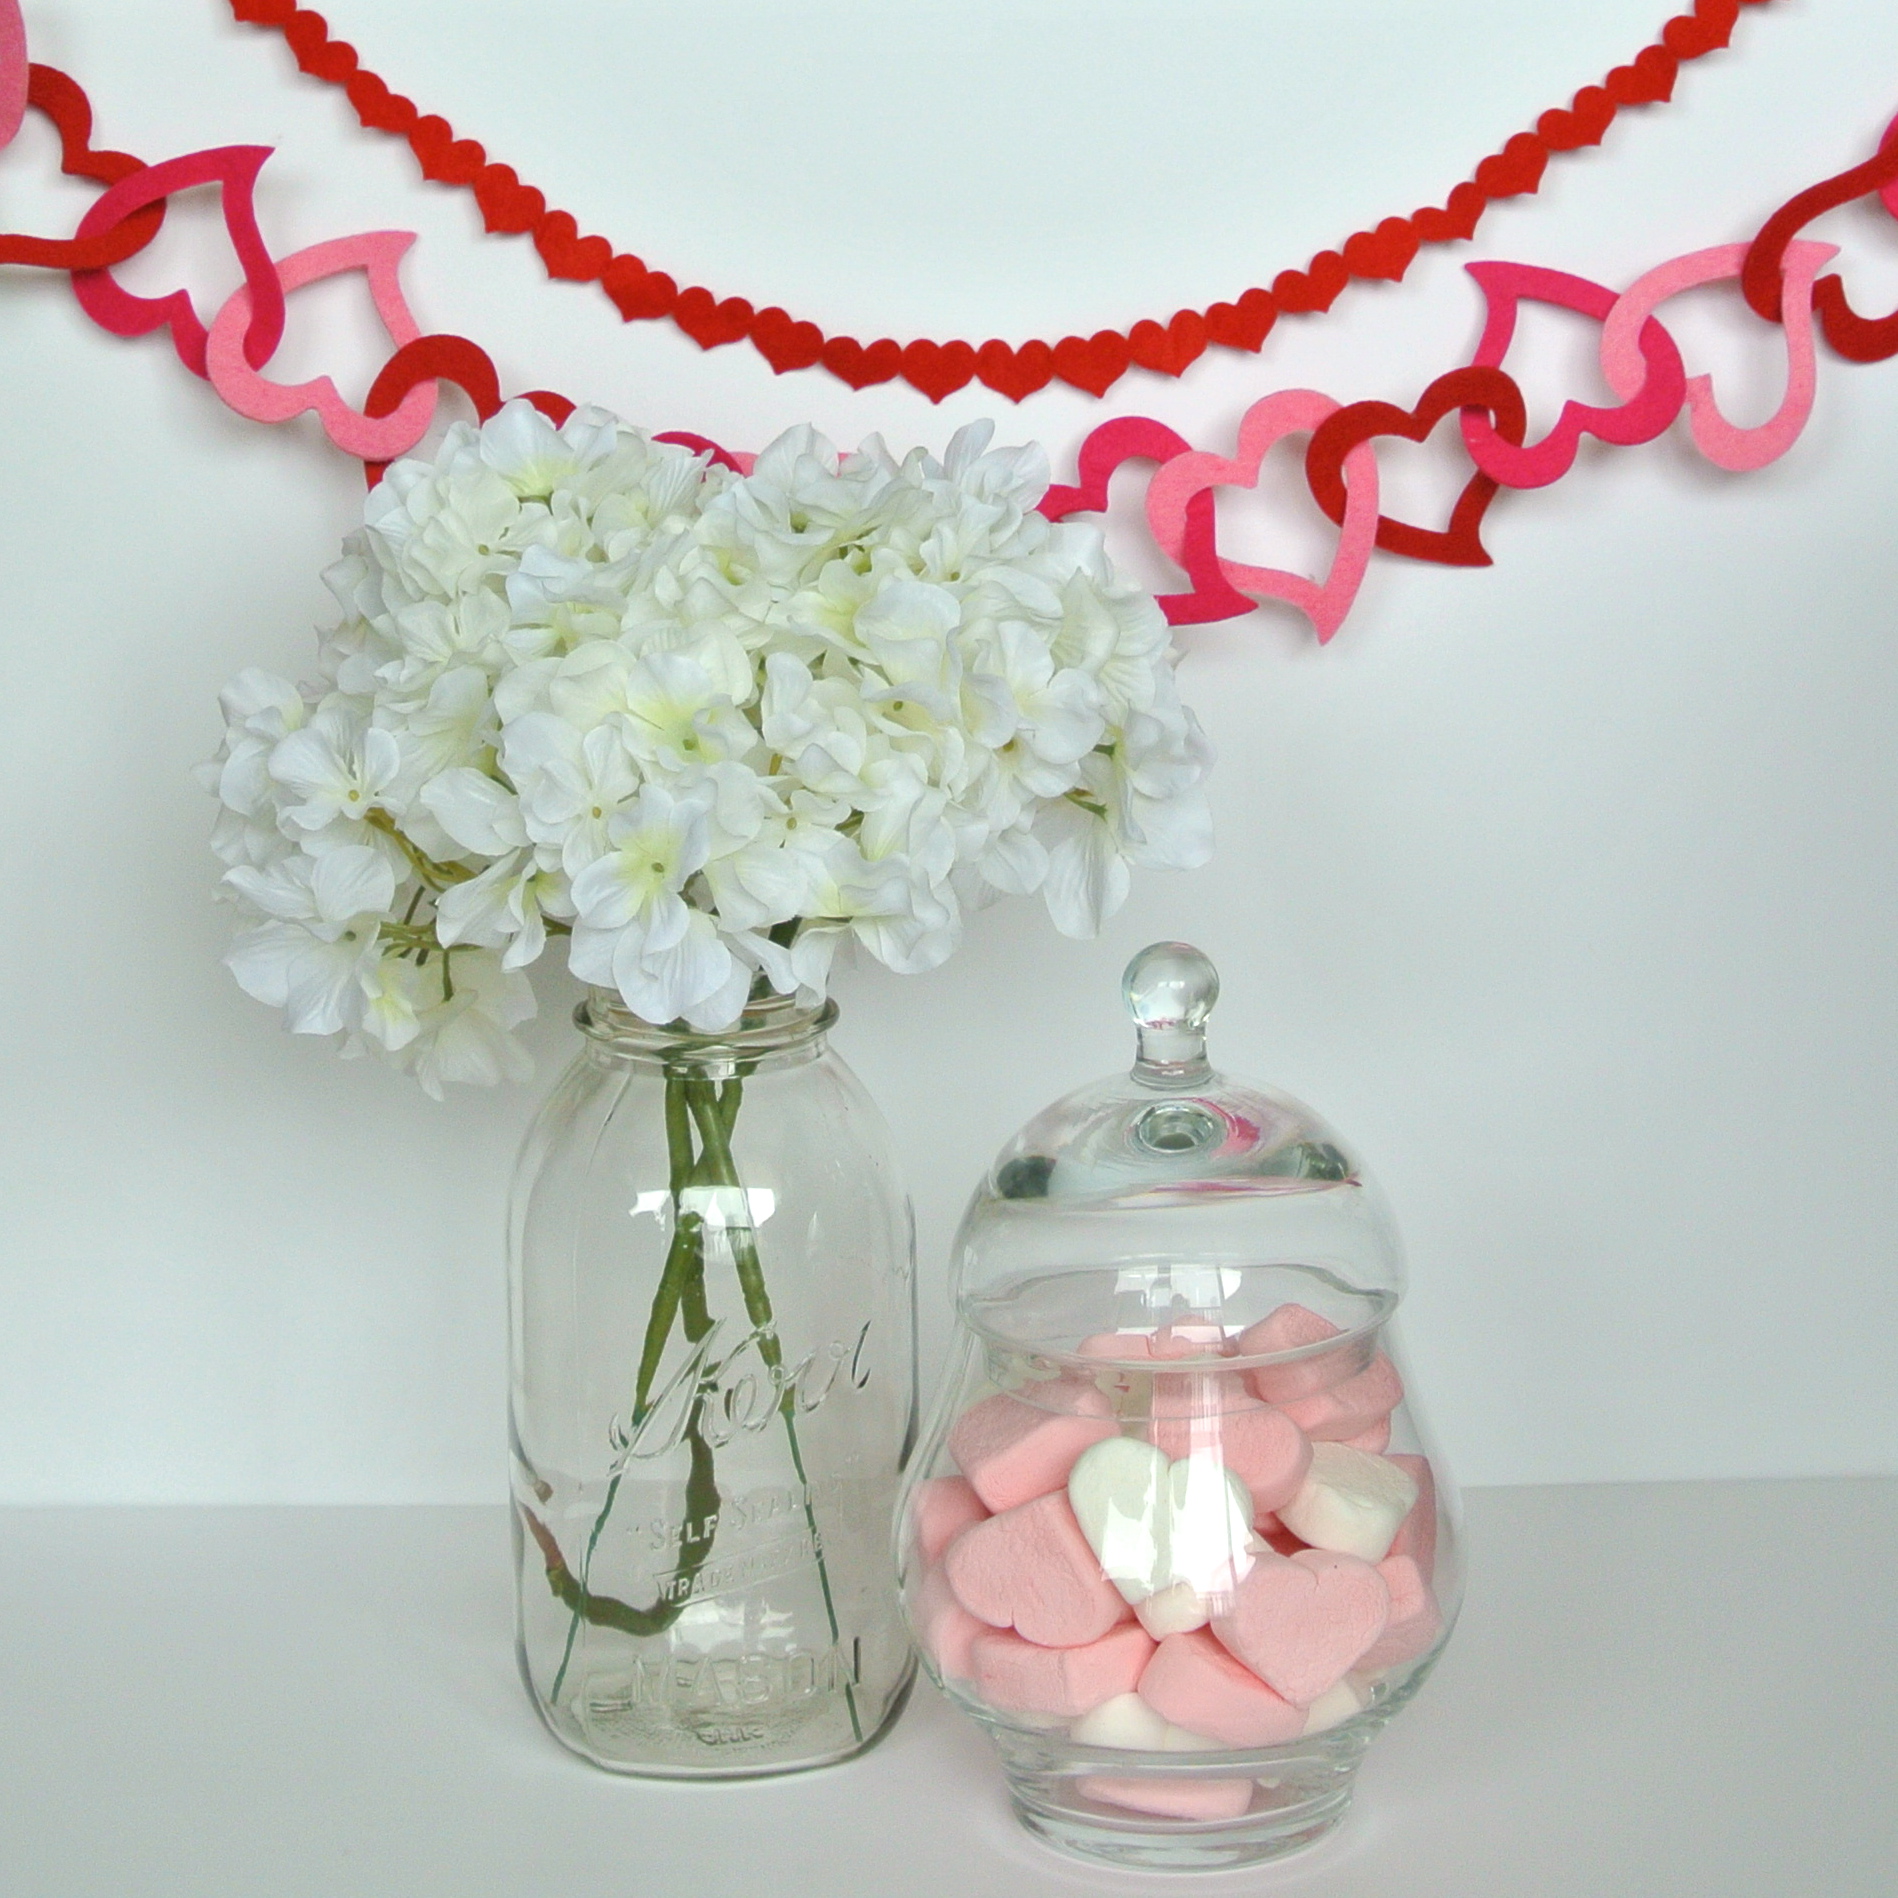 But.. I think I’ll leave these heart marshmallows out just a little bit longer.
I lived up to the meaning of “Fat Tuesday” and have been in a sugar coma all afternoon.
But.. I think I’ll leave these heart marshmallows out just a little bit longer.
I hope your day was filled with love and sweets!
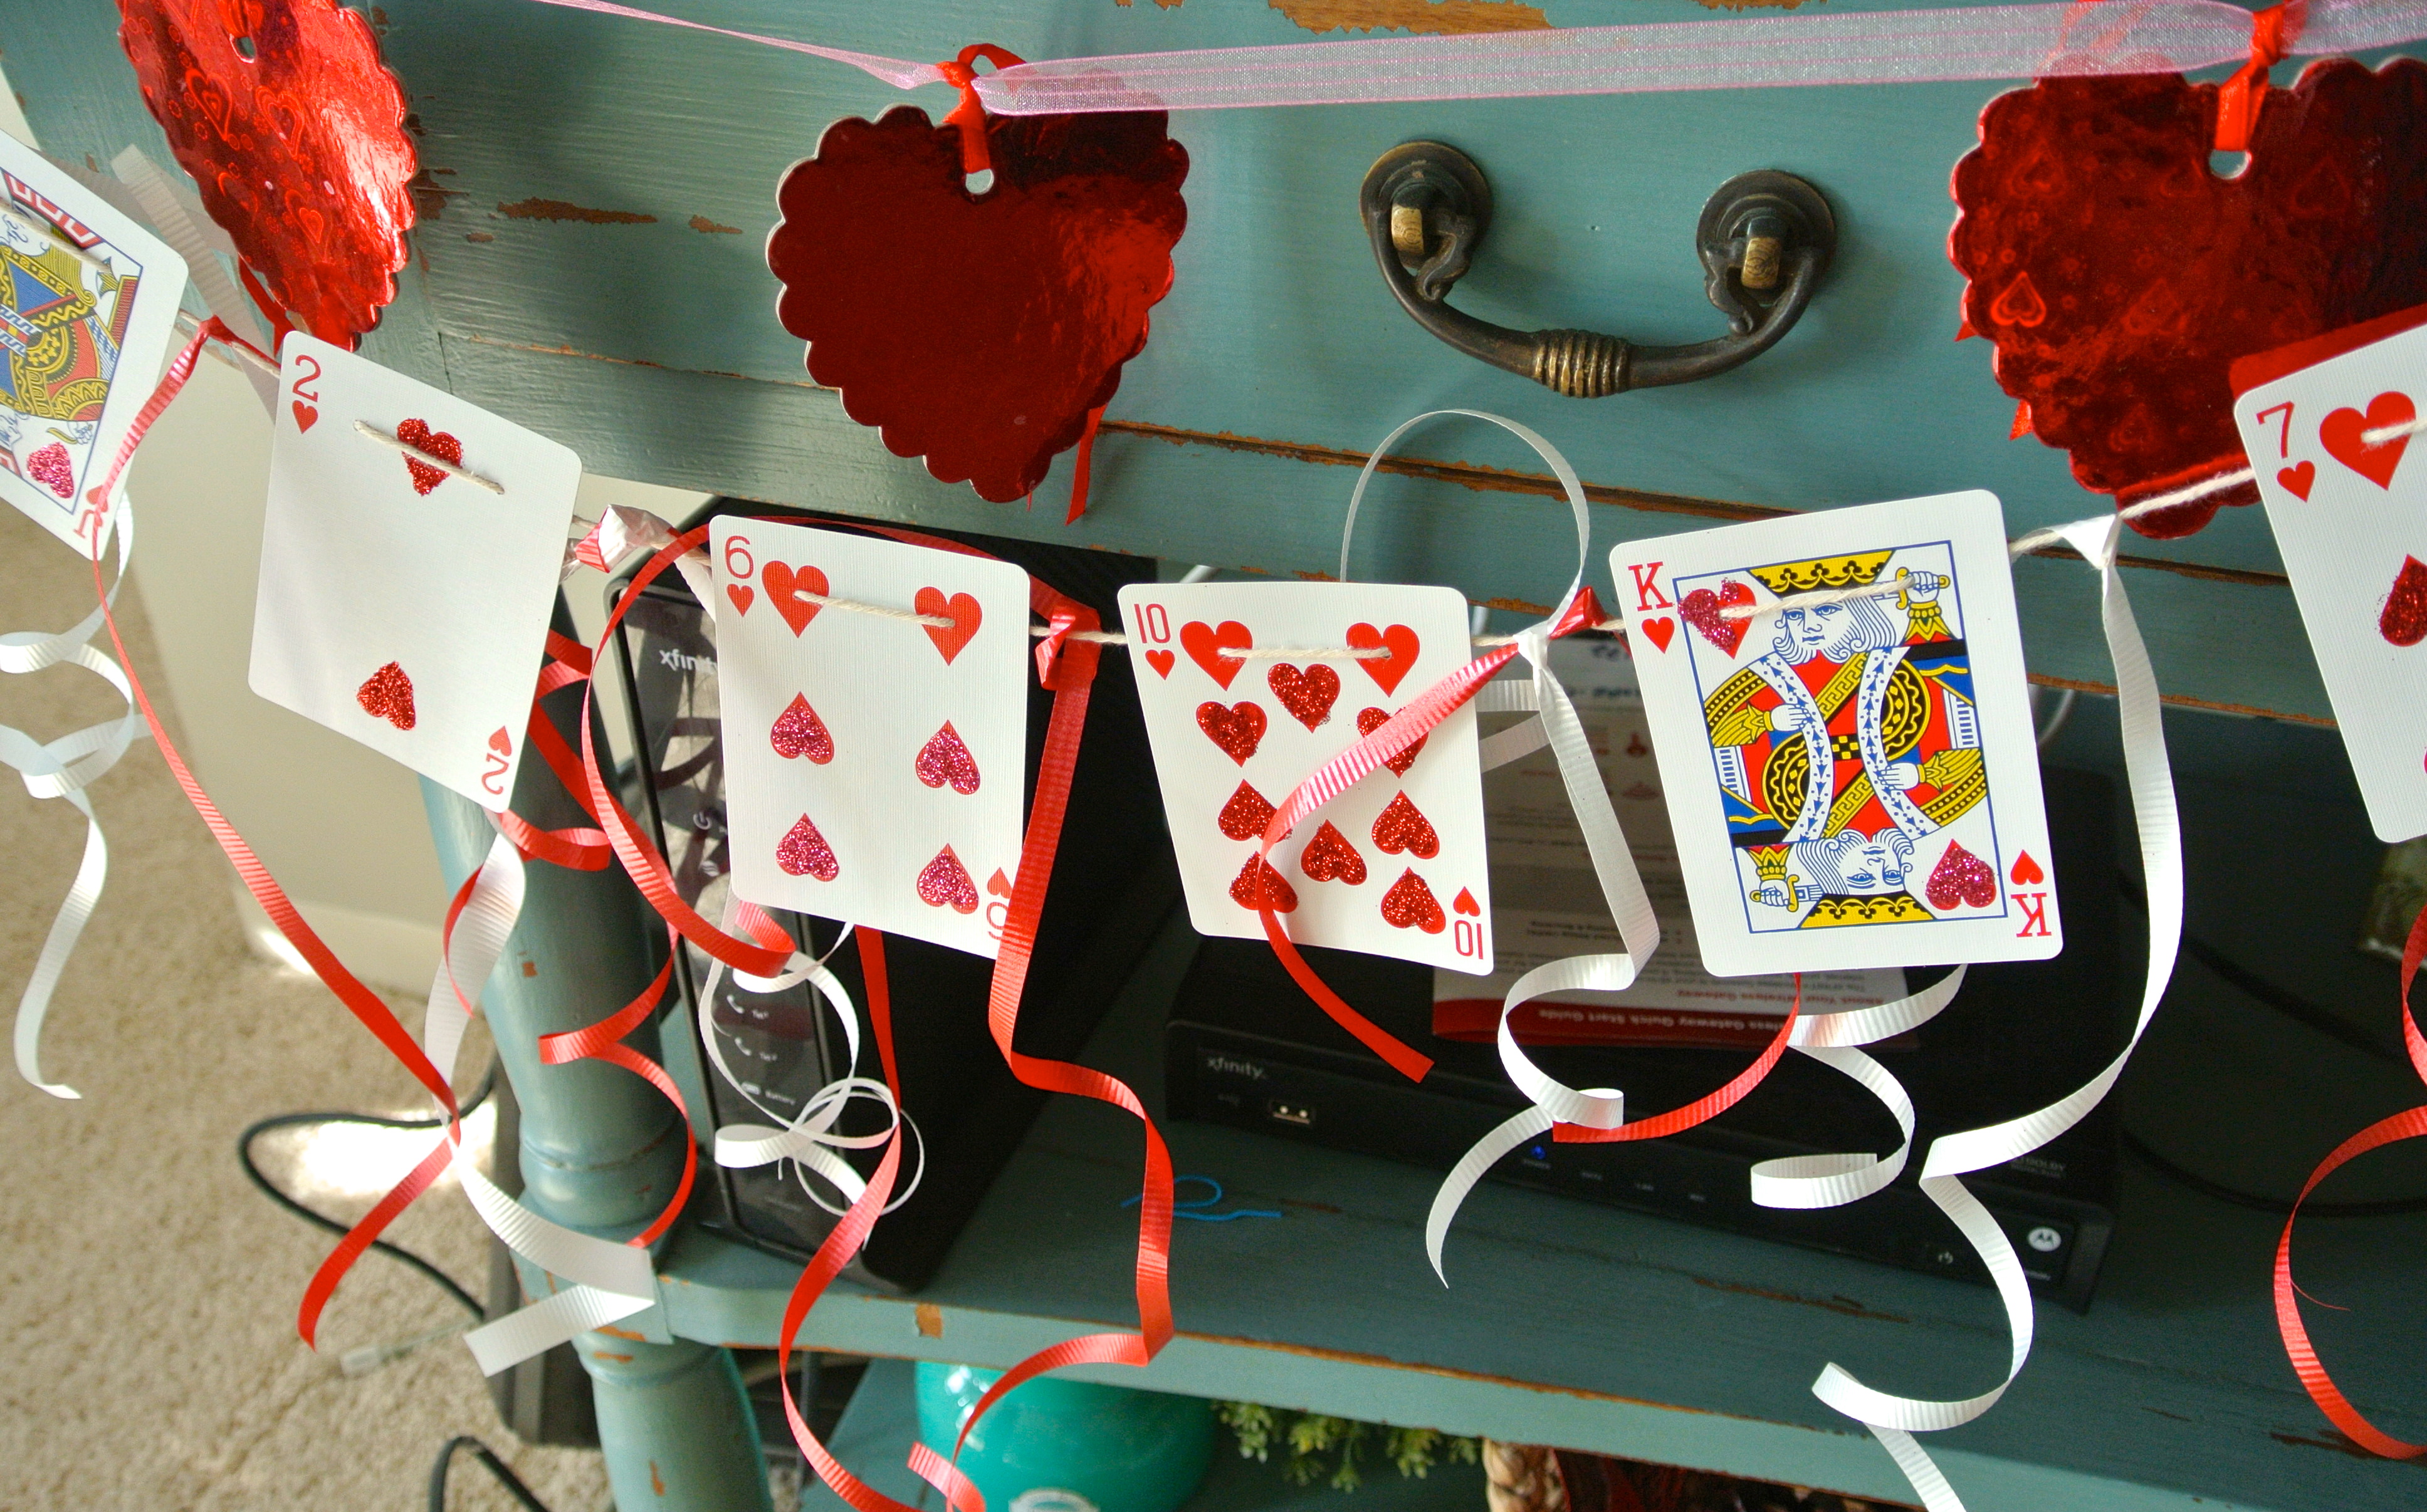
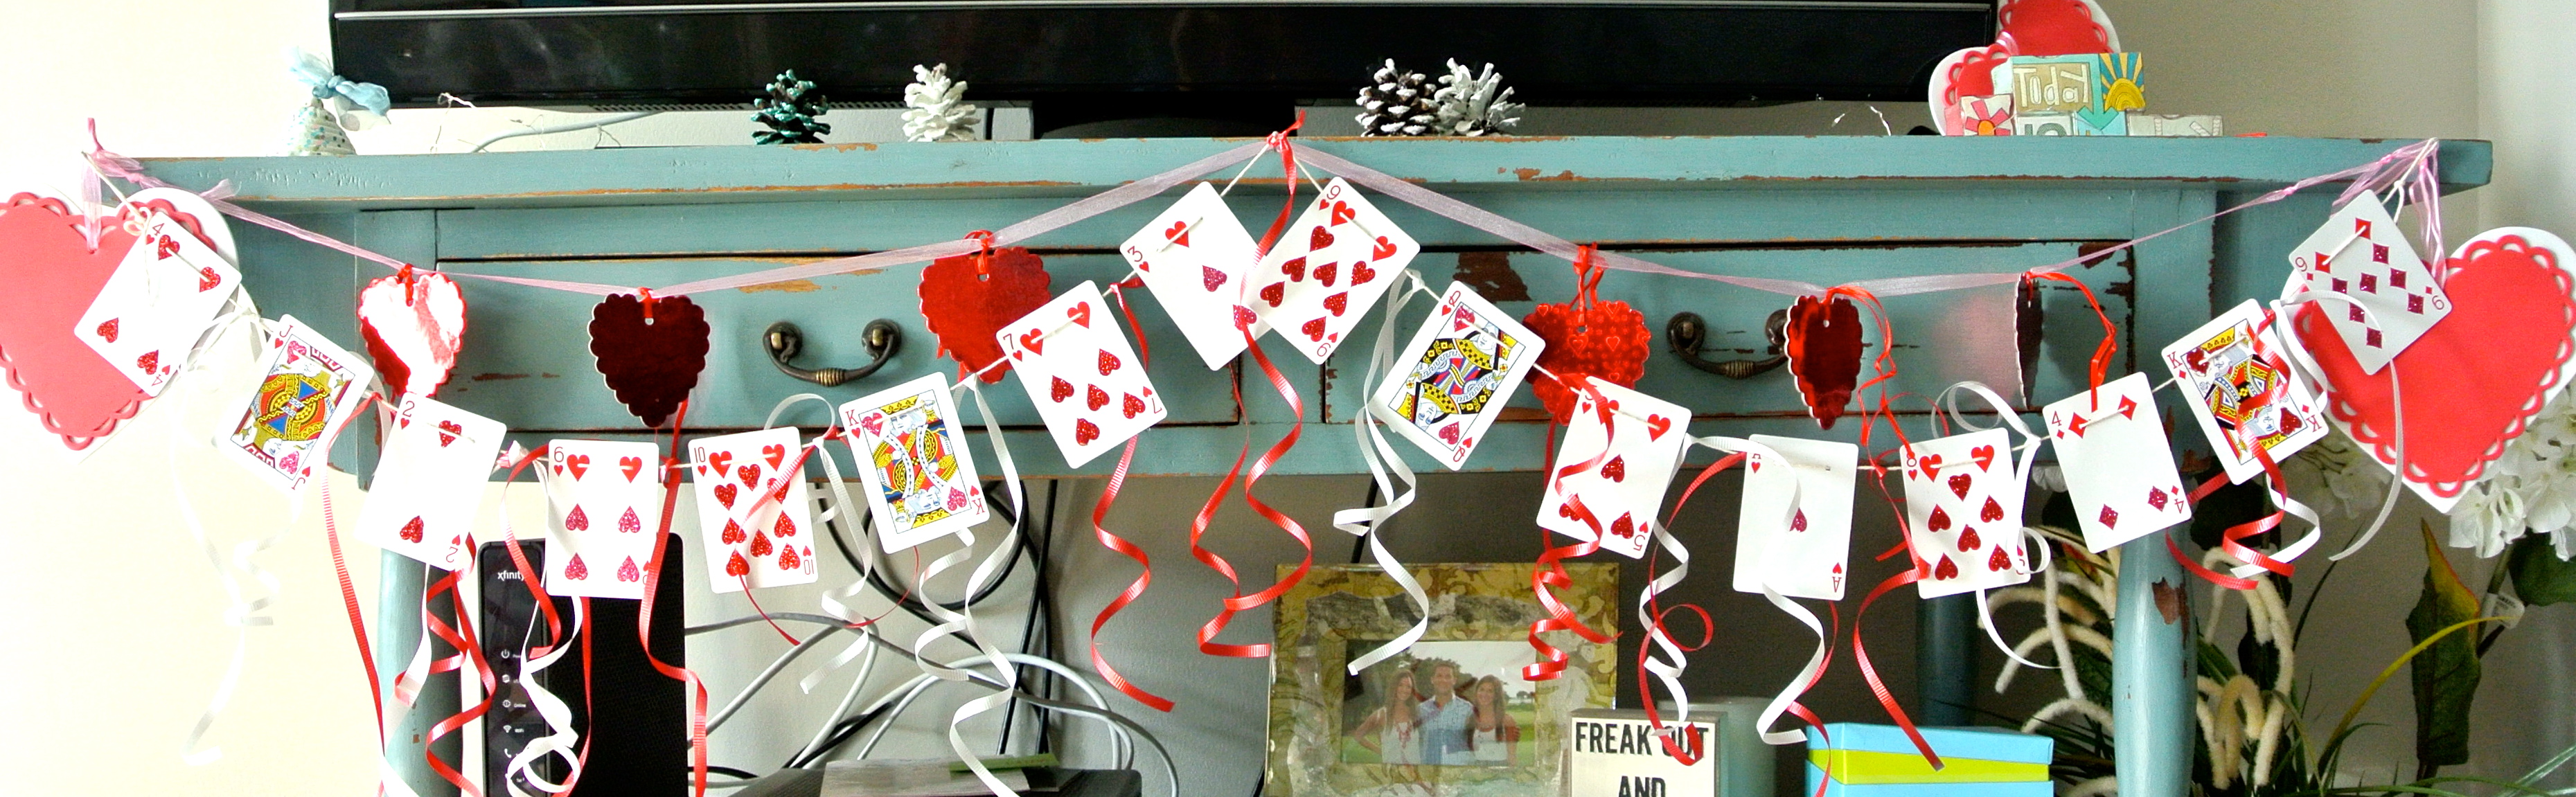
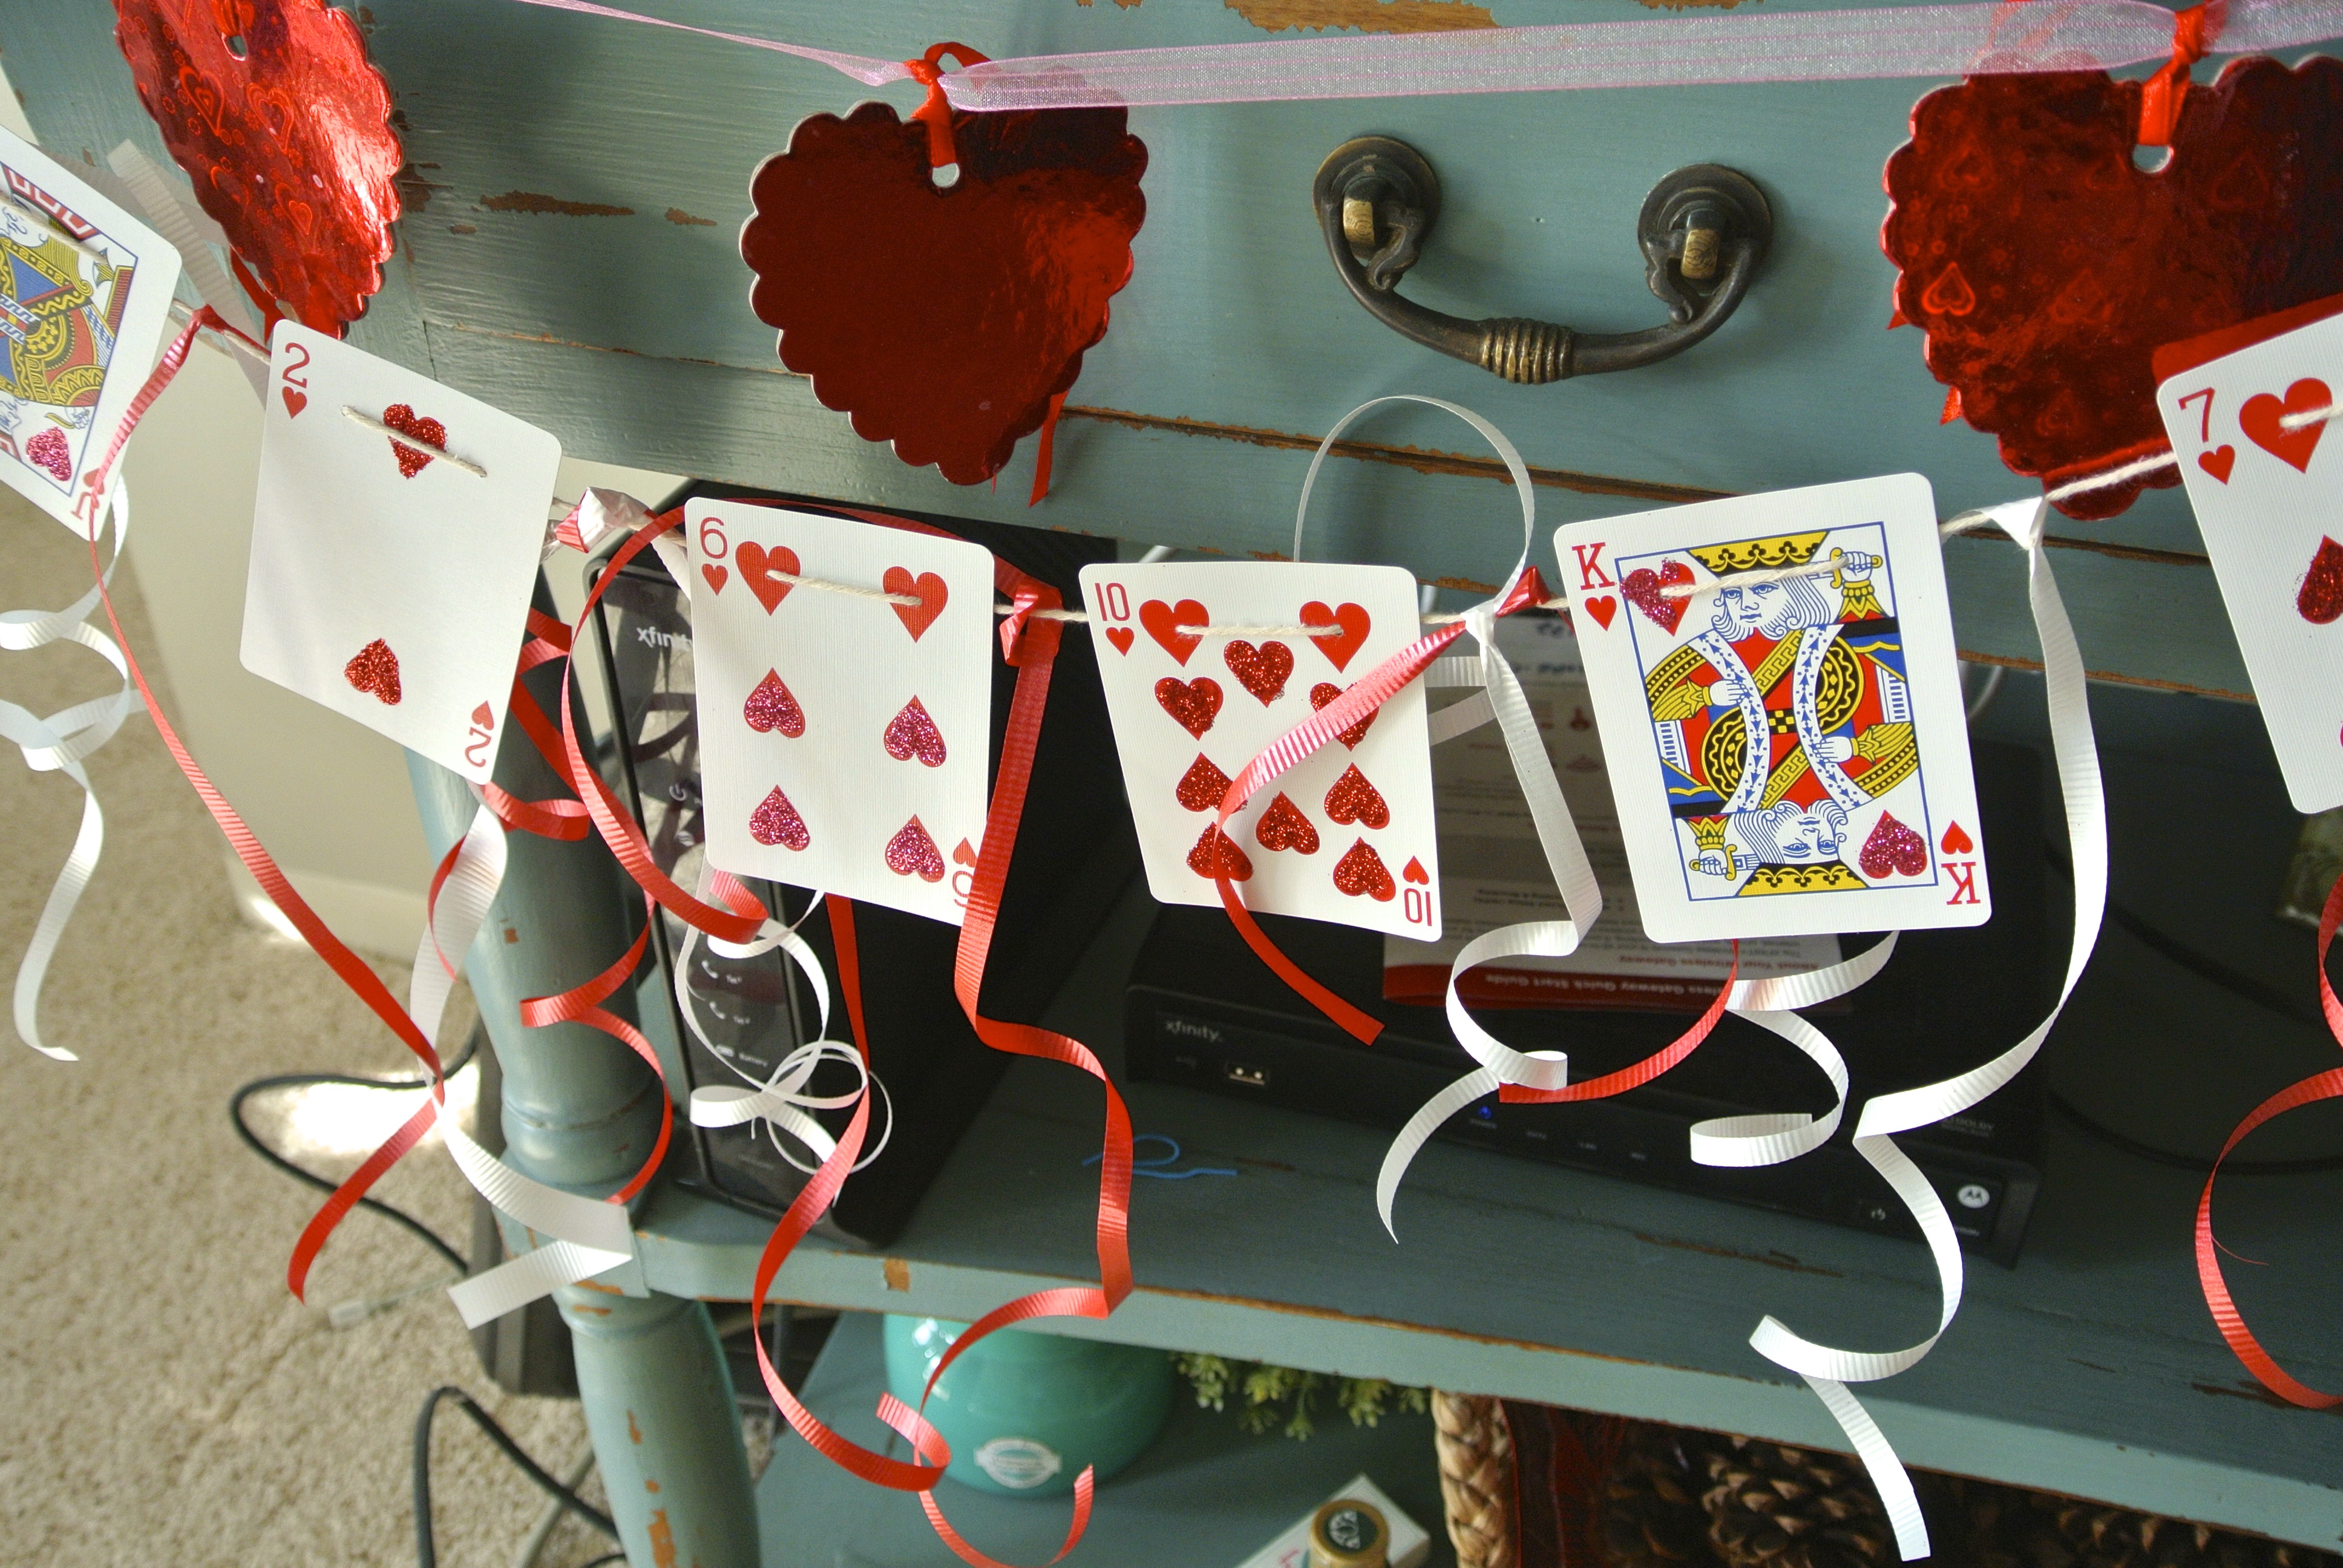
 This Valentine’s DIY is super cute and a budget friendly way to add color to any small space. Very little brain power is required and it’s likely you already have the materials shoved in the back of your junk drawer.
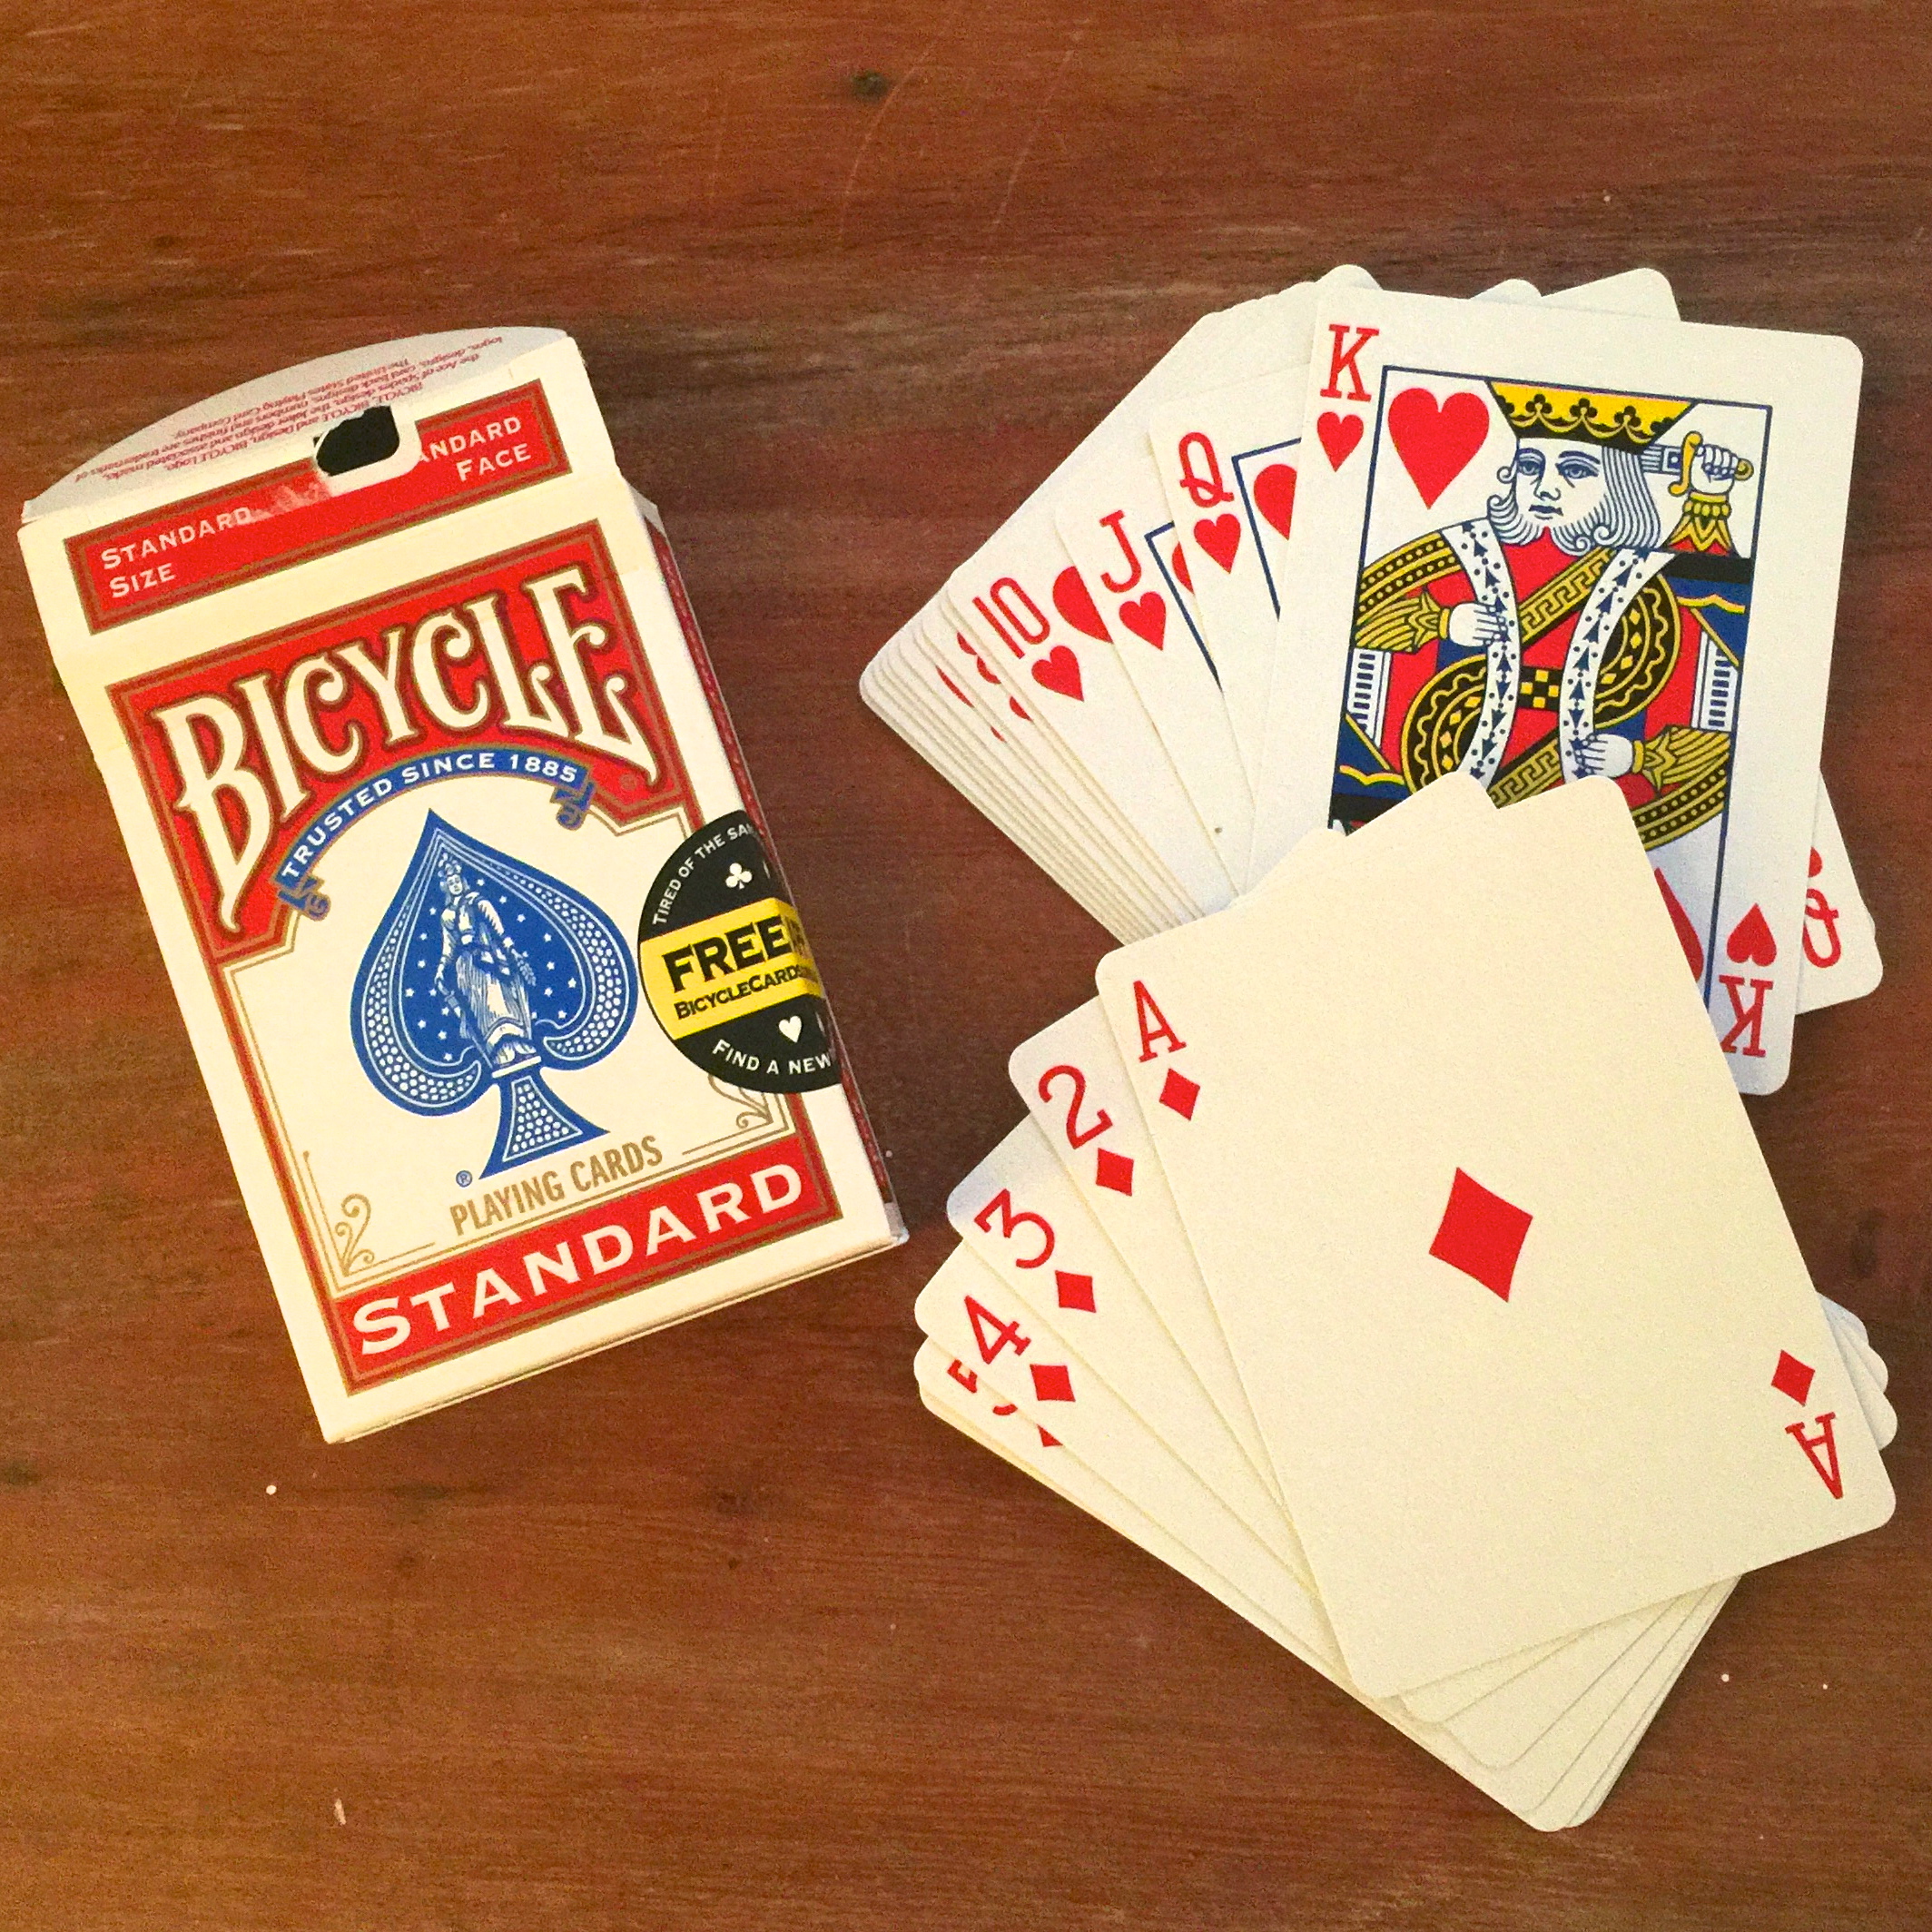
Start by separating the hearts and diamonds from the rest of the deck. Then use a hole punch or pin to poke 2 holes through the top corners of the cards. 
Dip a paint brush in glue and brush over the hearts and diamonds. Make sure to leave room around the hole punches so the string can still get through. Use glitter of your choice to sprinkle over the glue.
Let dry before stringing the cards together. The excess glitter will likely stick to the static on the card so I recommend using a dry paint brush to sweep it off the card.
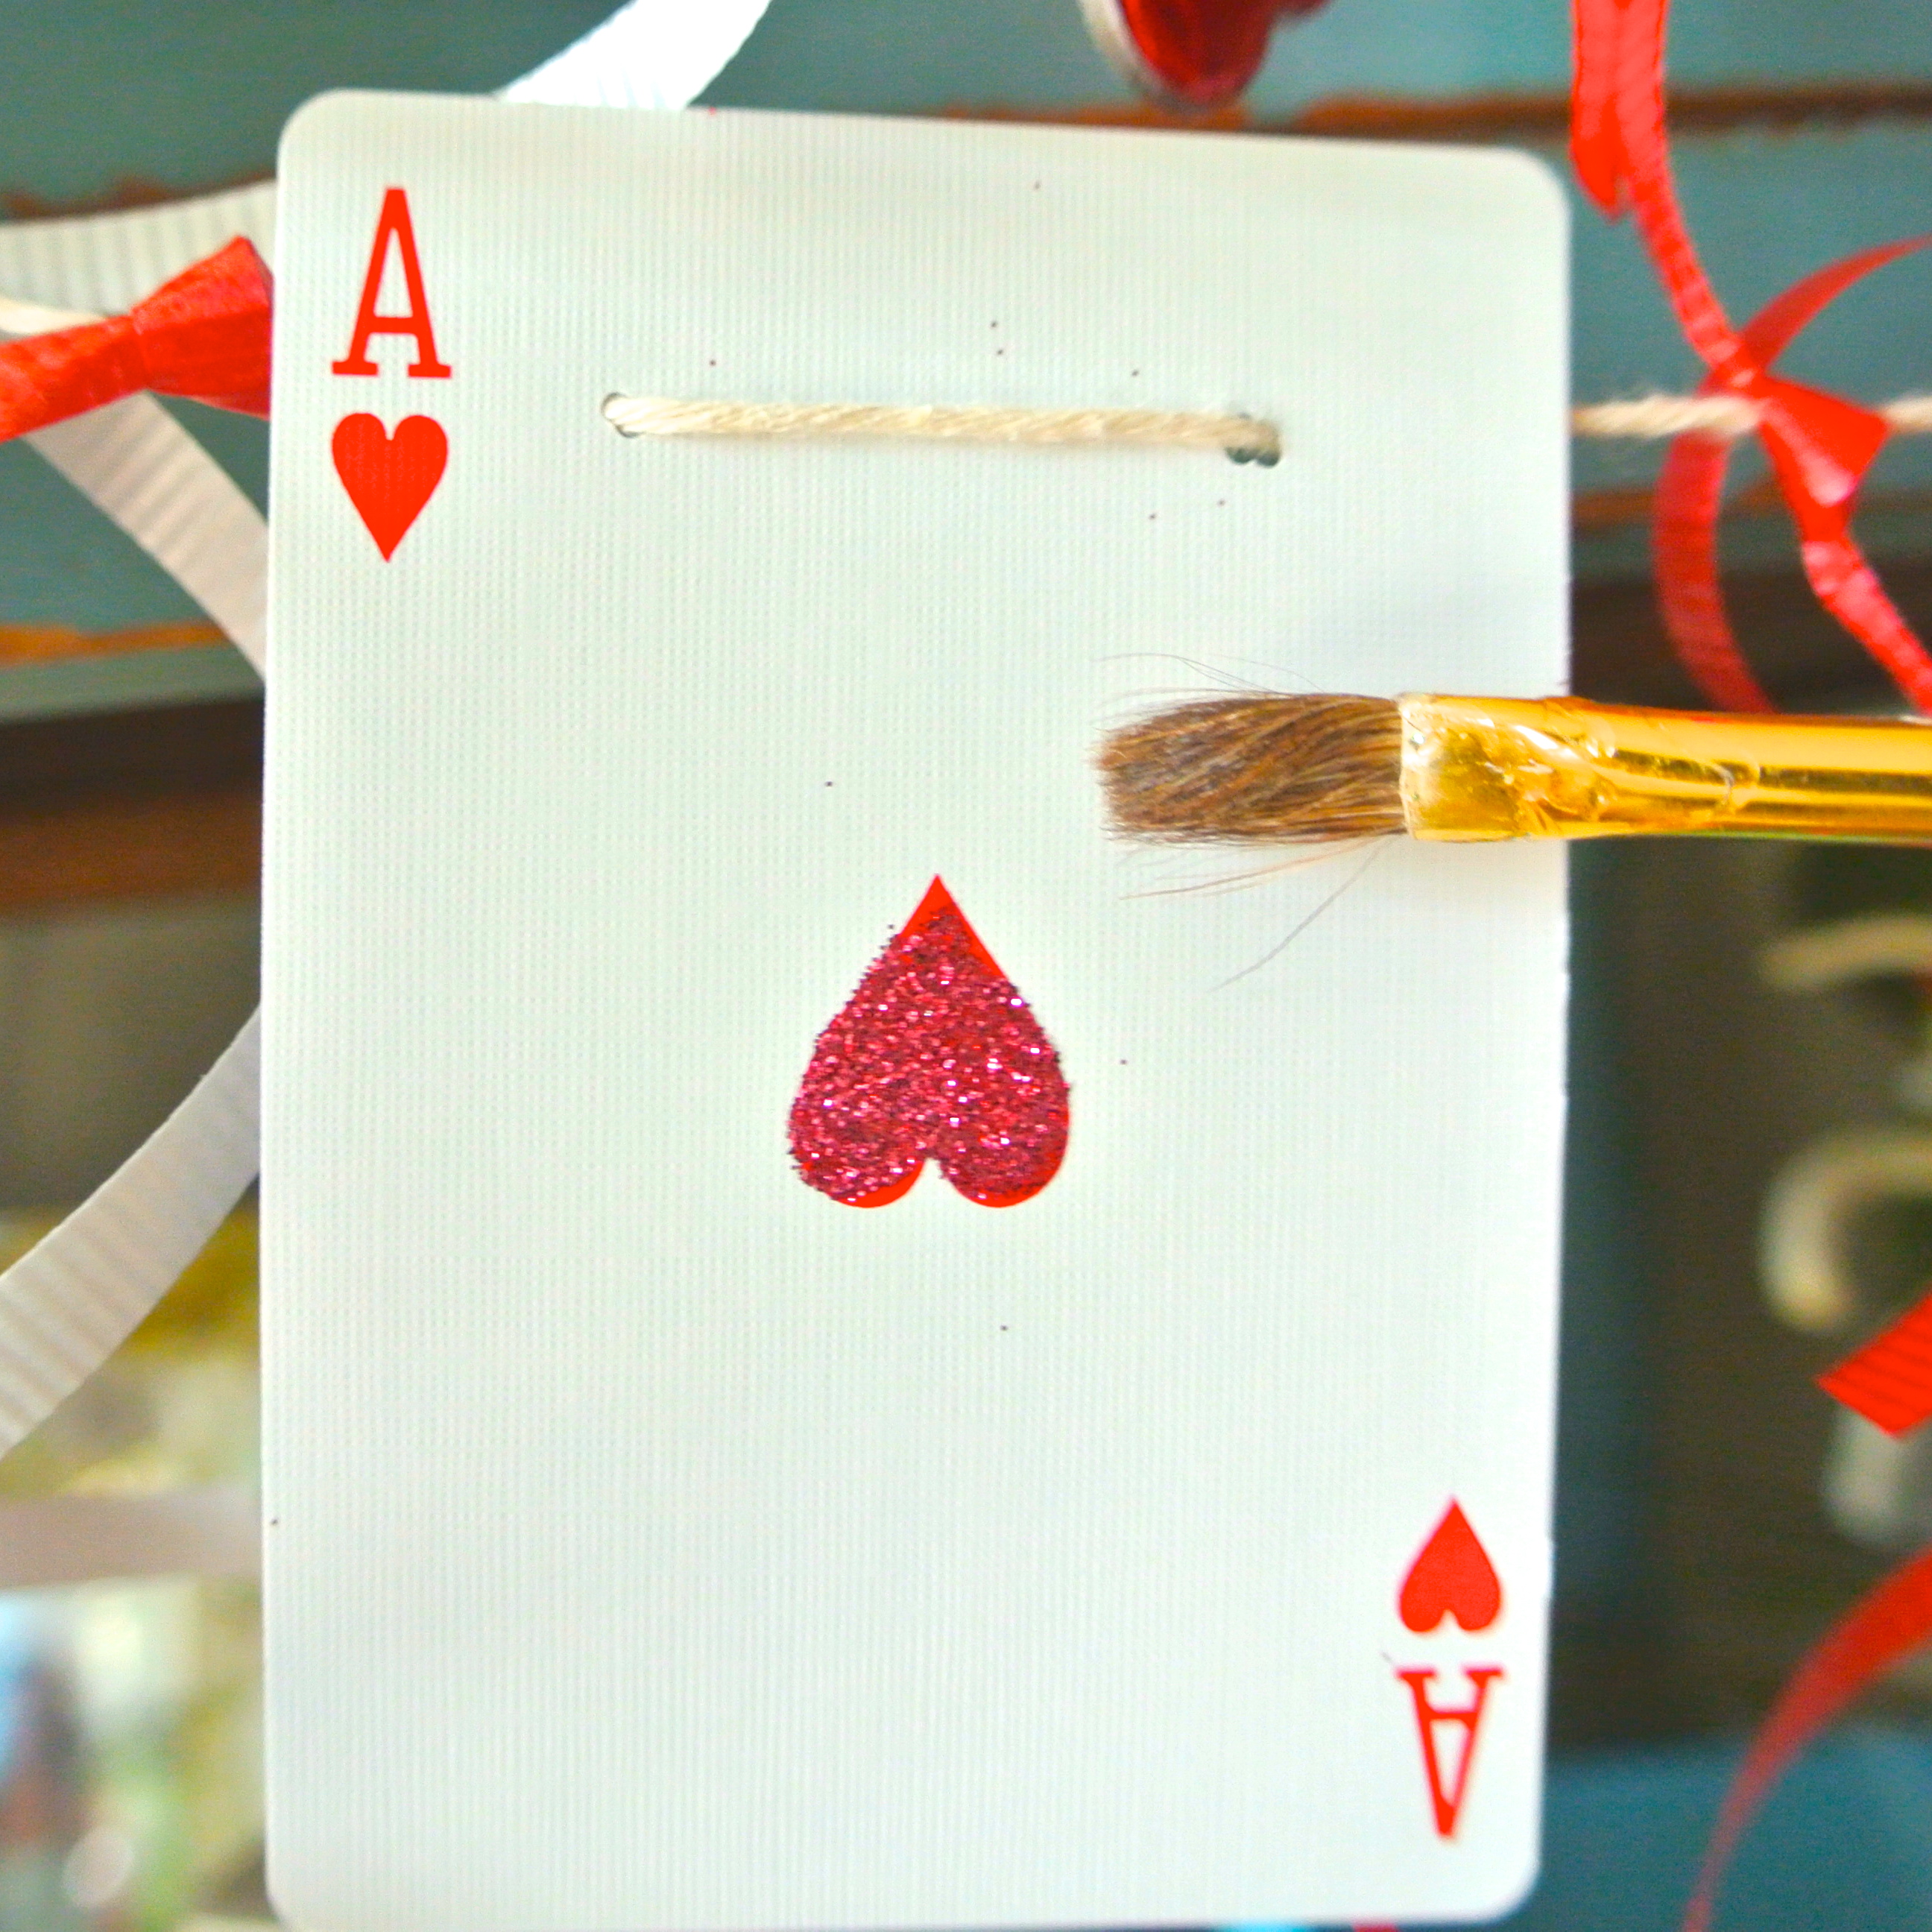
Take your thread/string/ribbon and weave it through the cards. Leave a little space between the cards so you can tie extra ribbon on the garland for more color and pazazz.
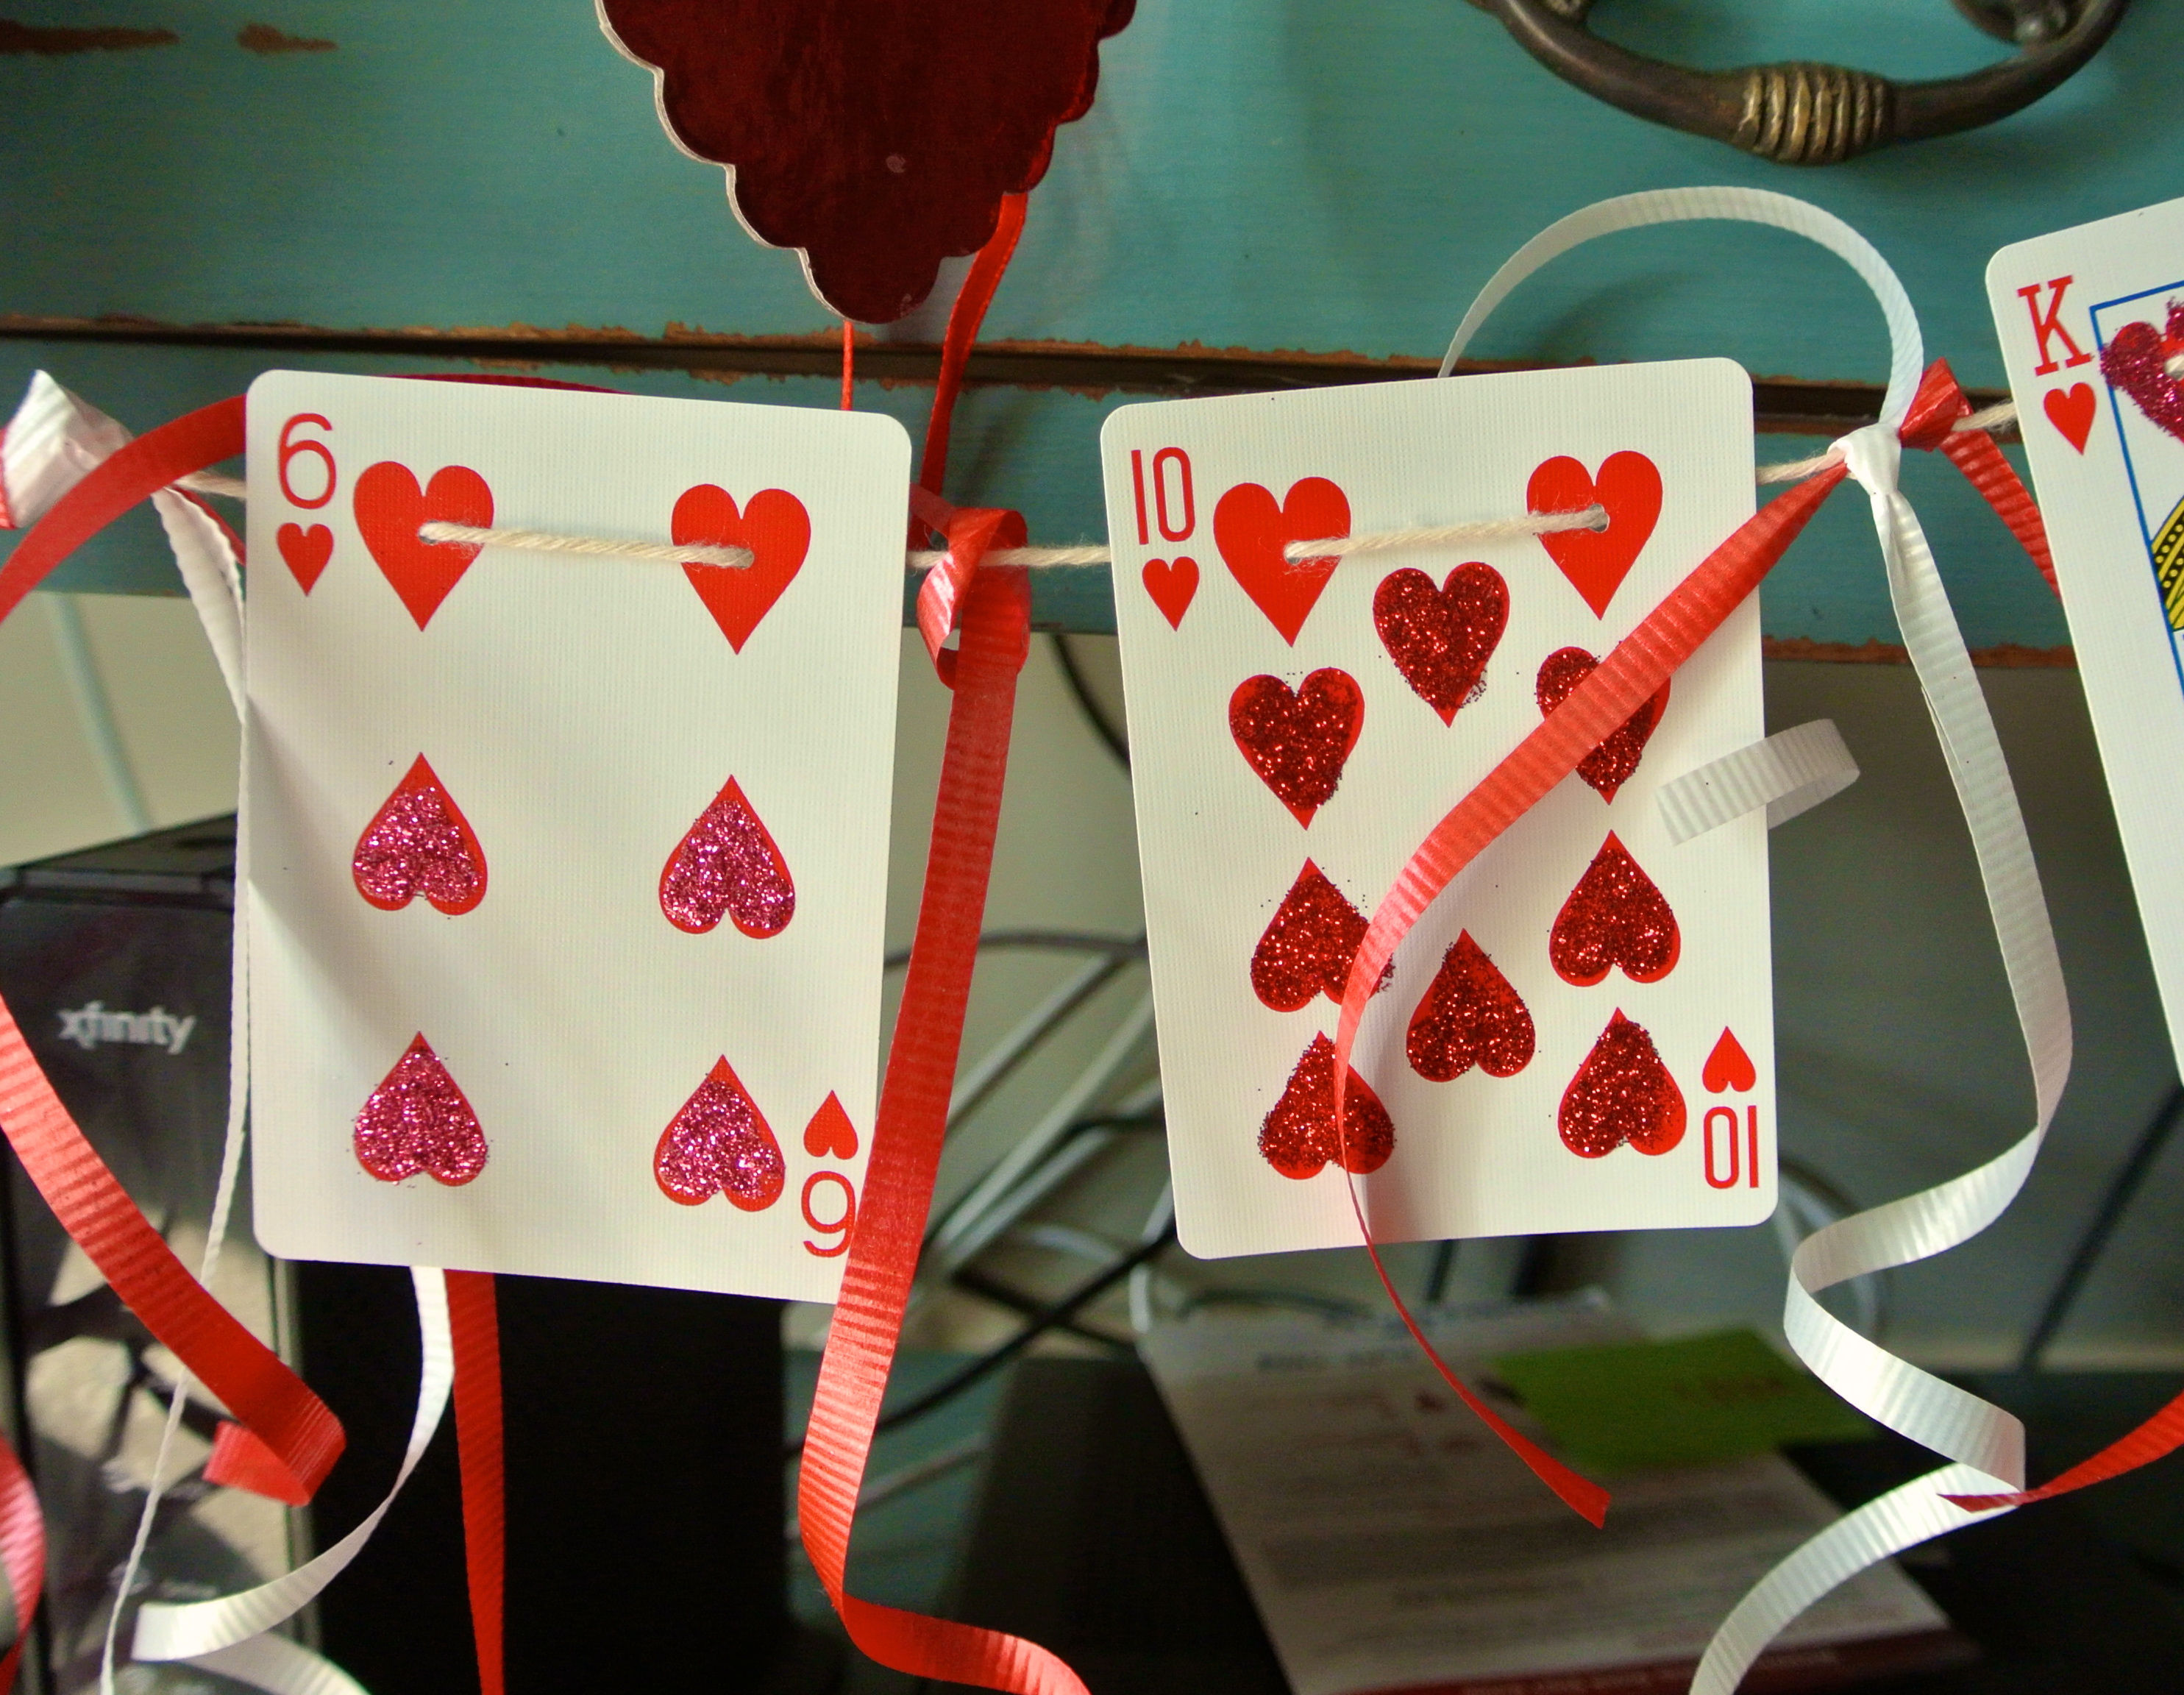
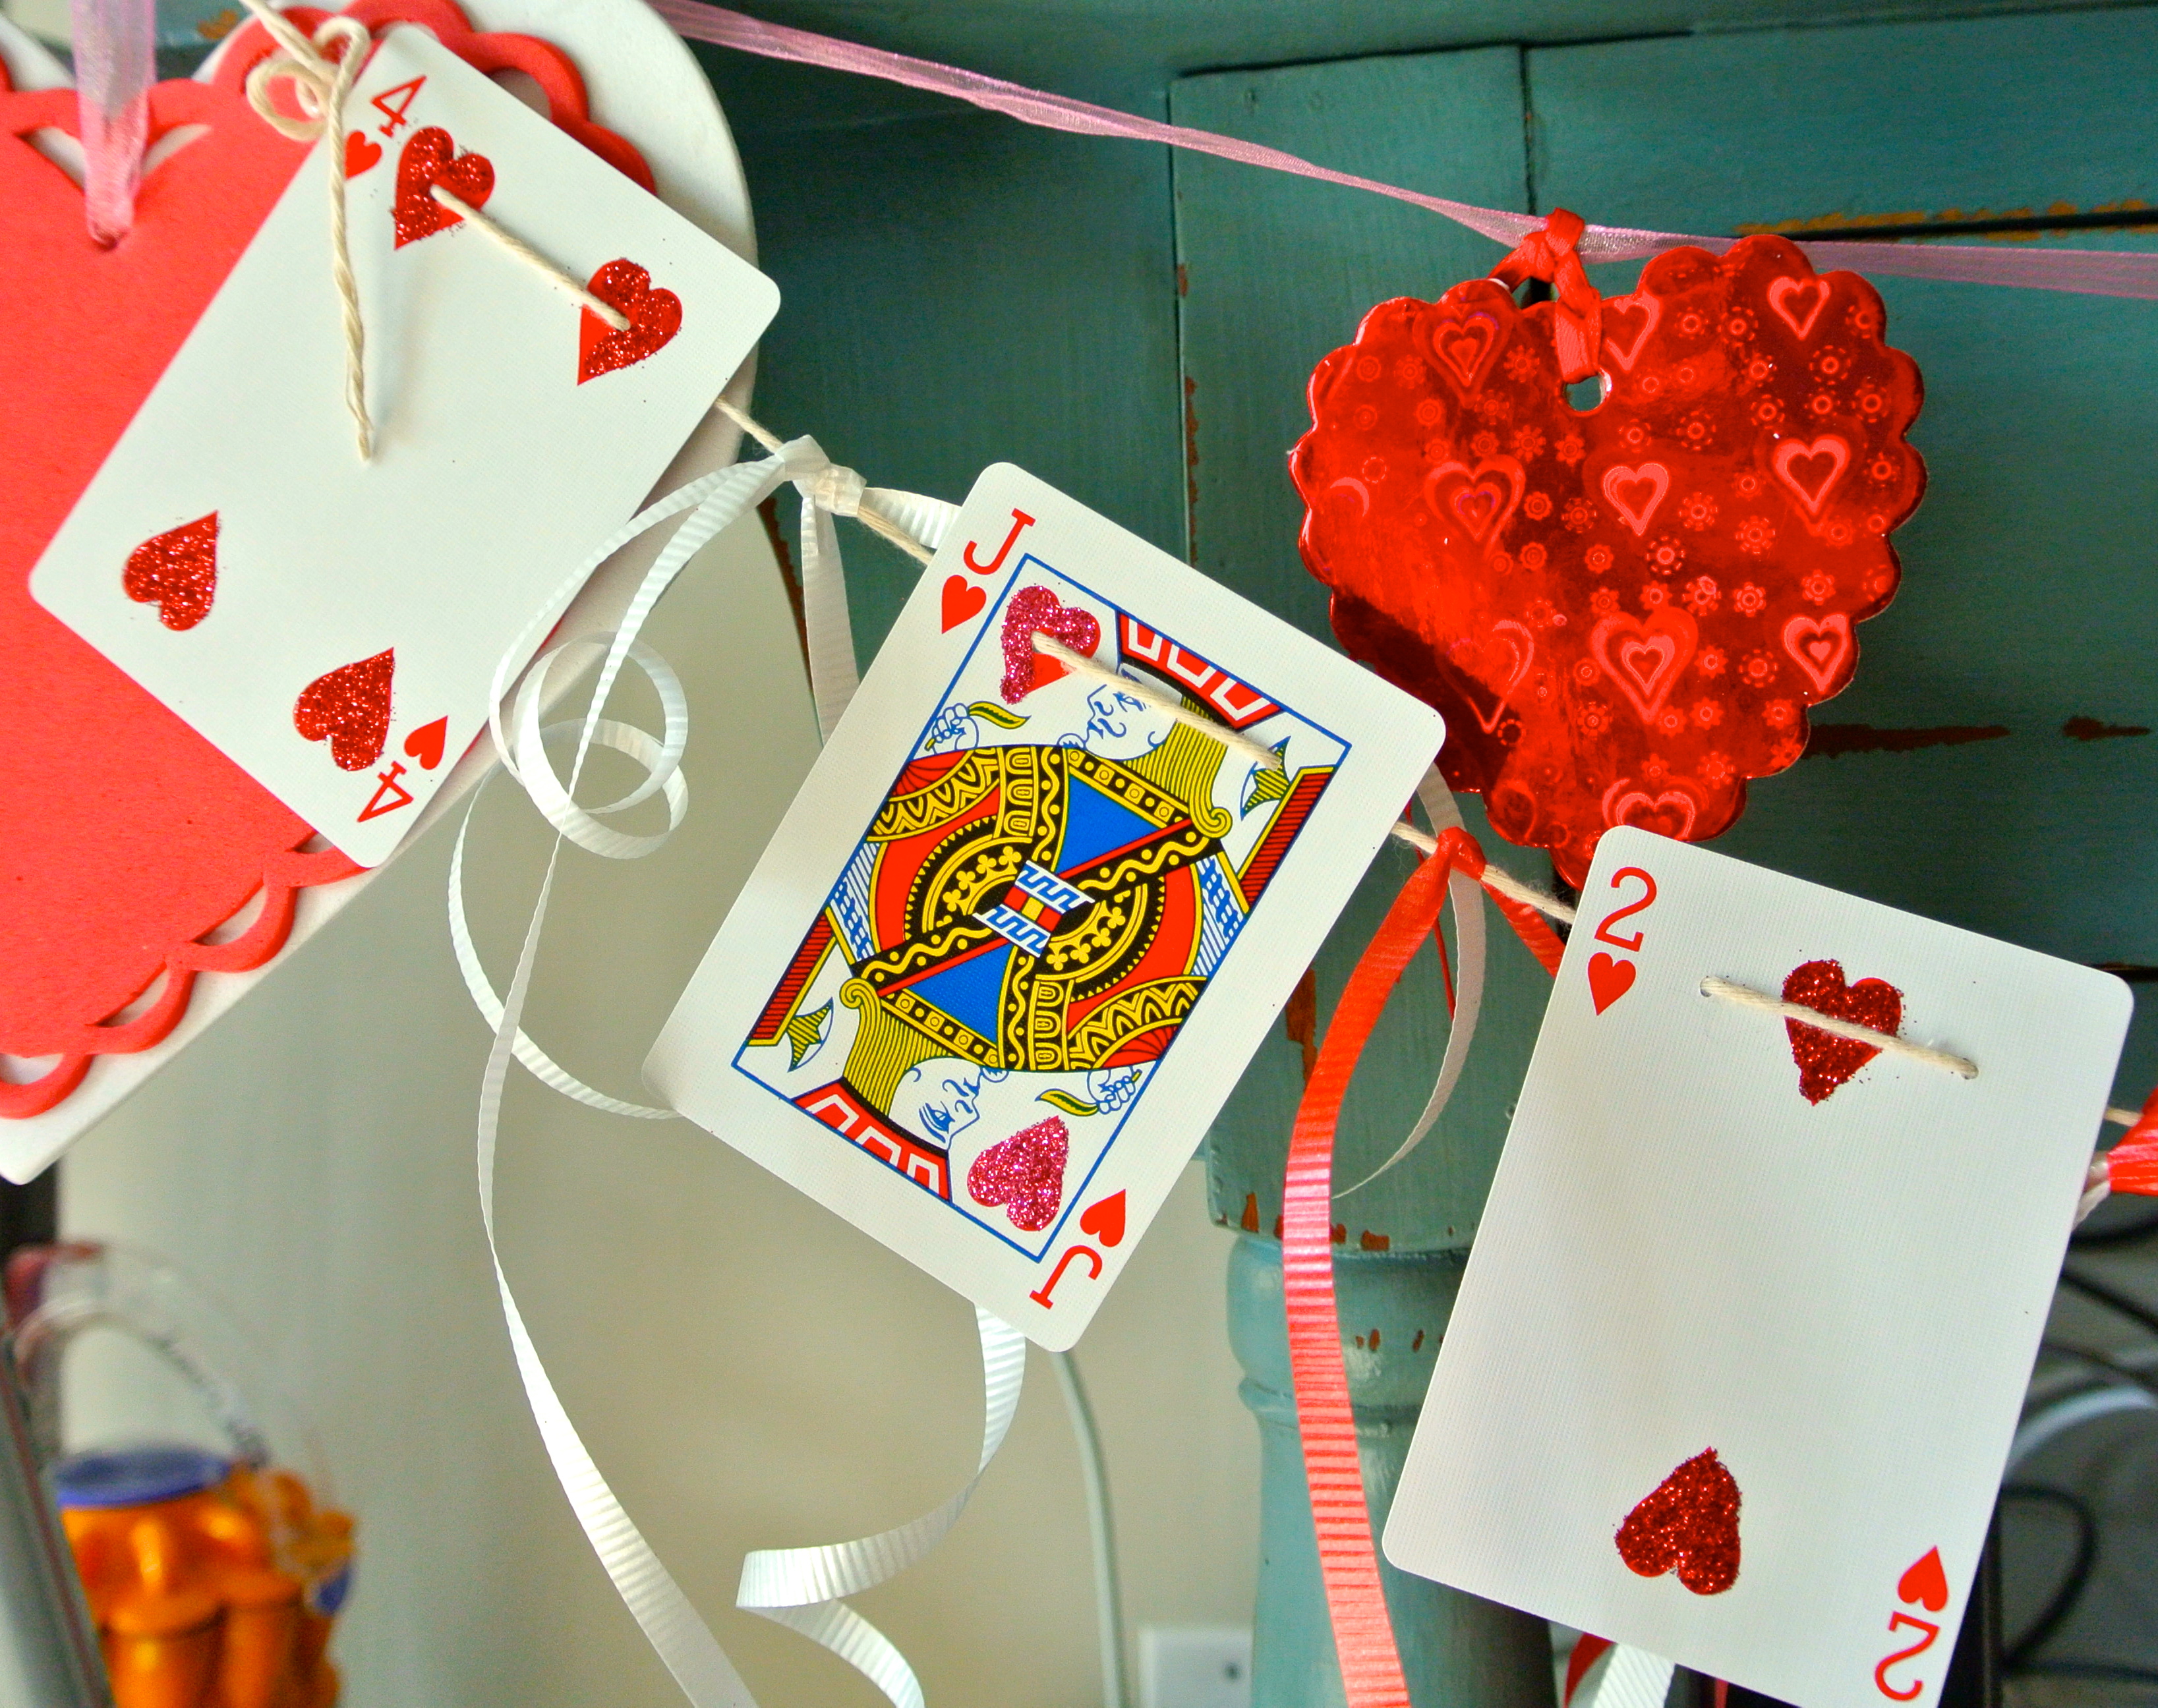
You will need:
– 1 deck of cards
– Hole punch or pin
– Glue
– Paintbrush
– Glitter
– String/ribbon

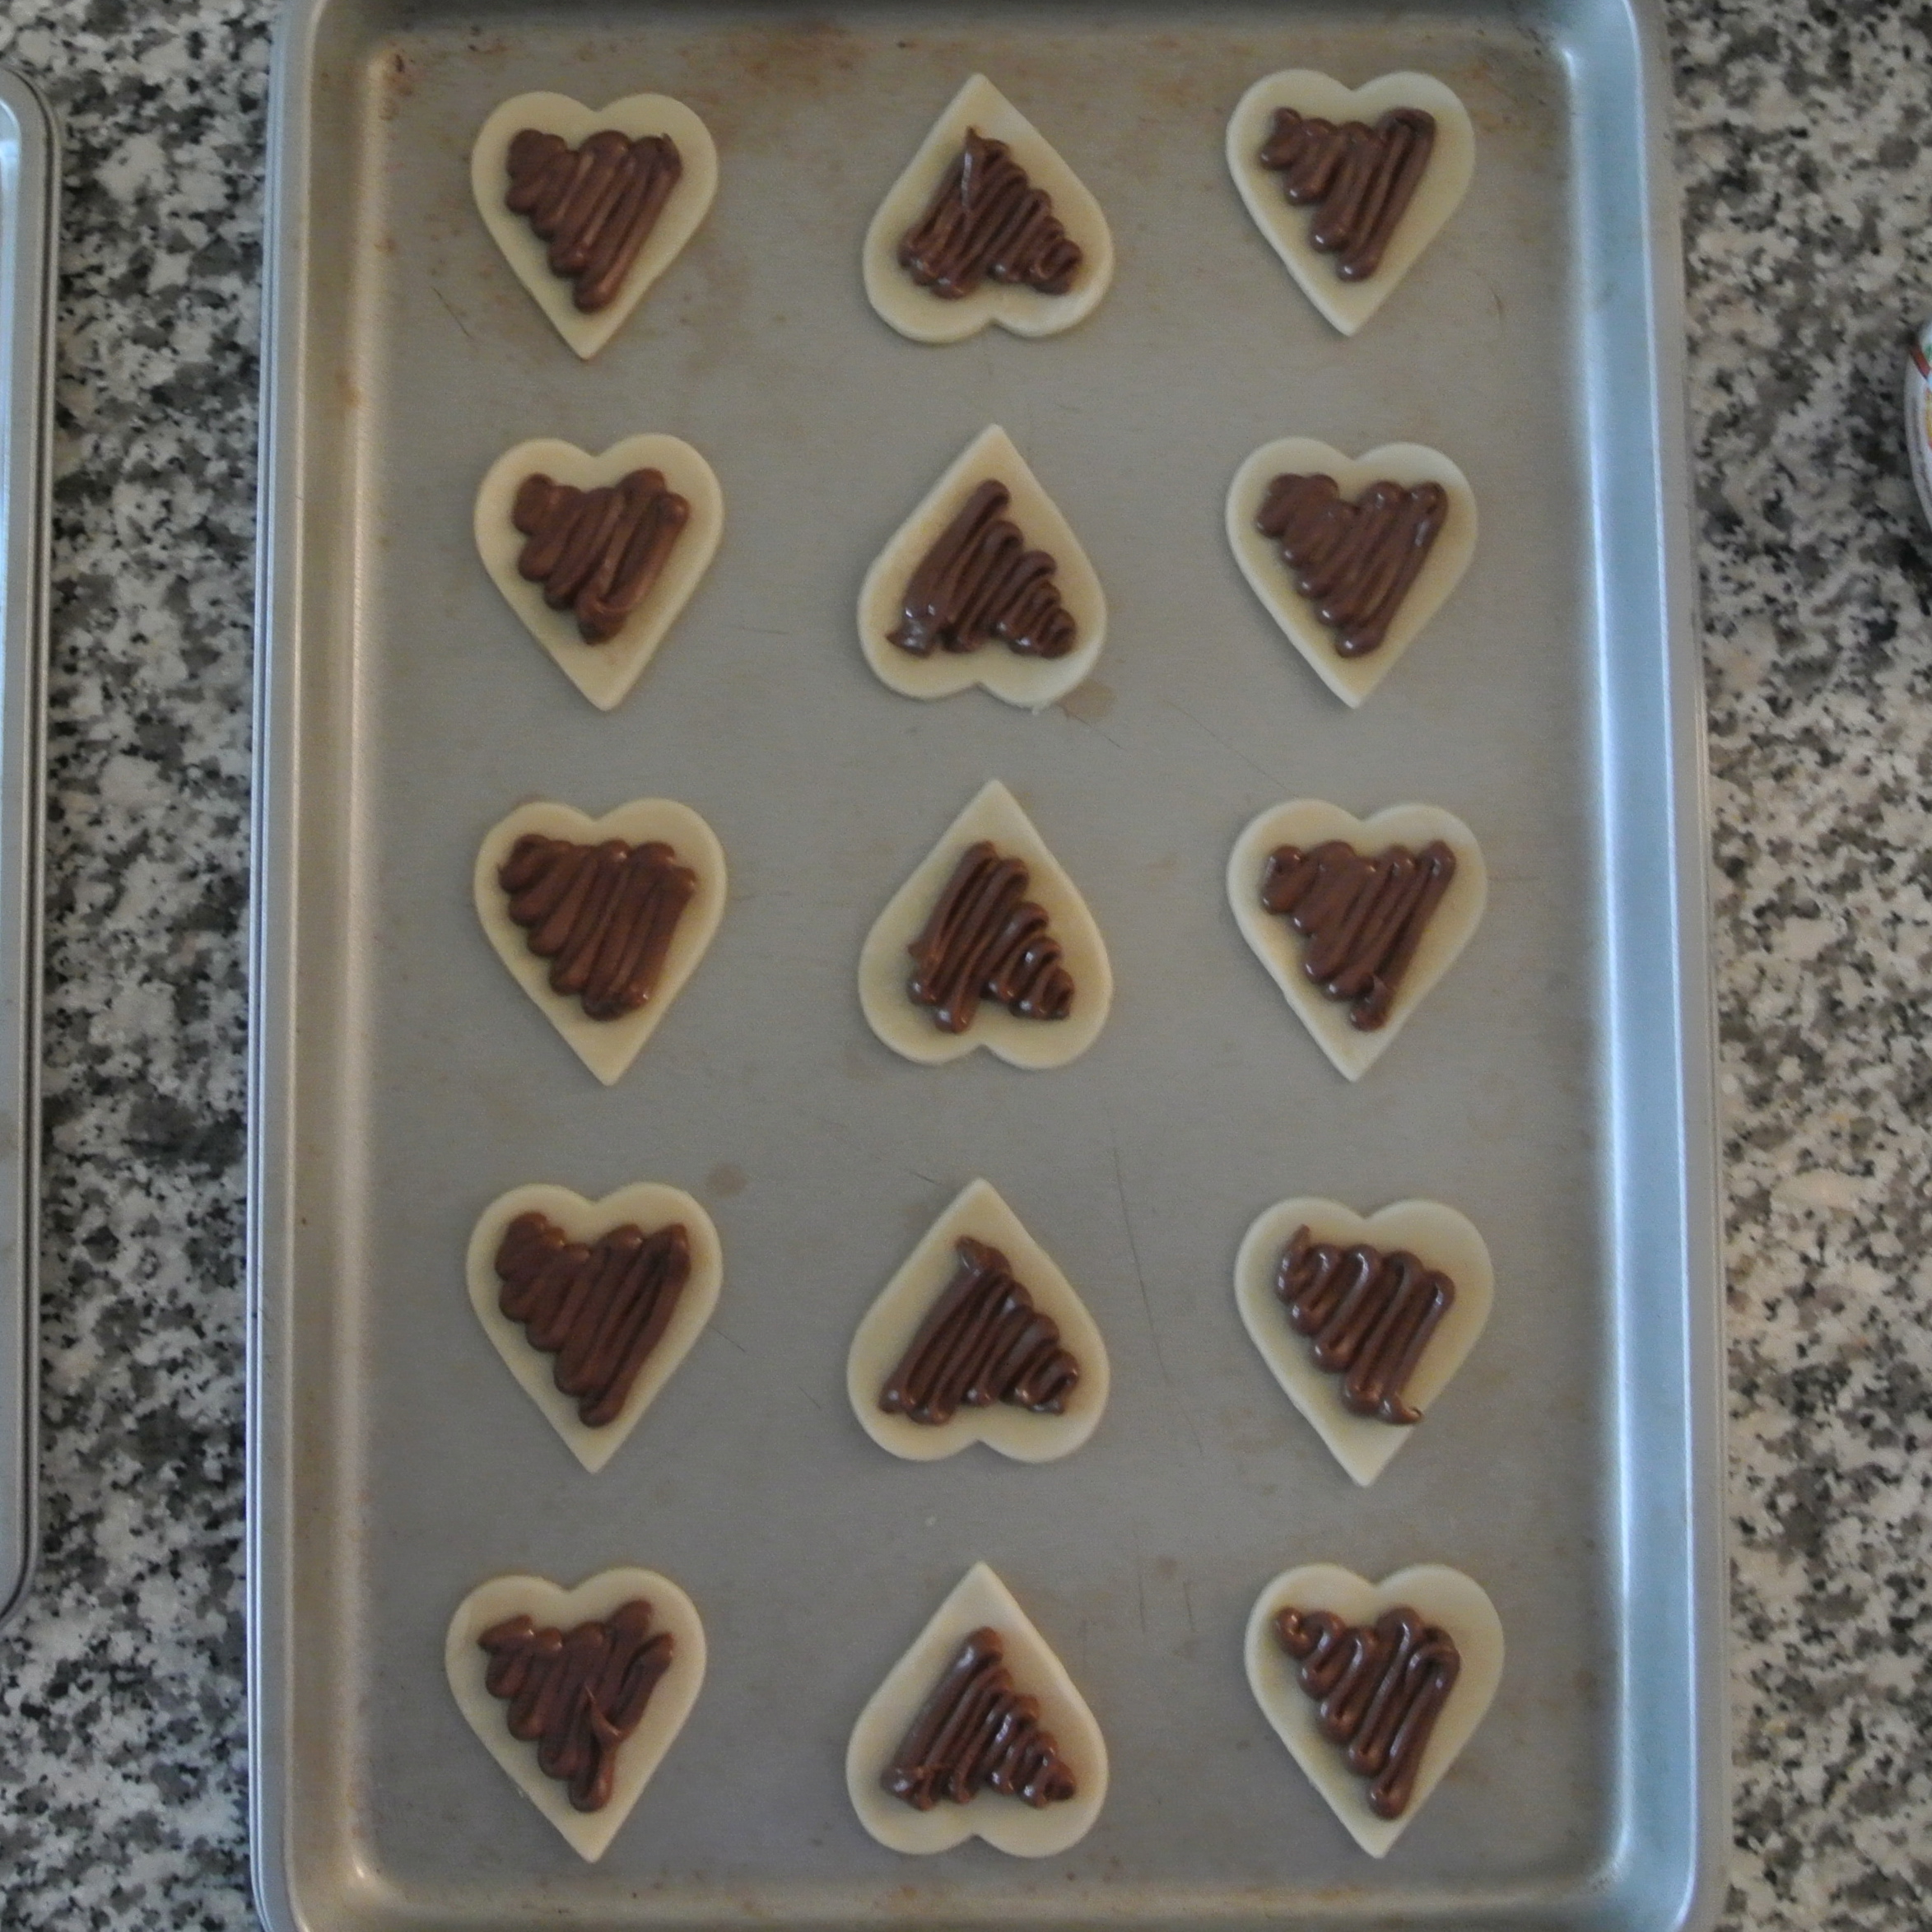
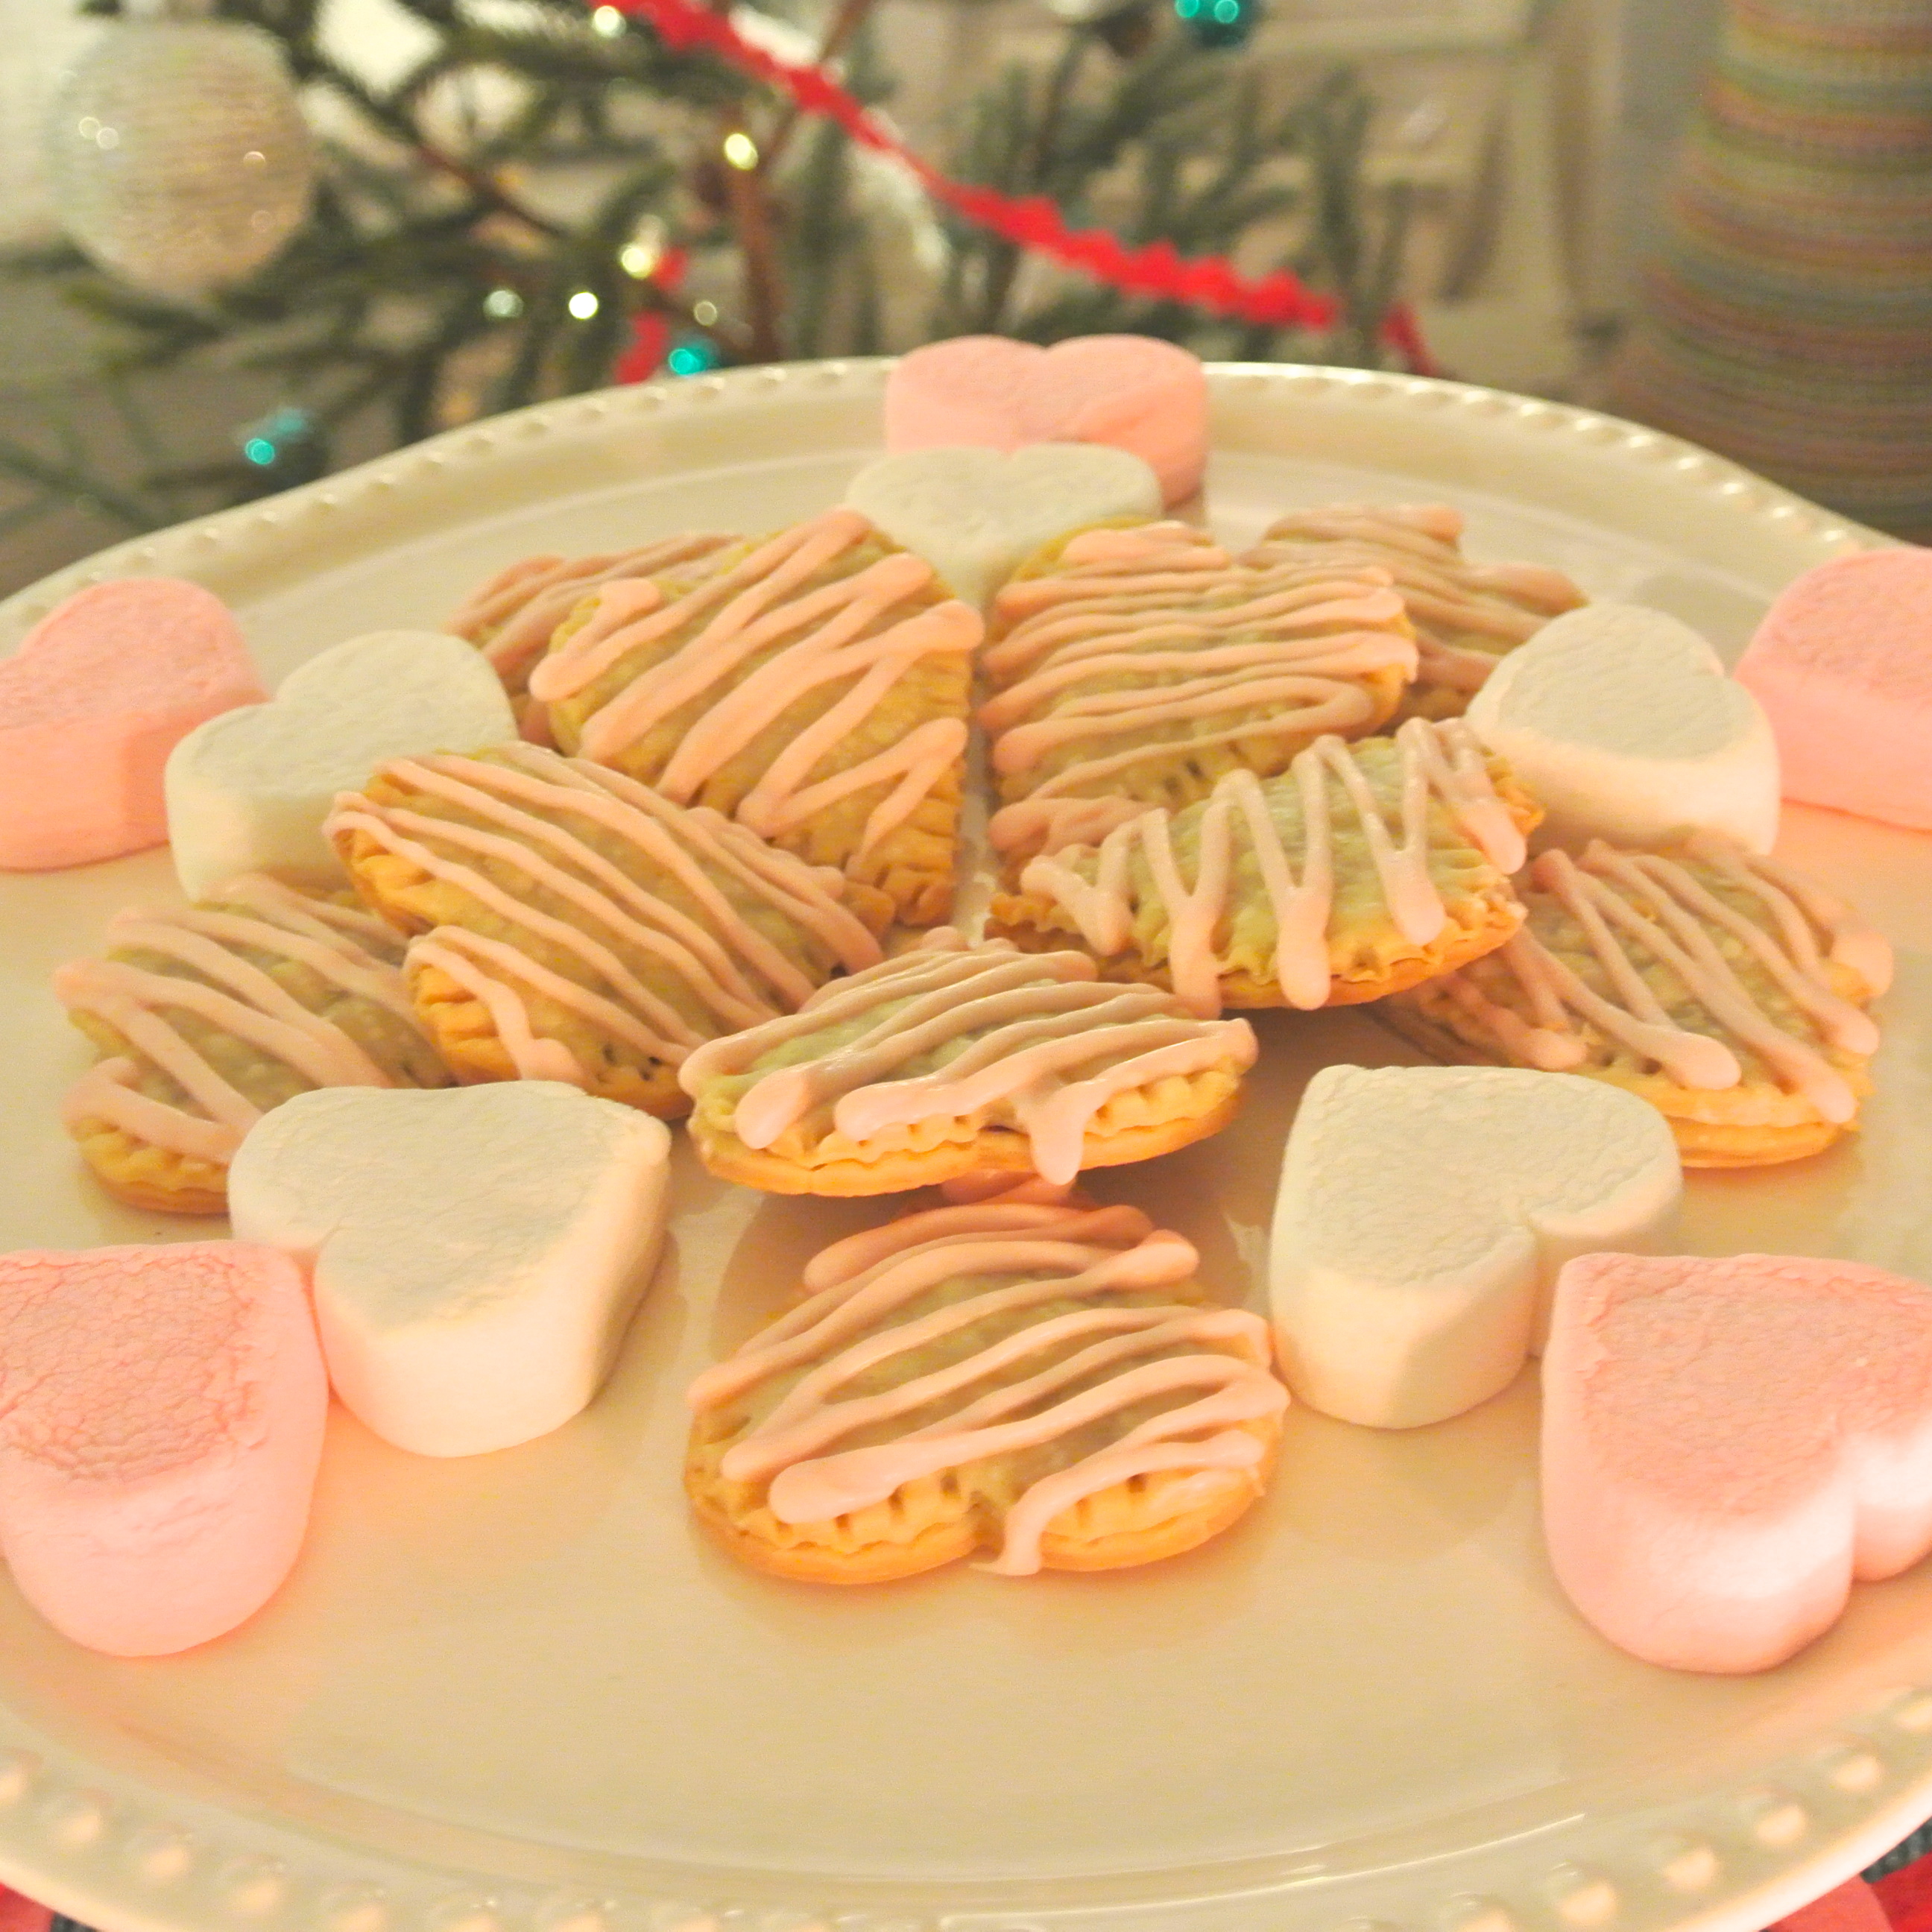
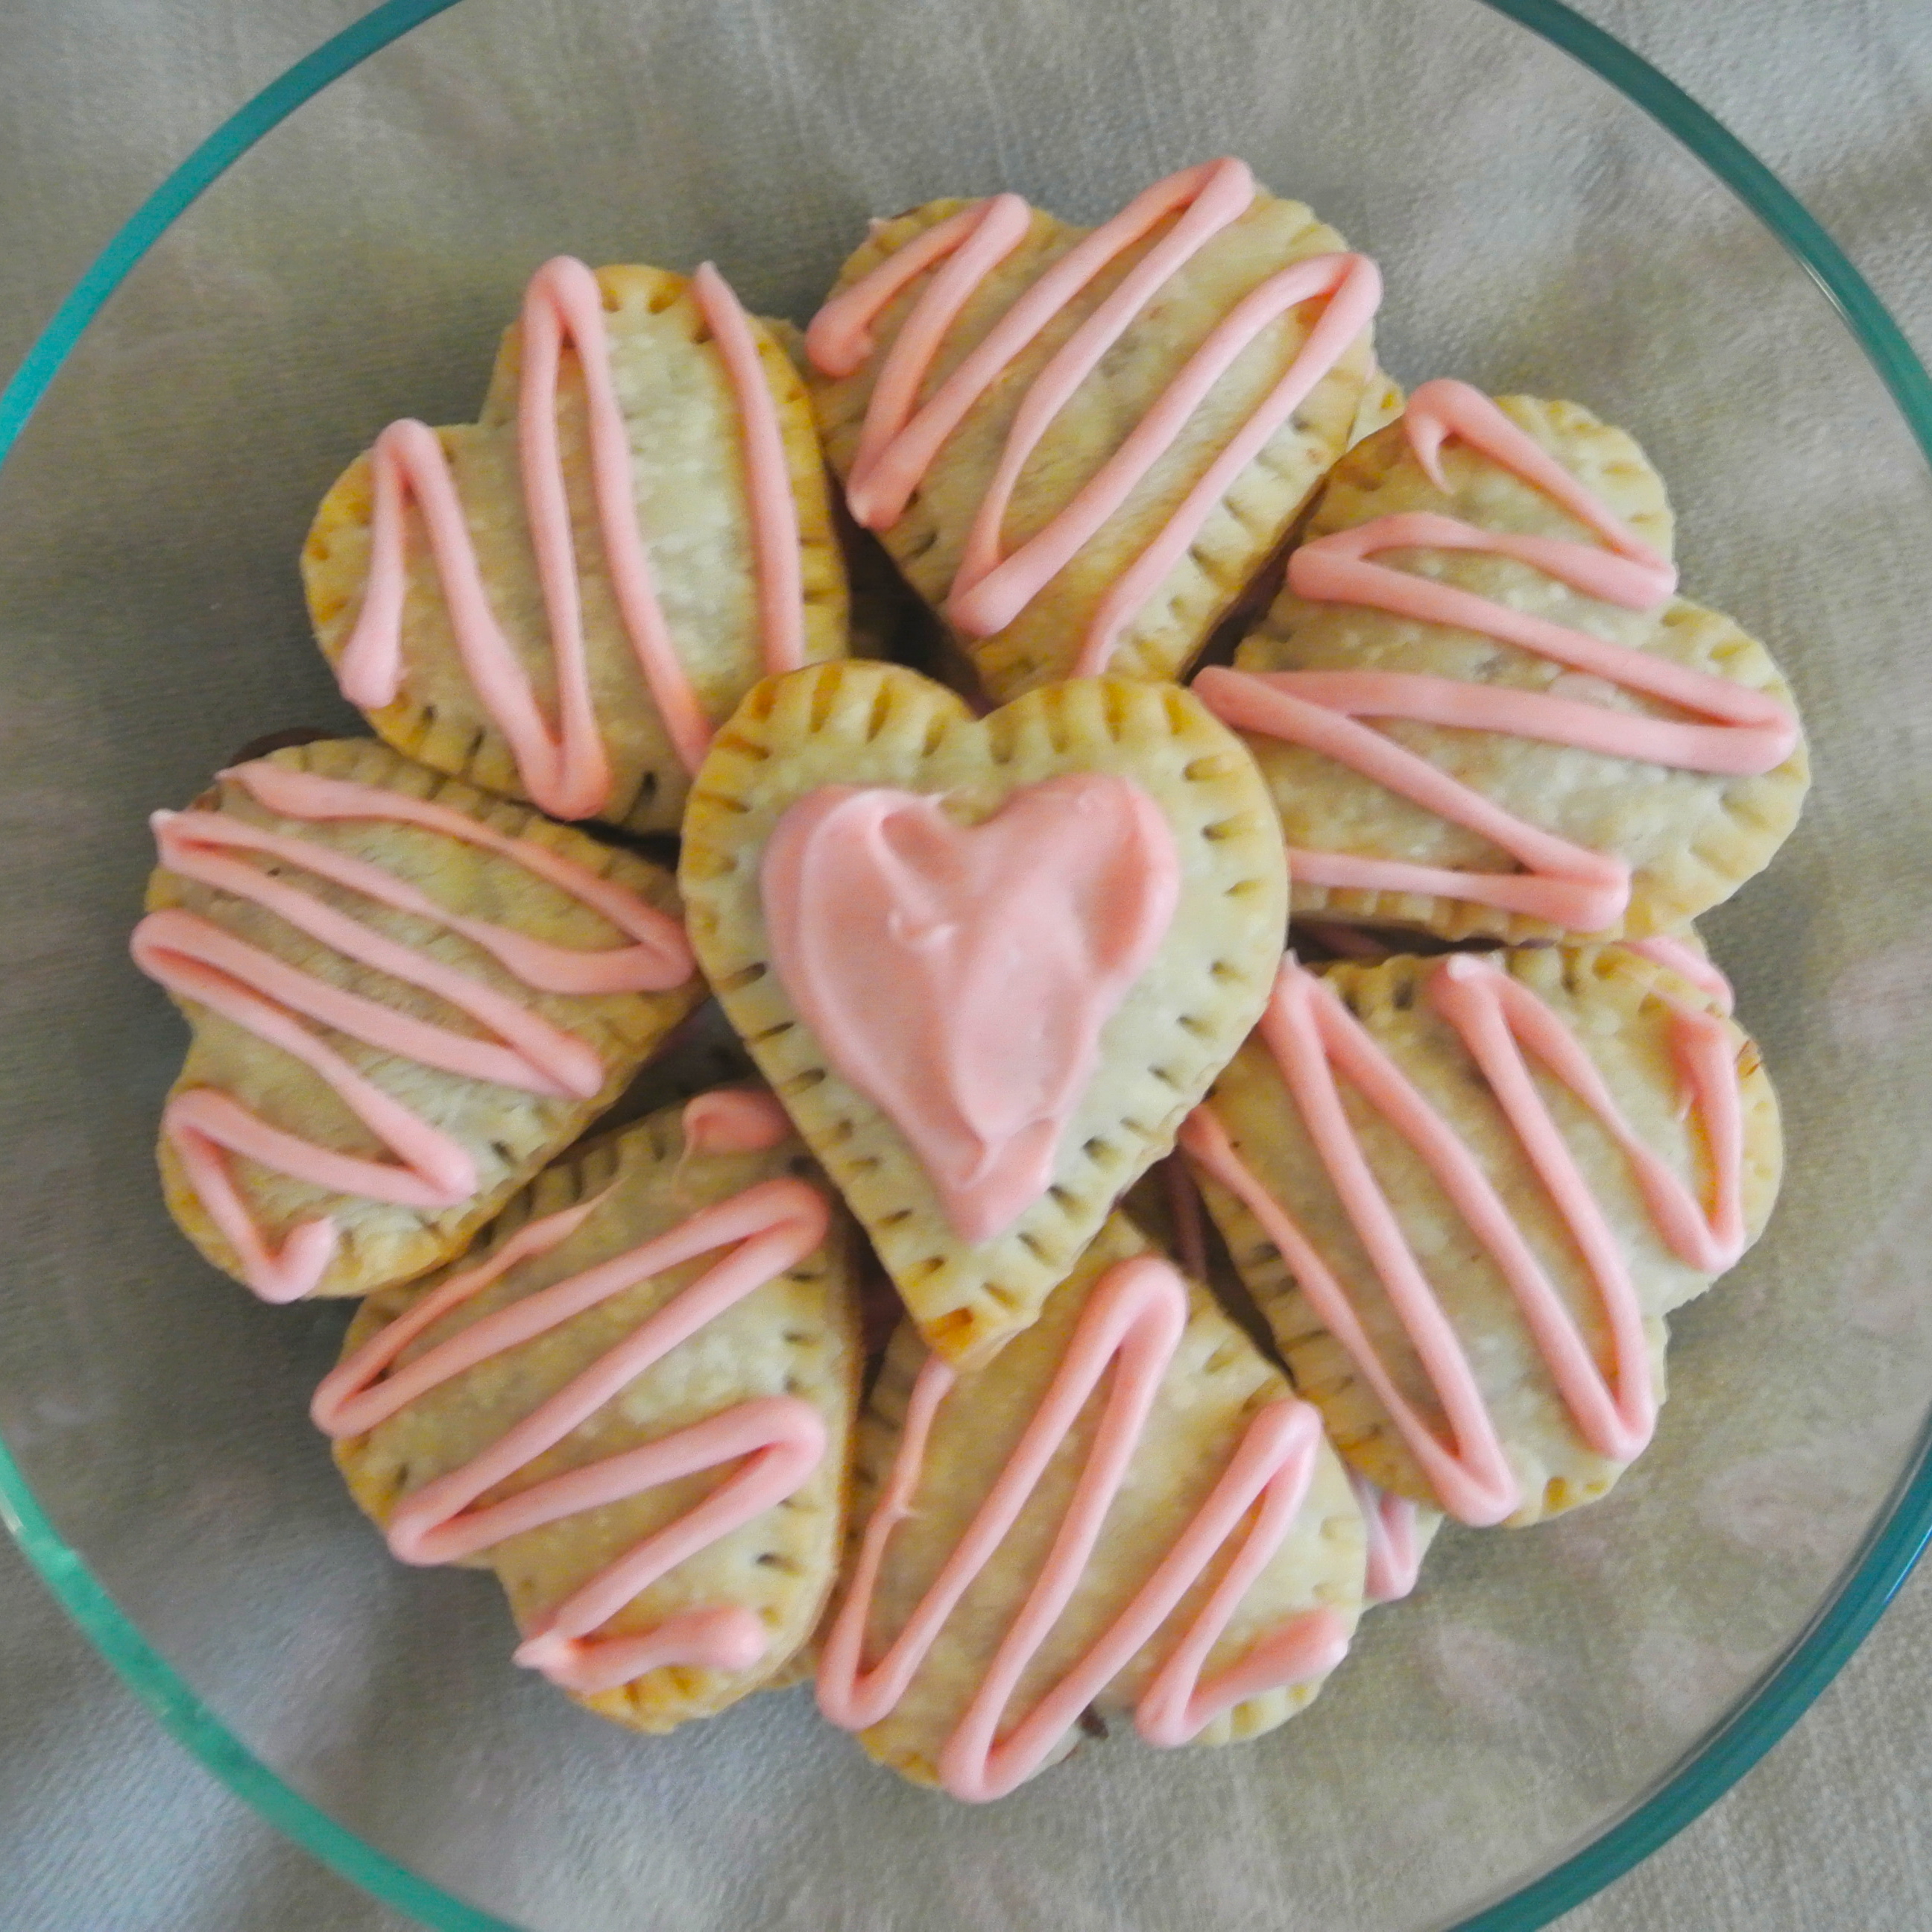
If you’re like me, anything with “Nutella” in the title already has my attention. These cutie patooties are so simple to make and only contain TWO ingredients! (or three ingredients if you’re getting fancy)
You can easily make these the day of a party and “wow” your guests when they bite through the buttery crisp of the pie crust to the ooey gooey Nutella center.
Preheat oven to 350°. Roll out the pie sheets and use the cookie cutter to cut out an even number of hearts. Place half of the shapes onto a cookie sheet. It’s okay if the shapes are close together because they won’t spread when you cook them.
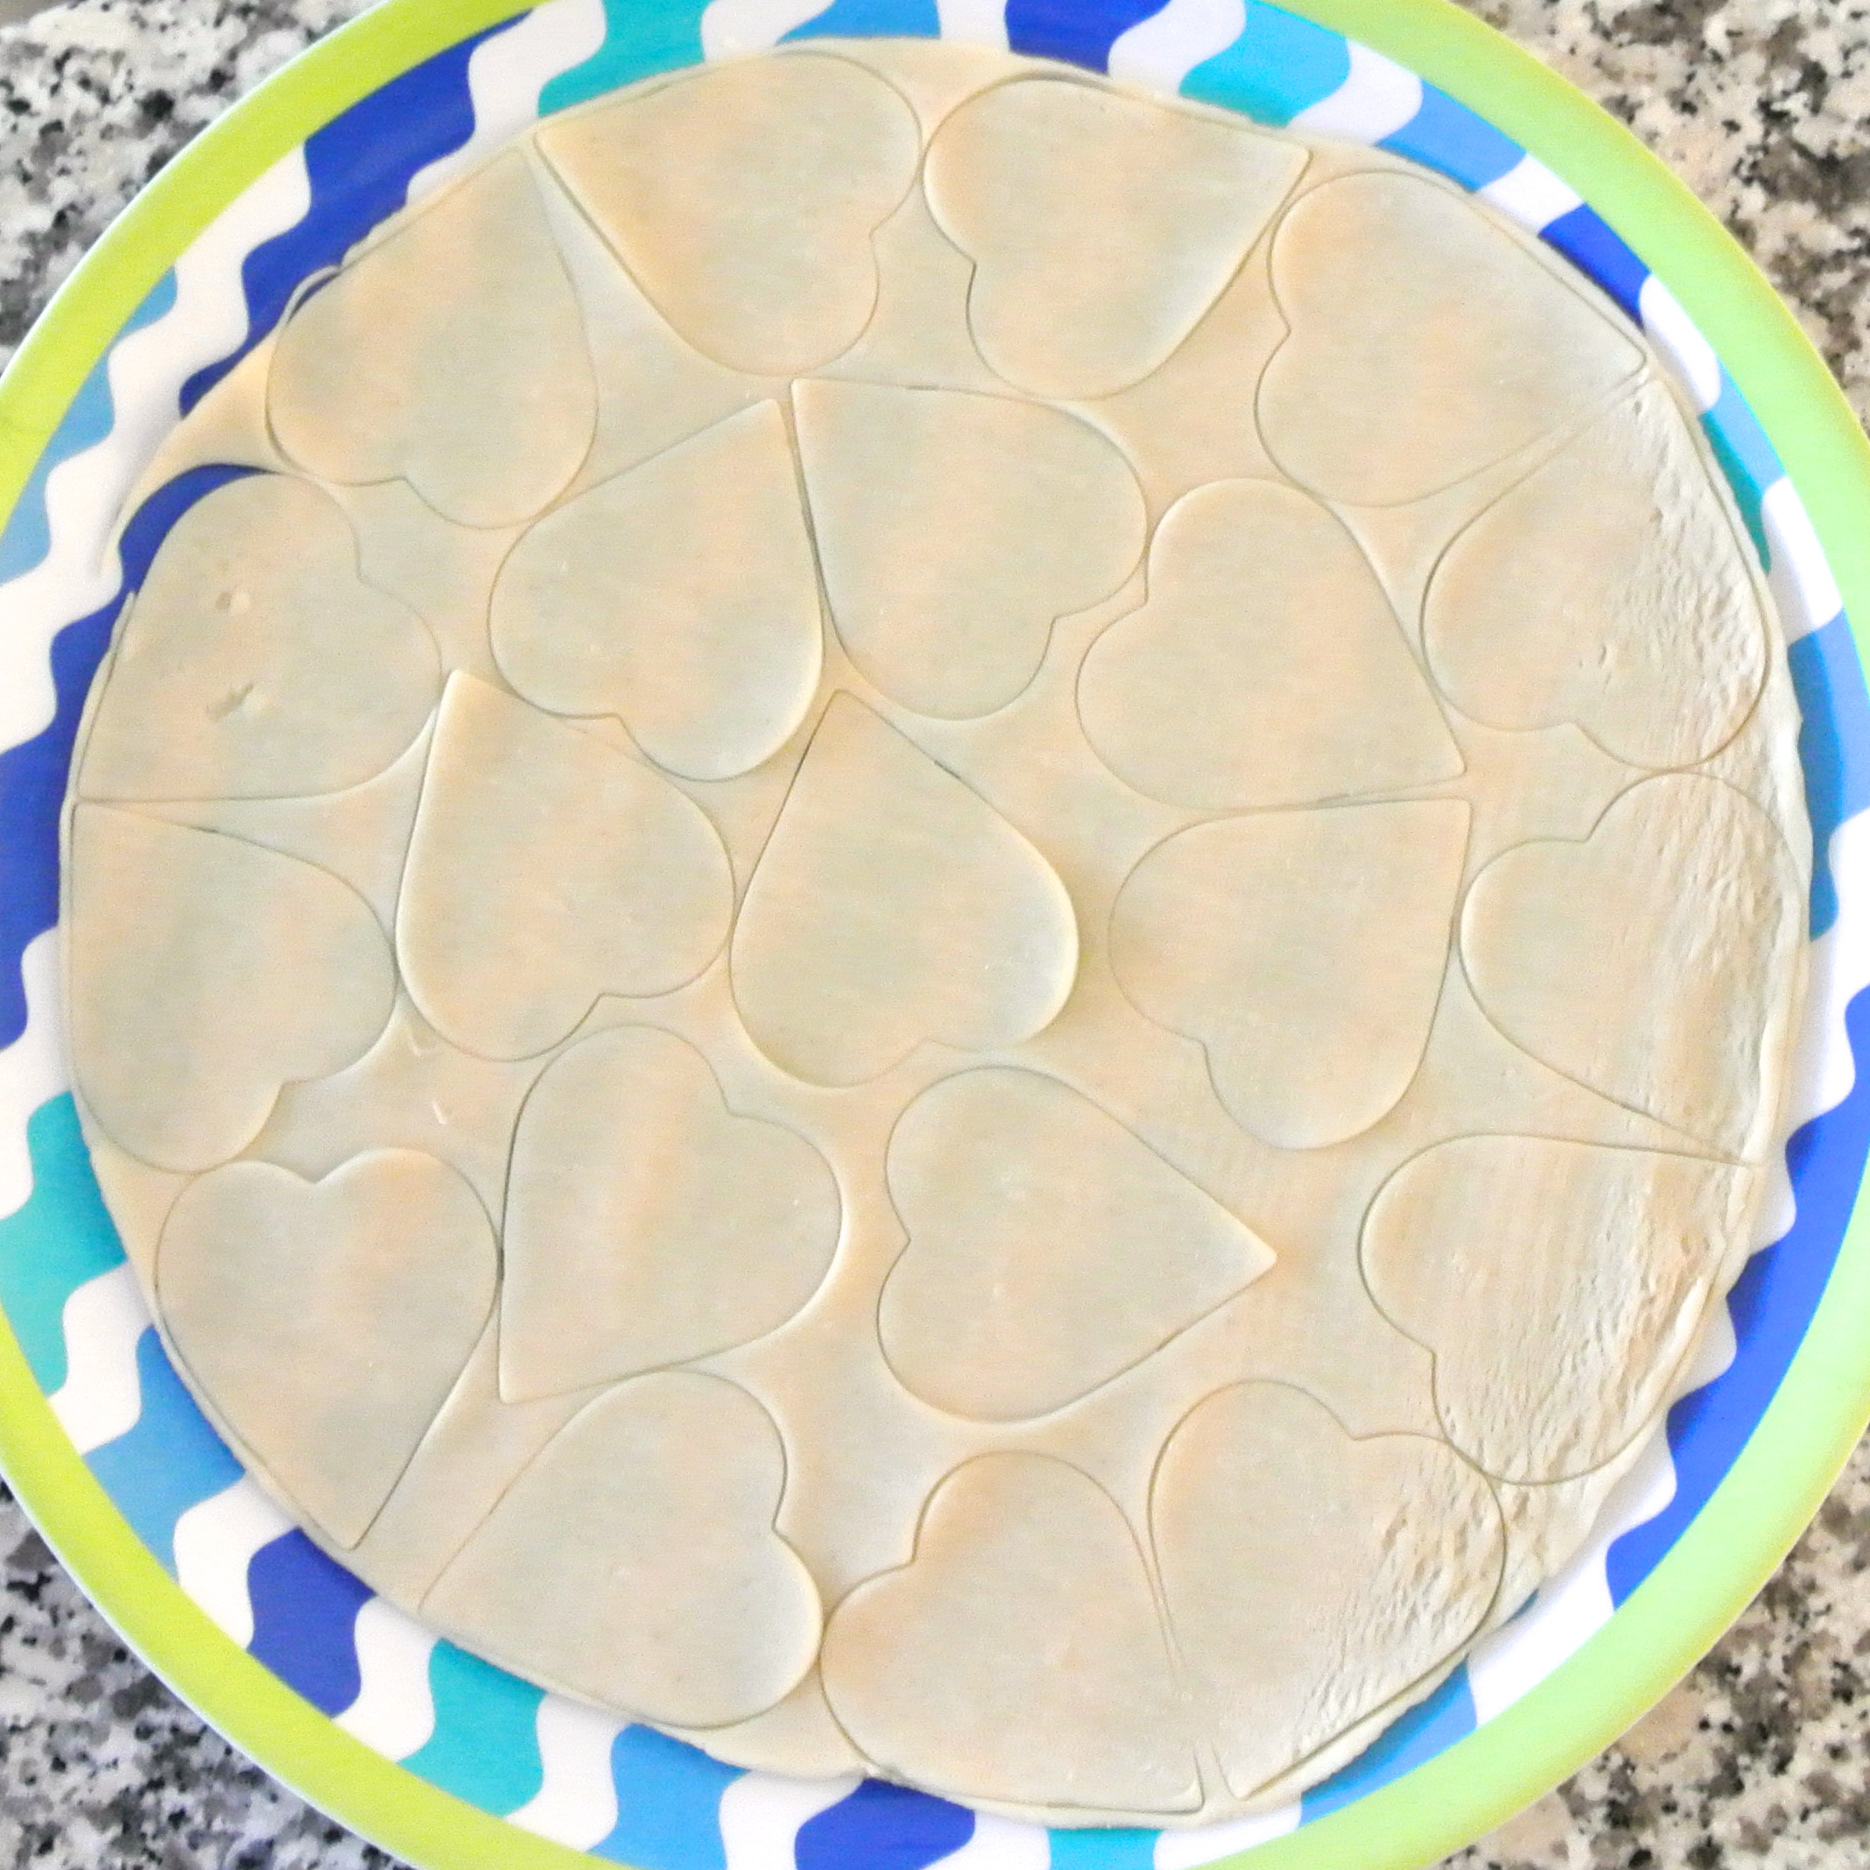
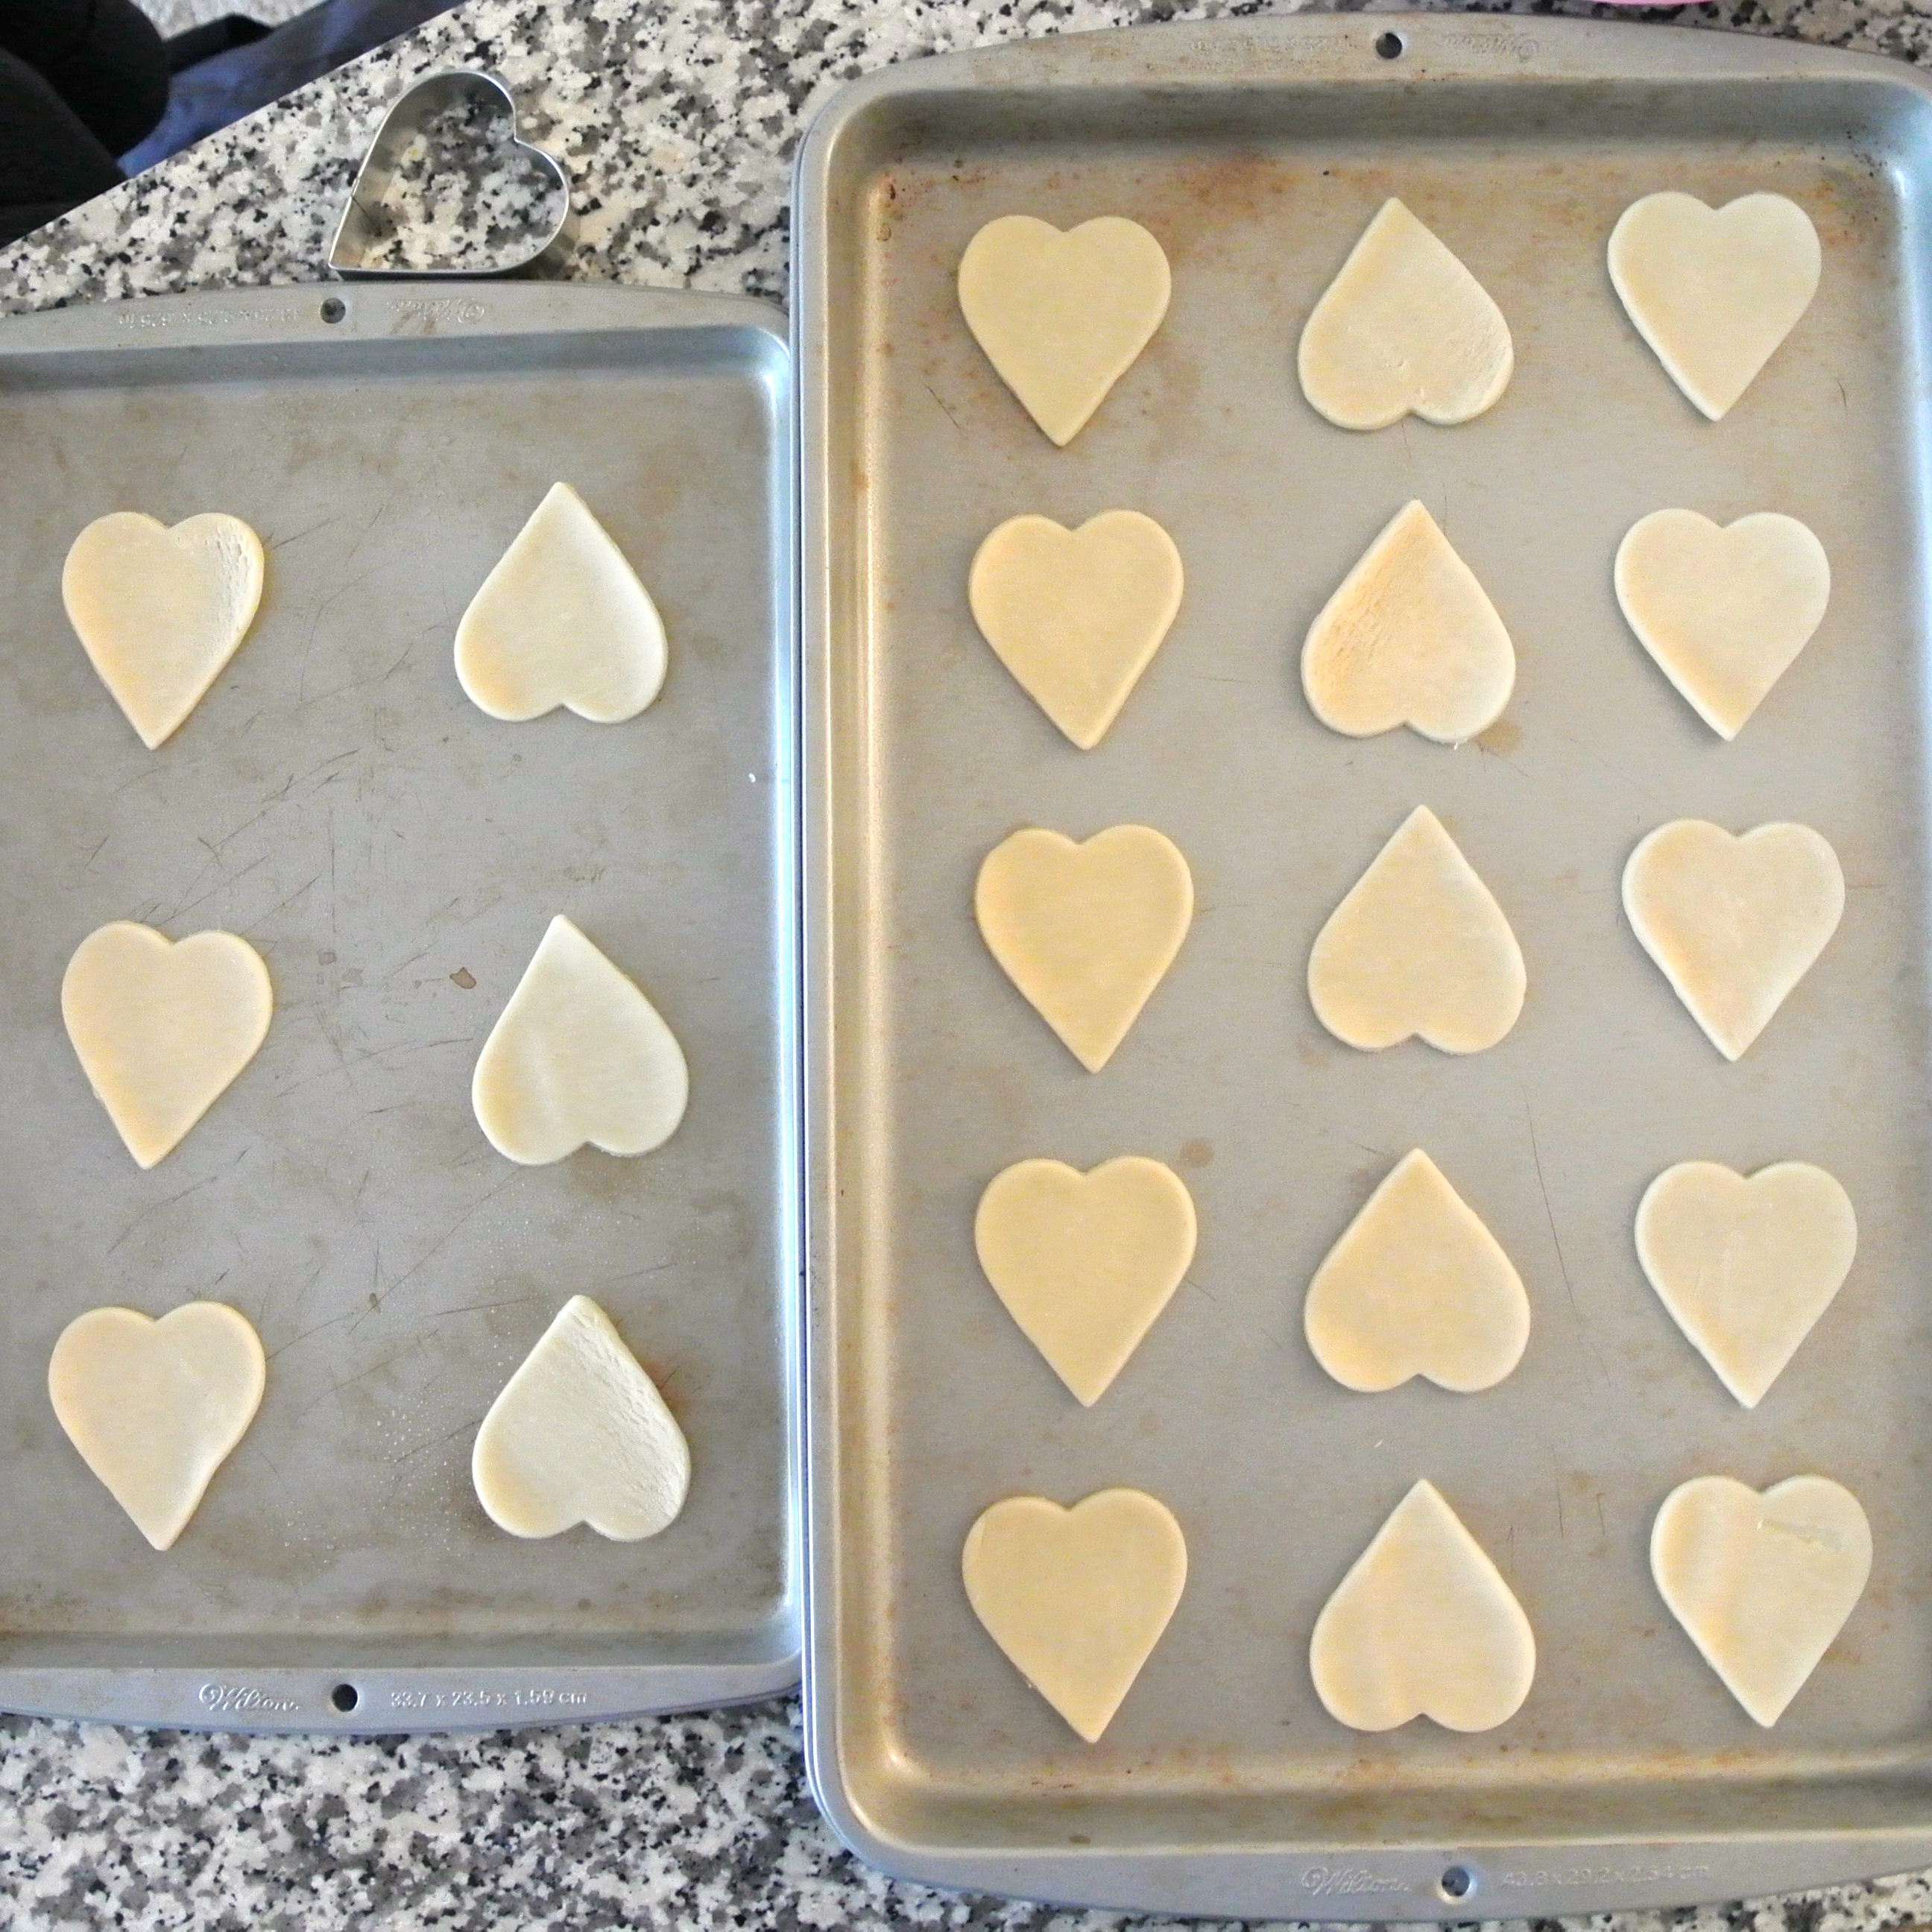
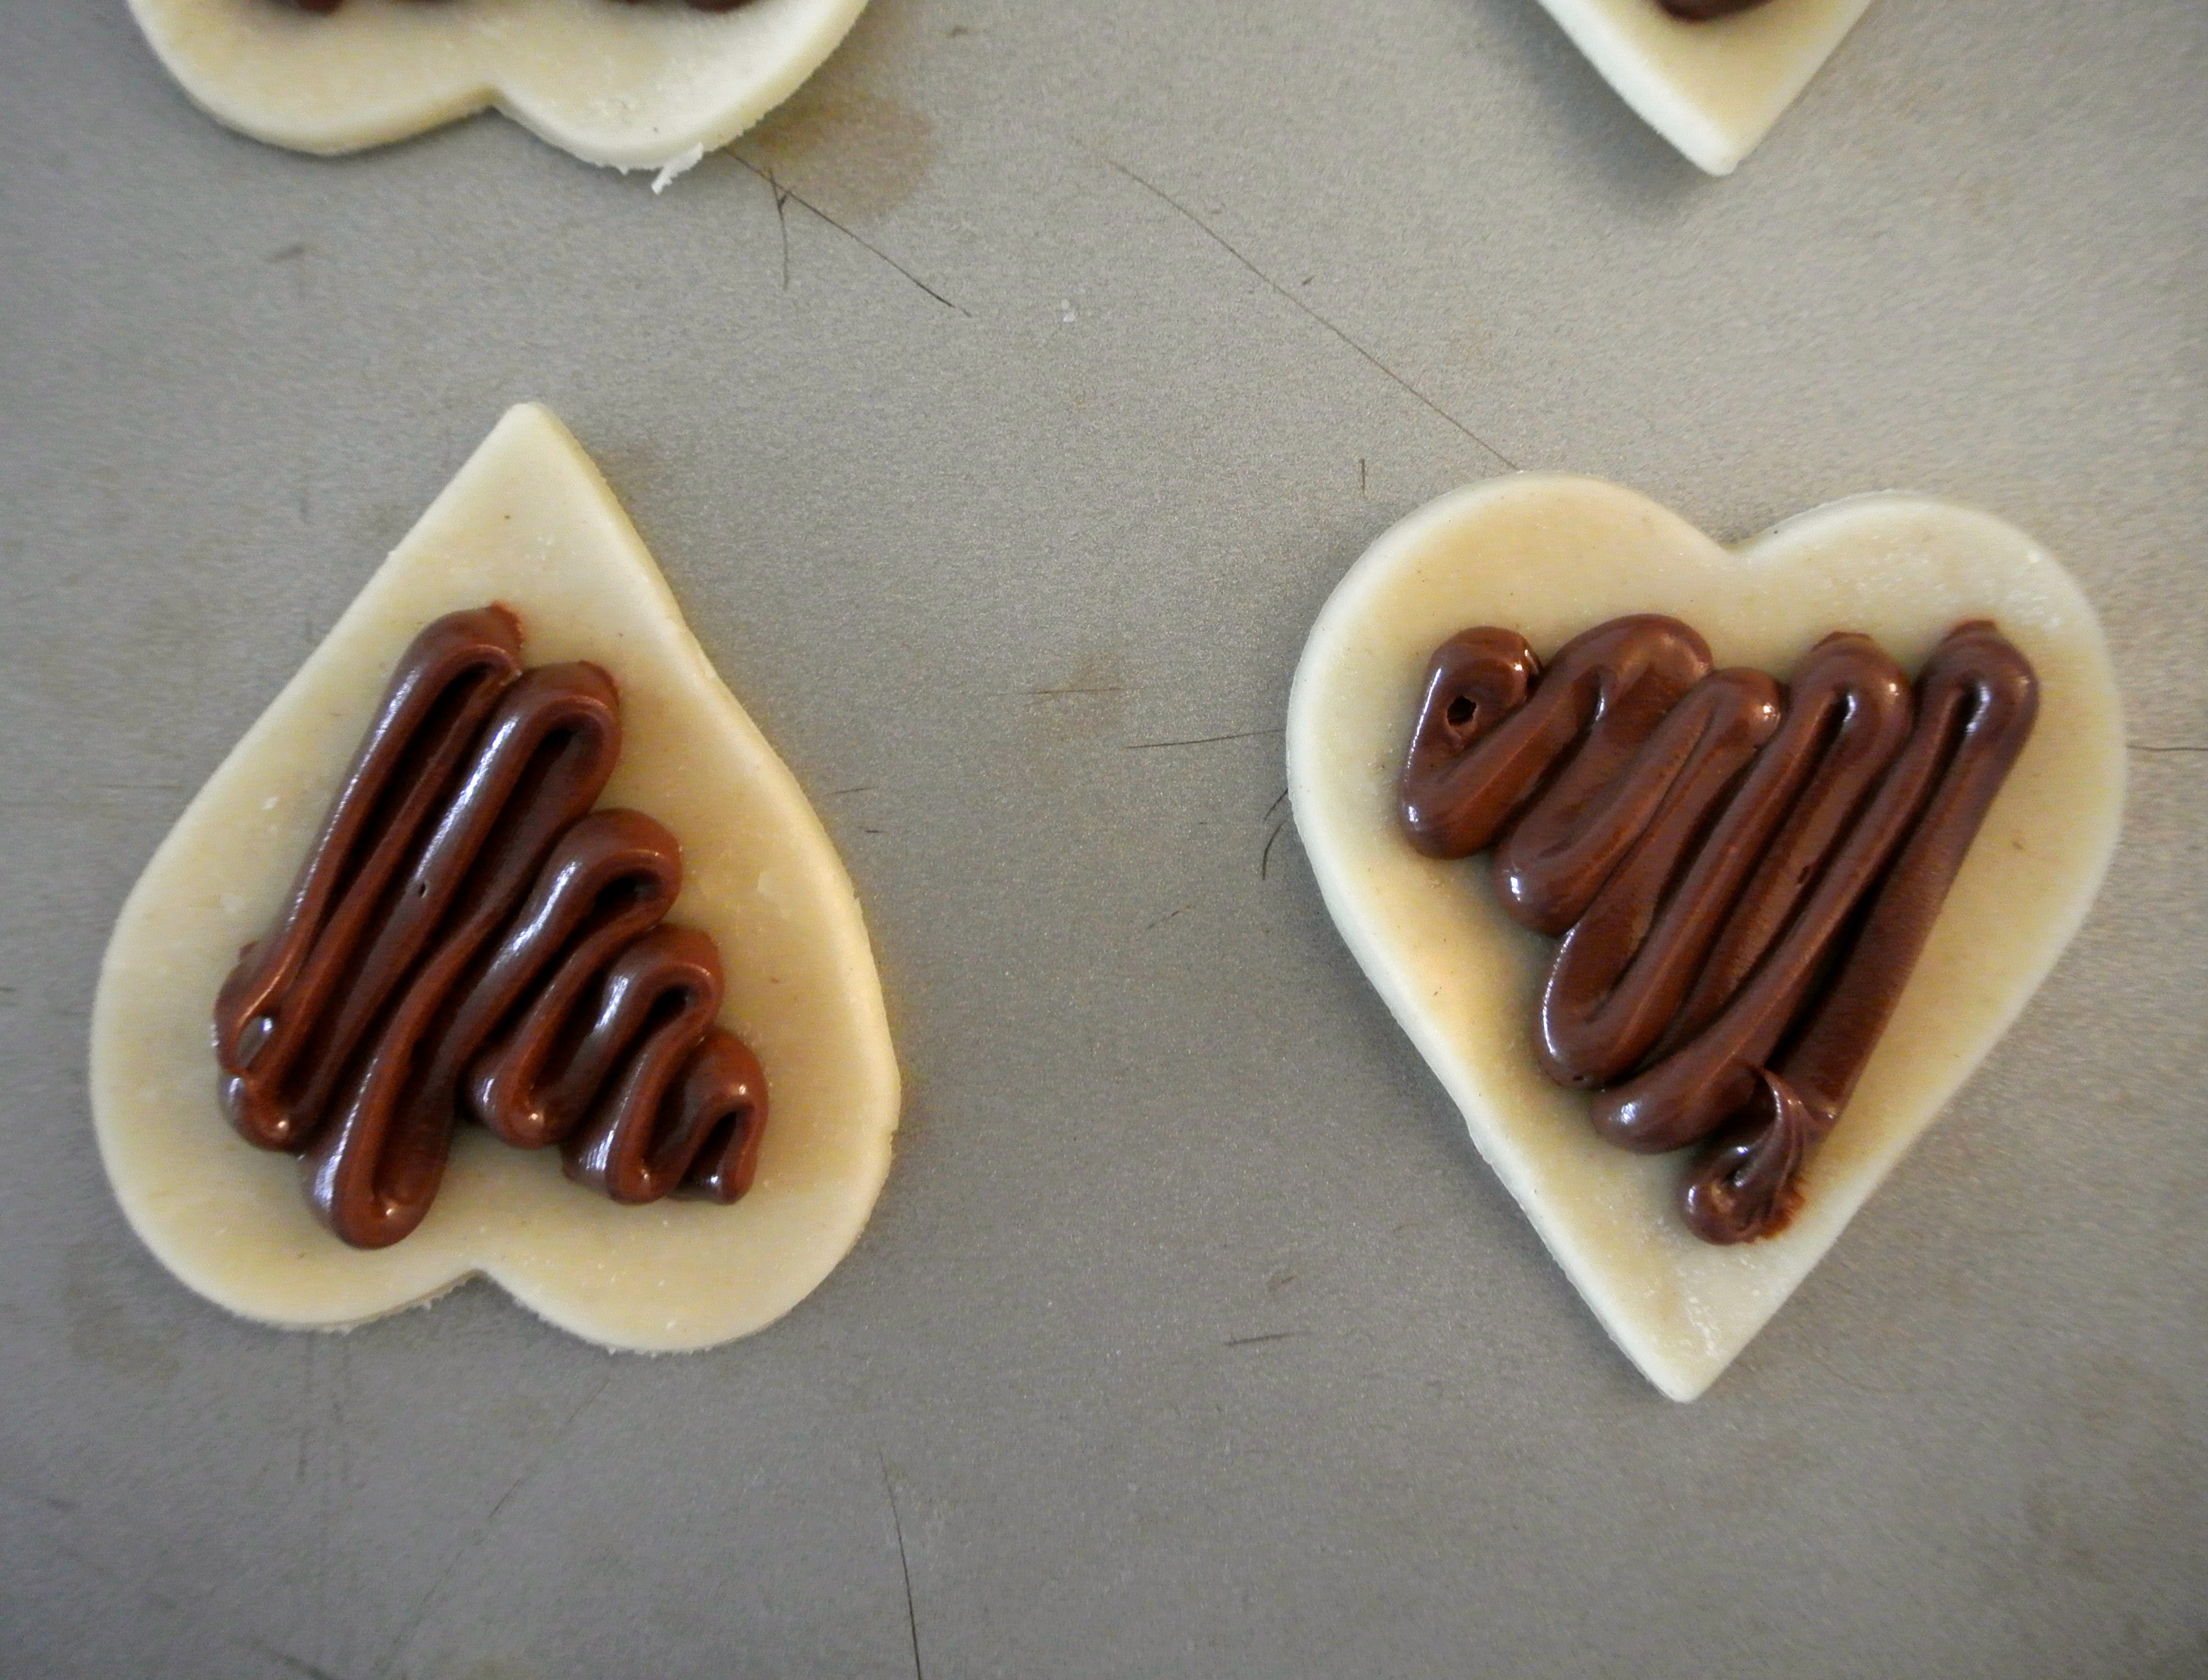
Put a big scoop of Nutella into a plastic bag. Cut the corner of the bag and squeeze a generous amount of Nutella onto half of the hearts. Make sure to leave enough space around the edges so chocolate doesn’t ooze out the edges when you press them together.
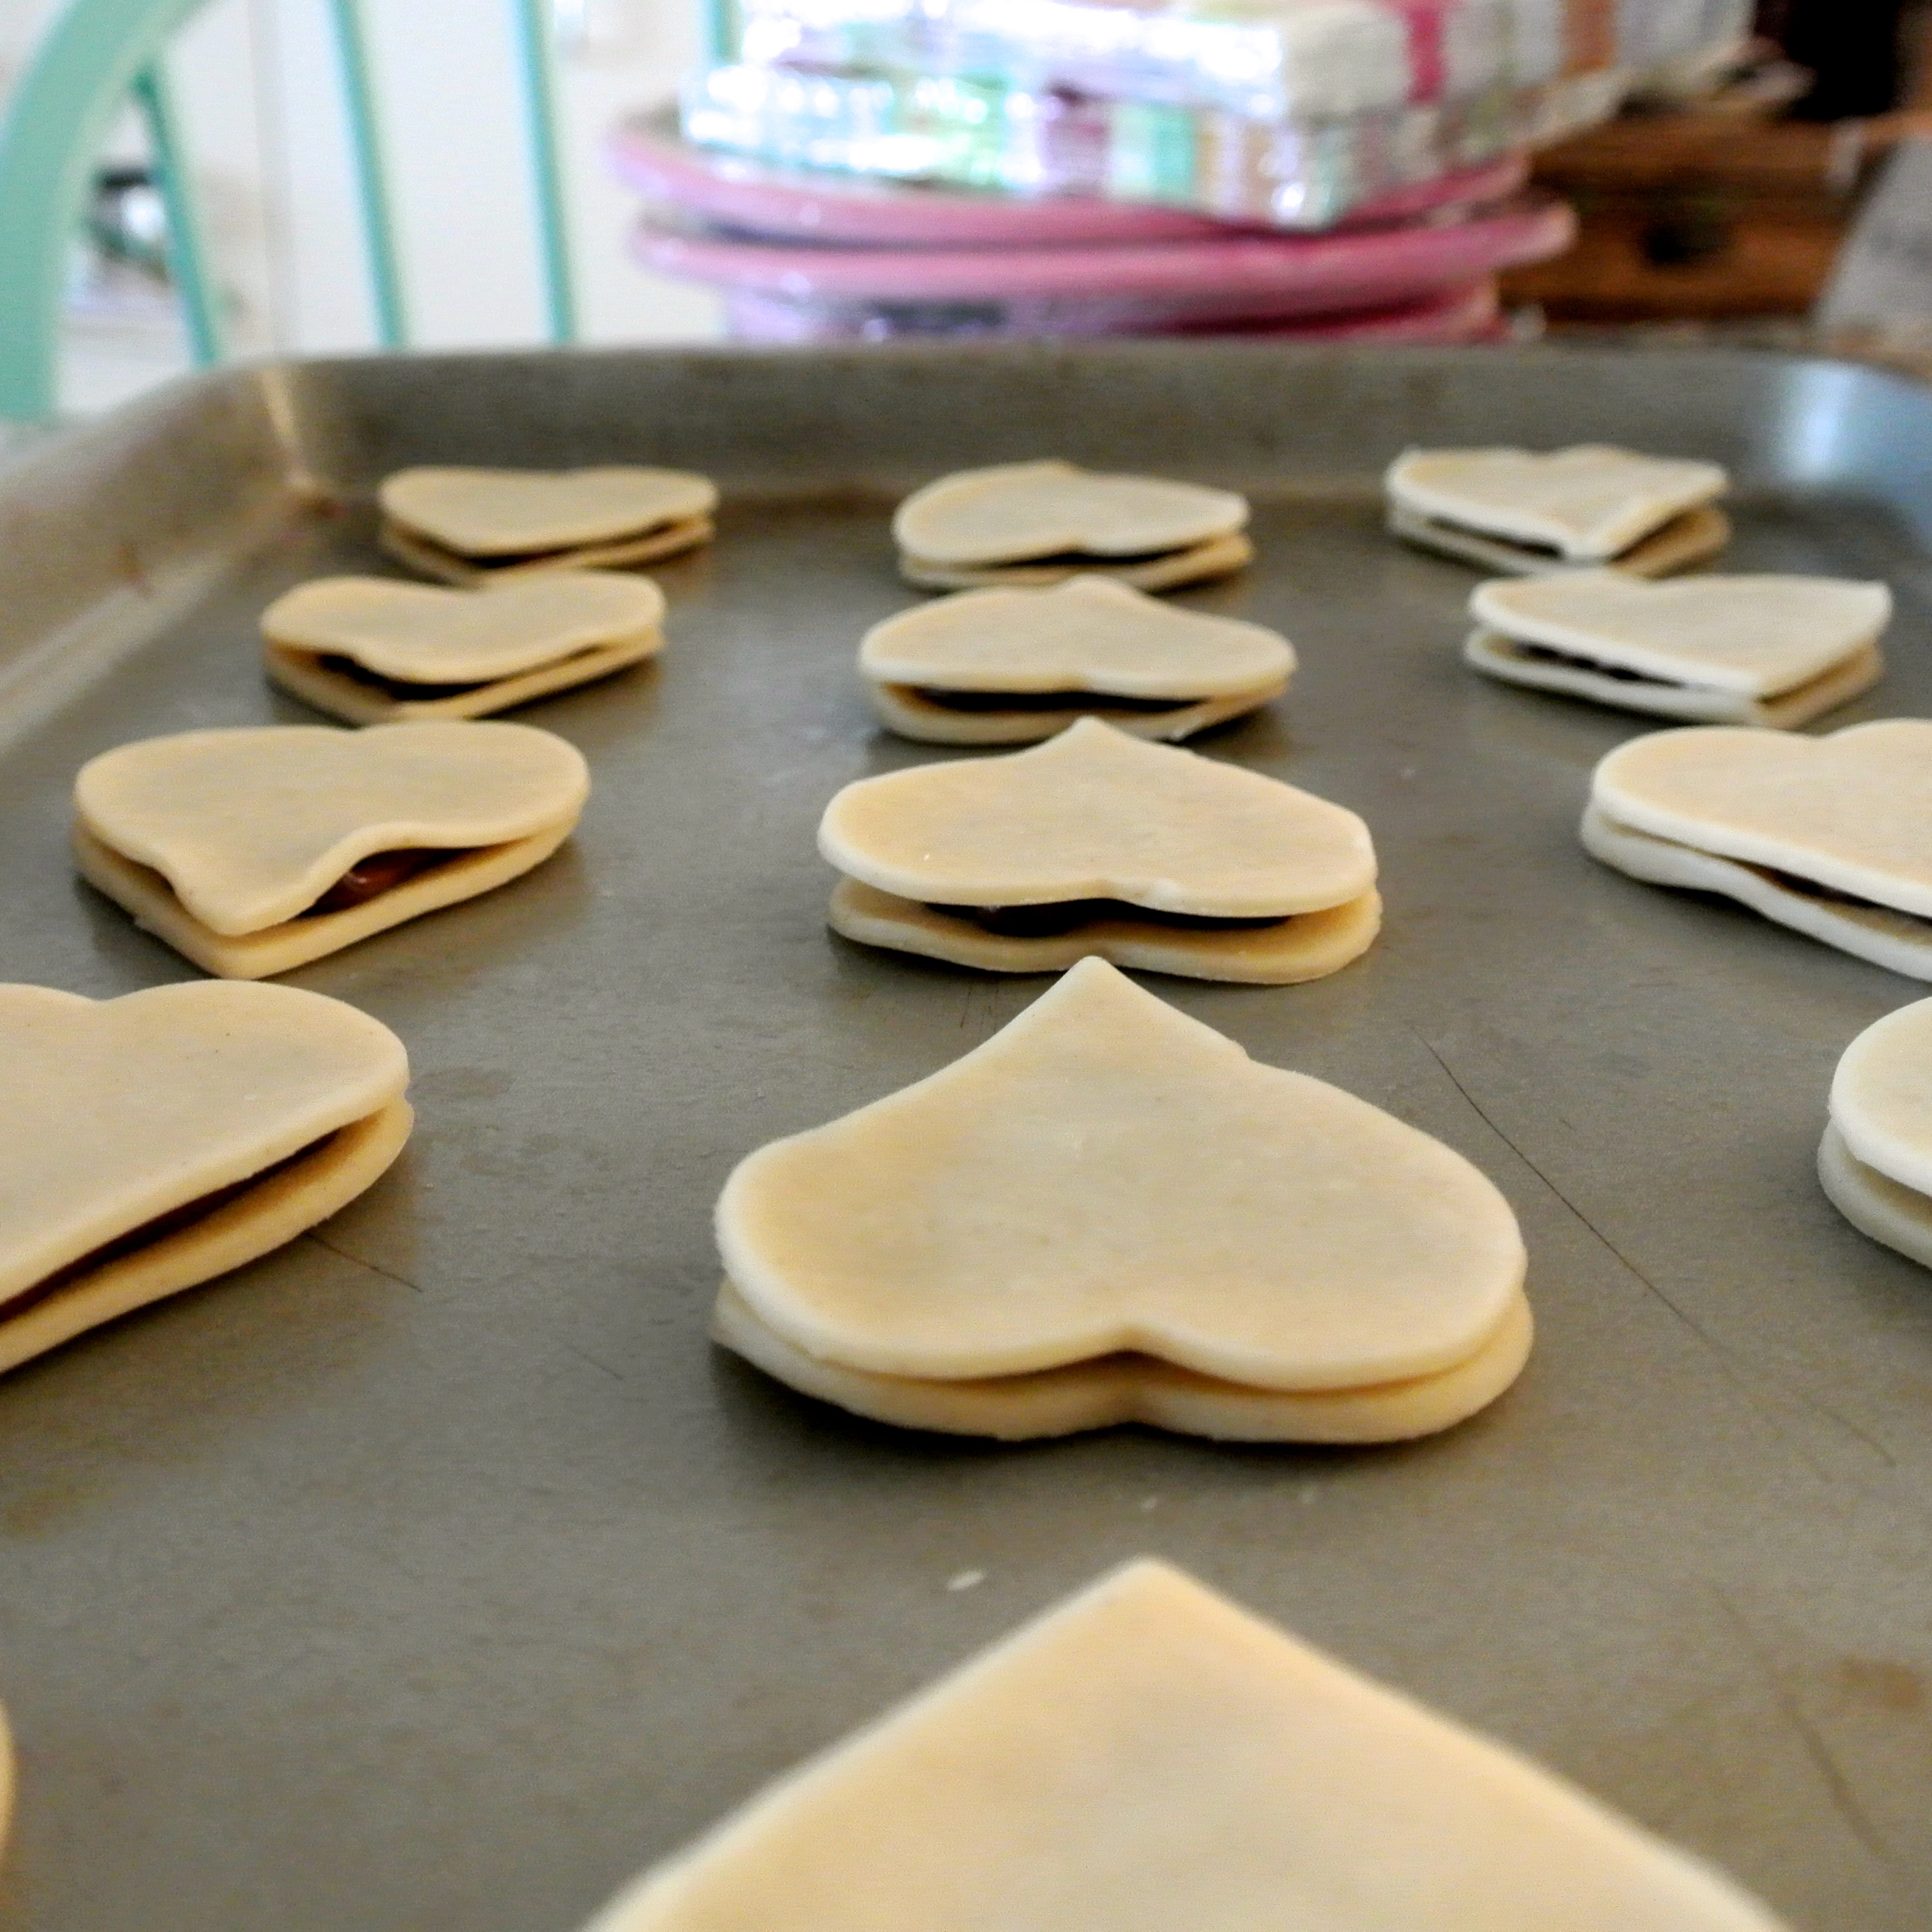 Using a fork, gently press the edges of the heart together. This will help hold the dough together as it cooks.
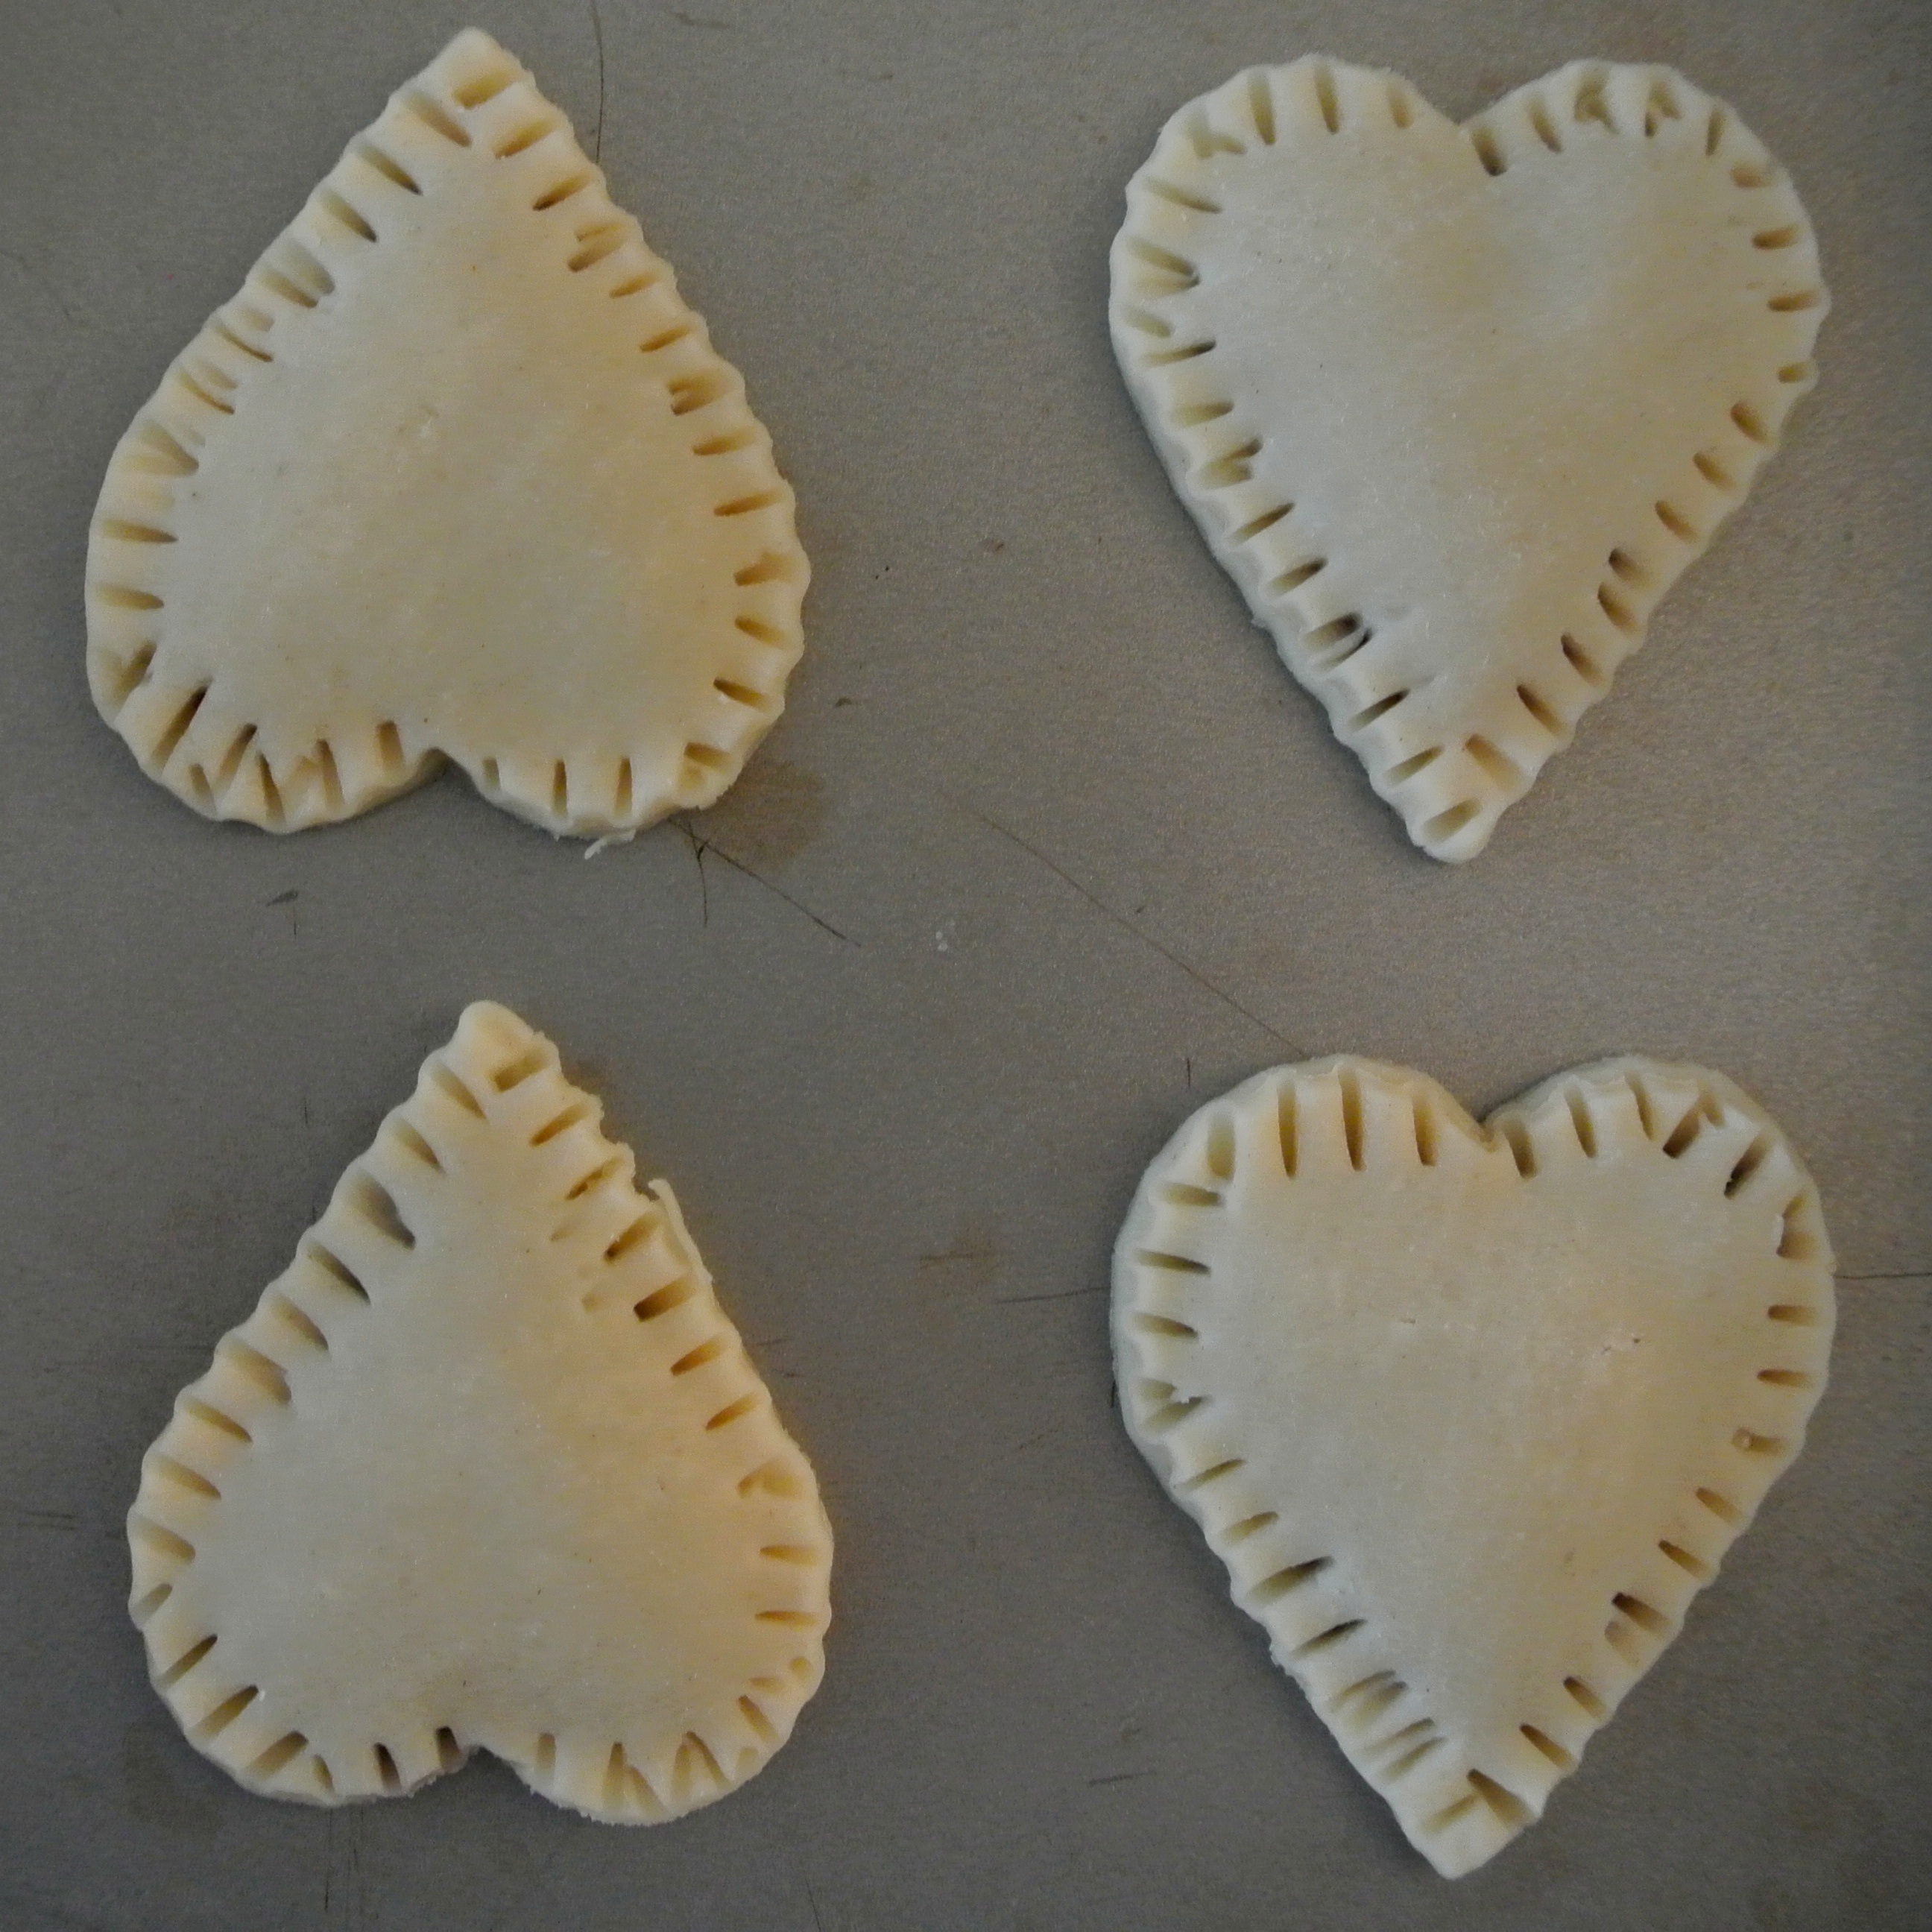
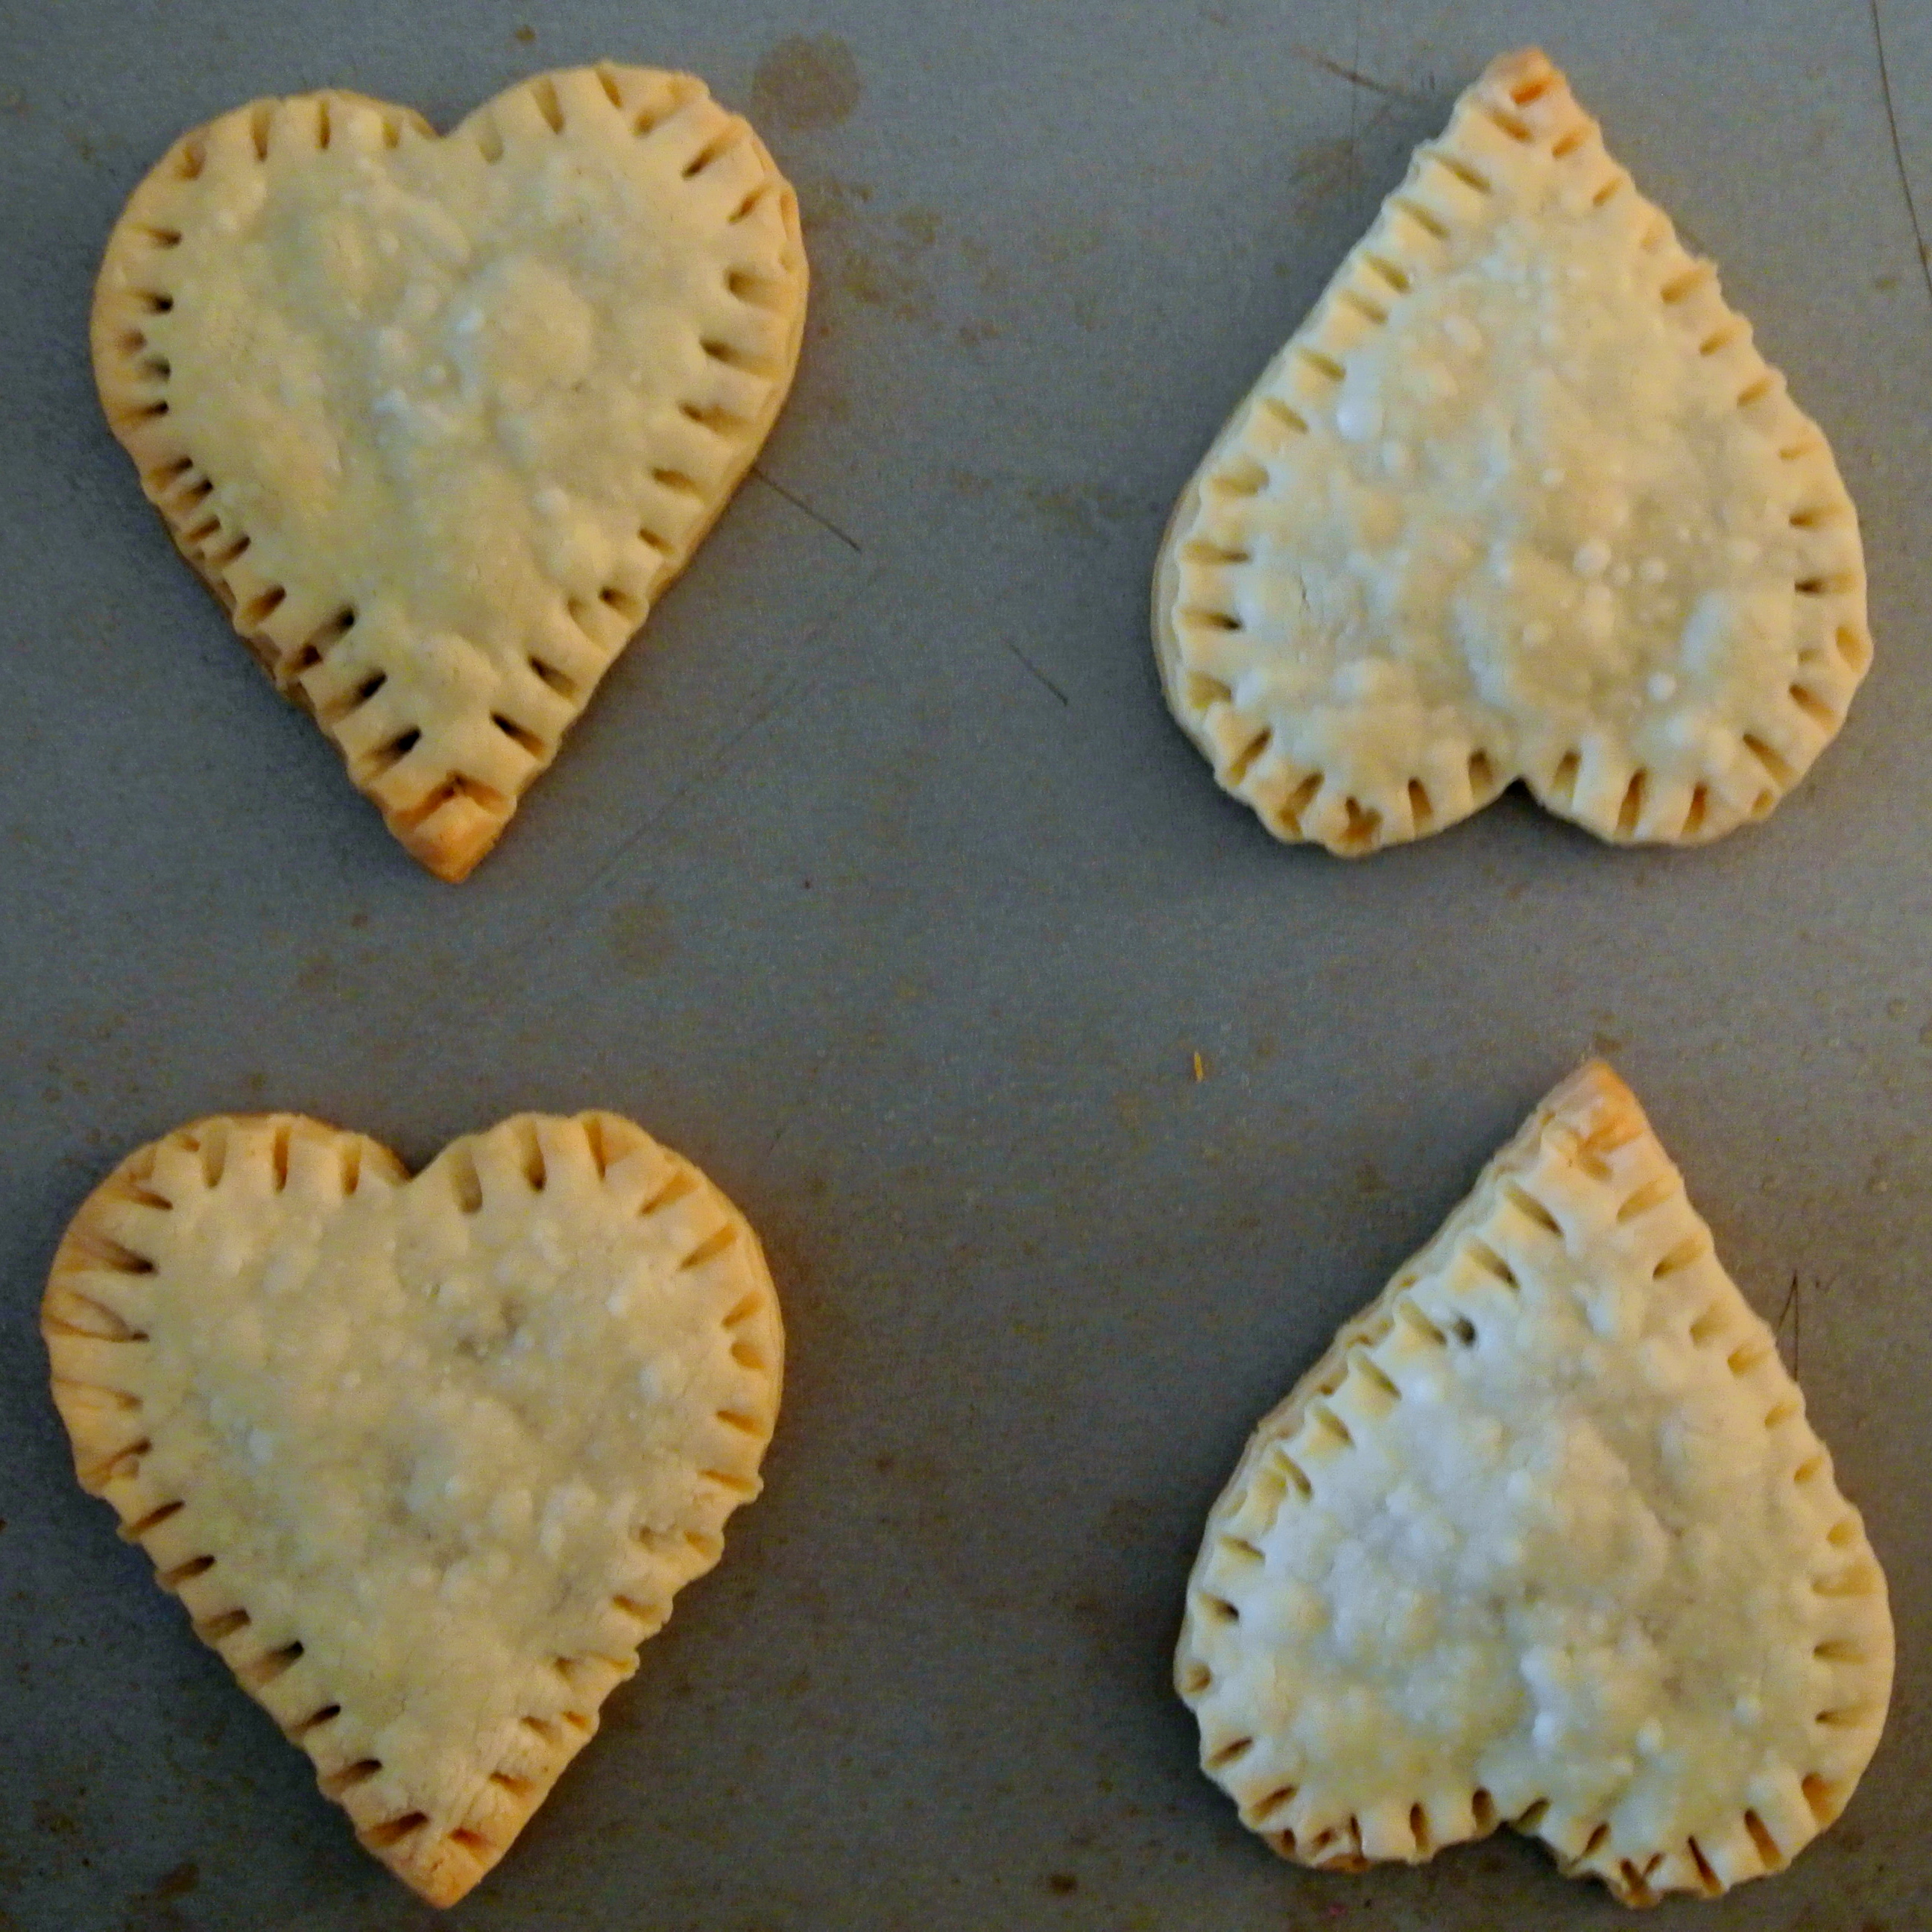
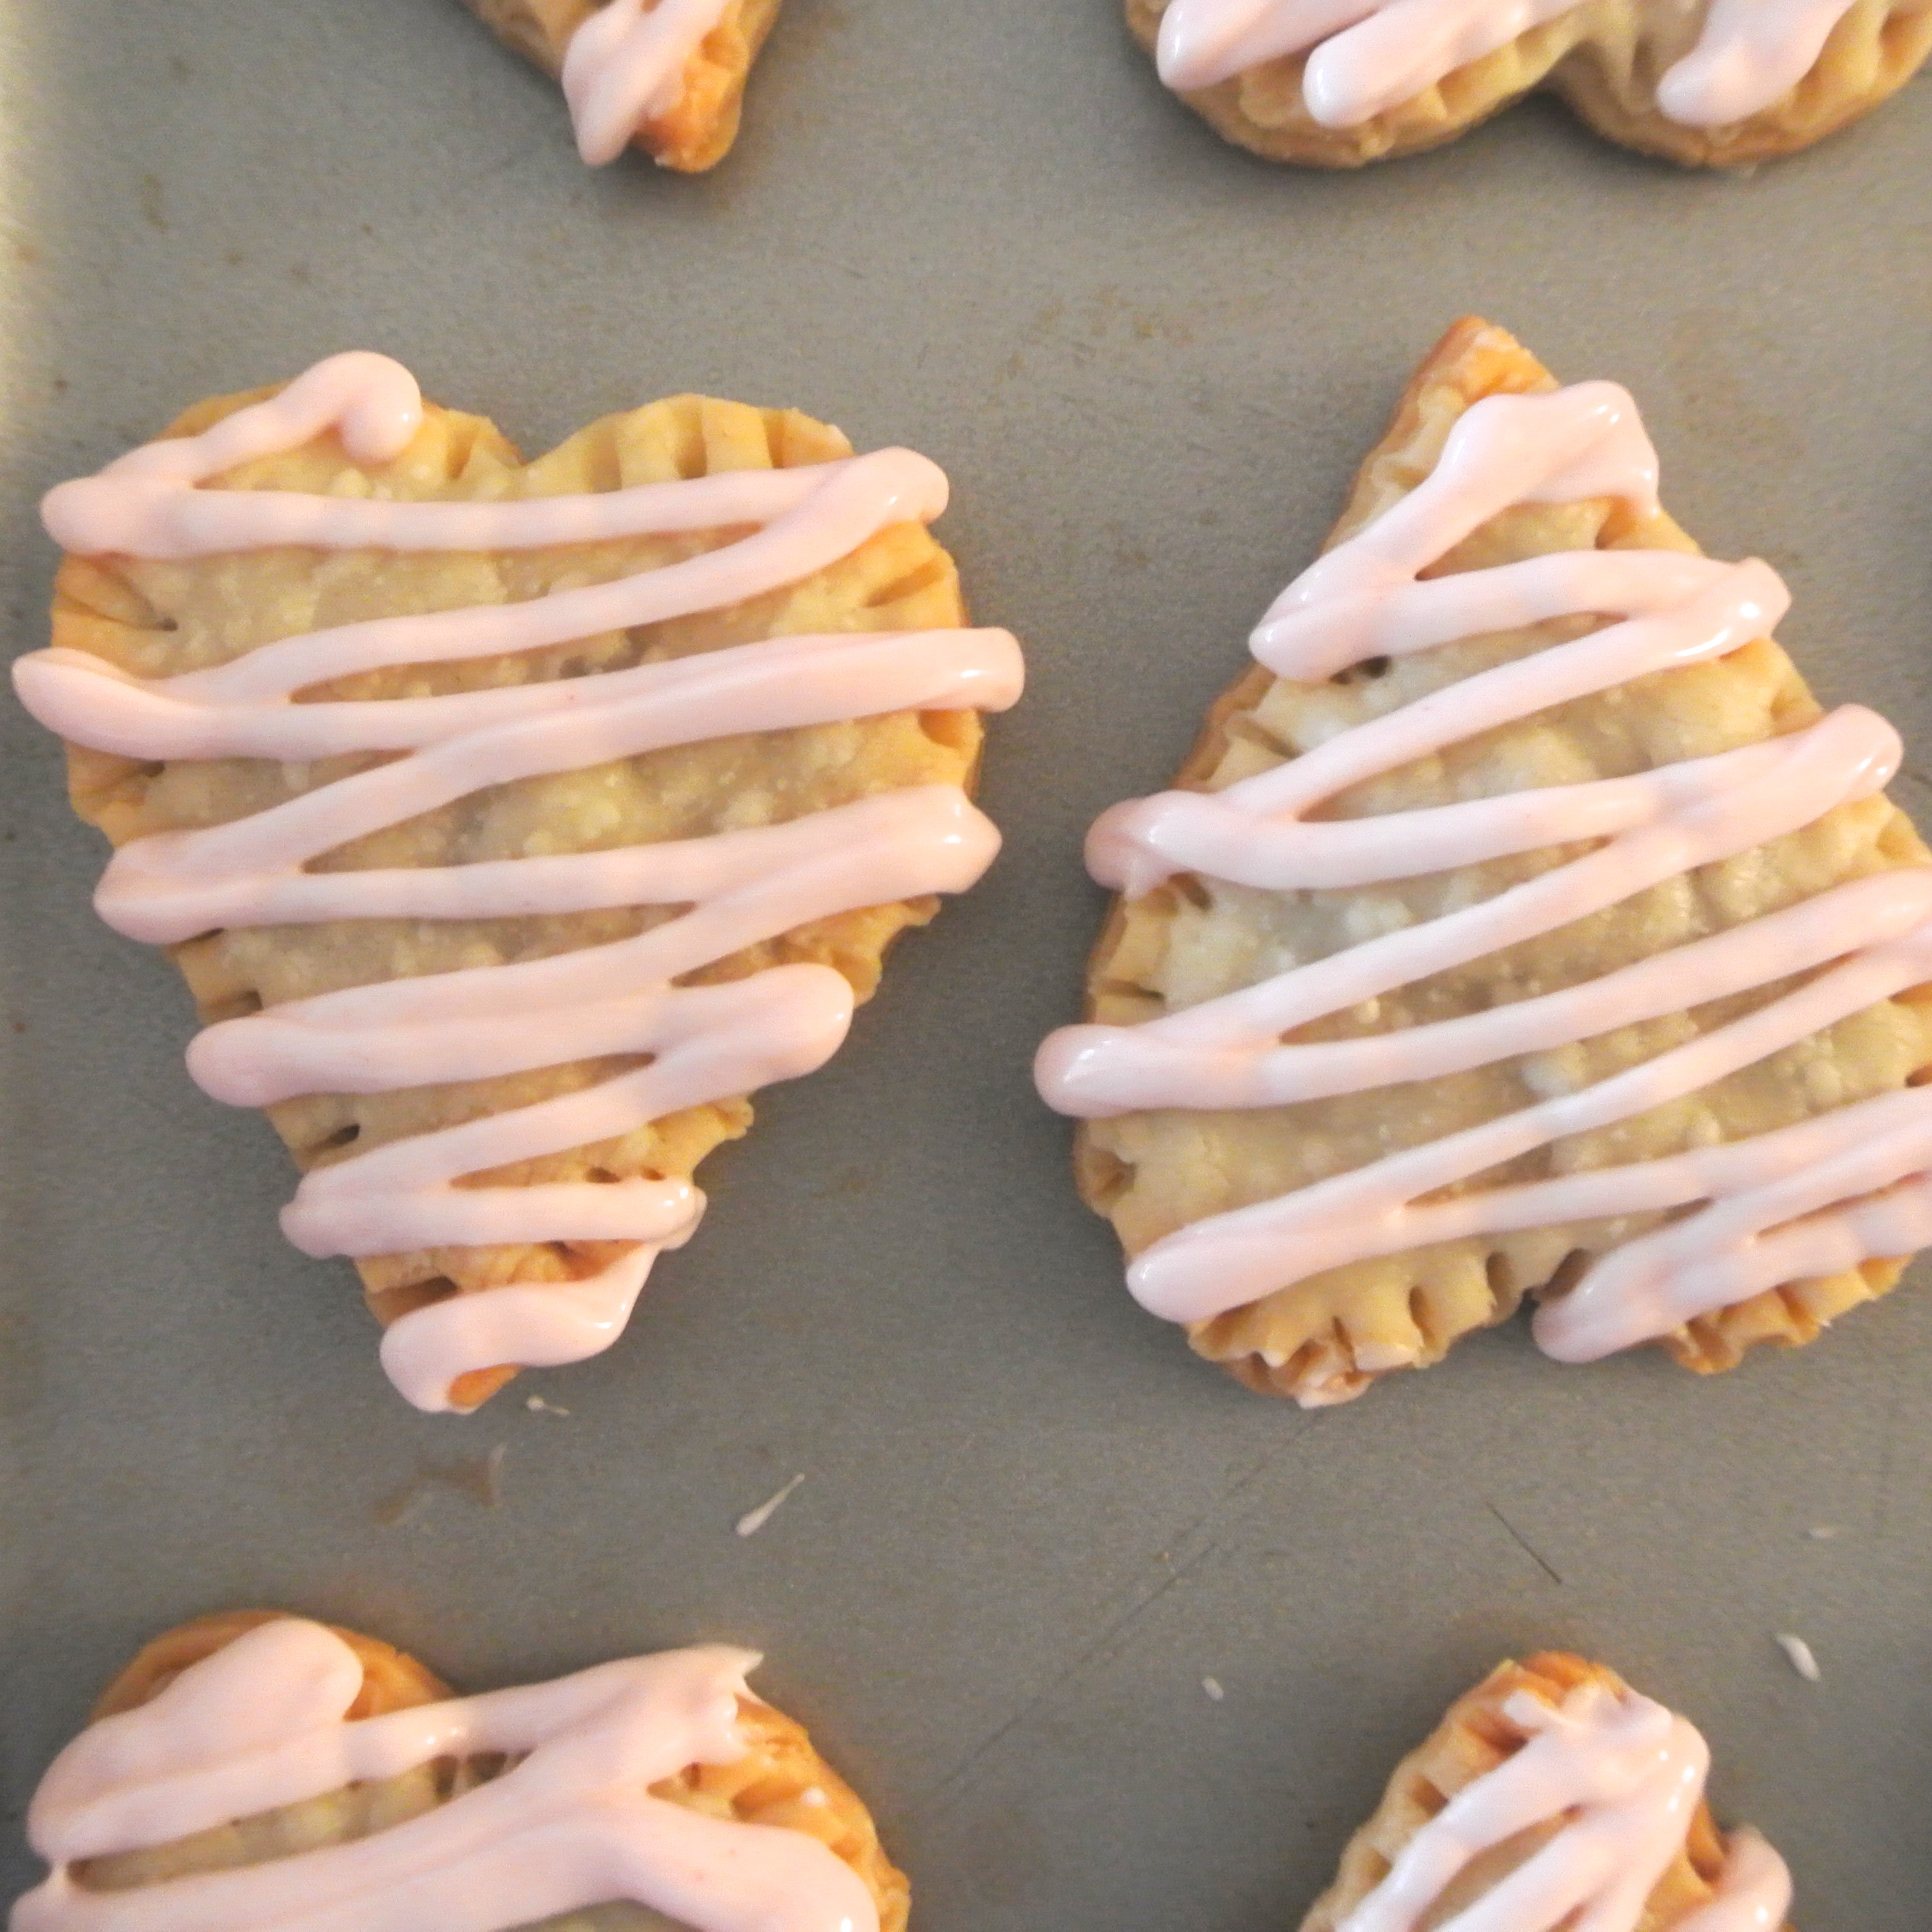
Bake for 10-13 minutes or until golden brown. Let cool for 10 minutes before decorating.
Prep time 10 minutes, bake time 10 minutes.
You will need:
– 2 pie crusts
– Heart shaped cookie cutter
– Jar of Nutella
– Icing/melting chocolate optional
Makes 21 pop-hearts
Happy February 1st!
LOVE (literally) my new pillow decor that is just in time for Valentine’s Day! Aren’t little gifts from Mom always the best?
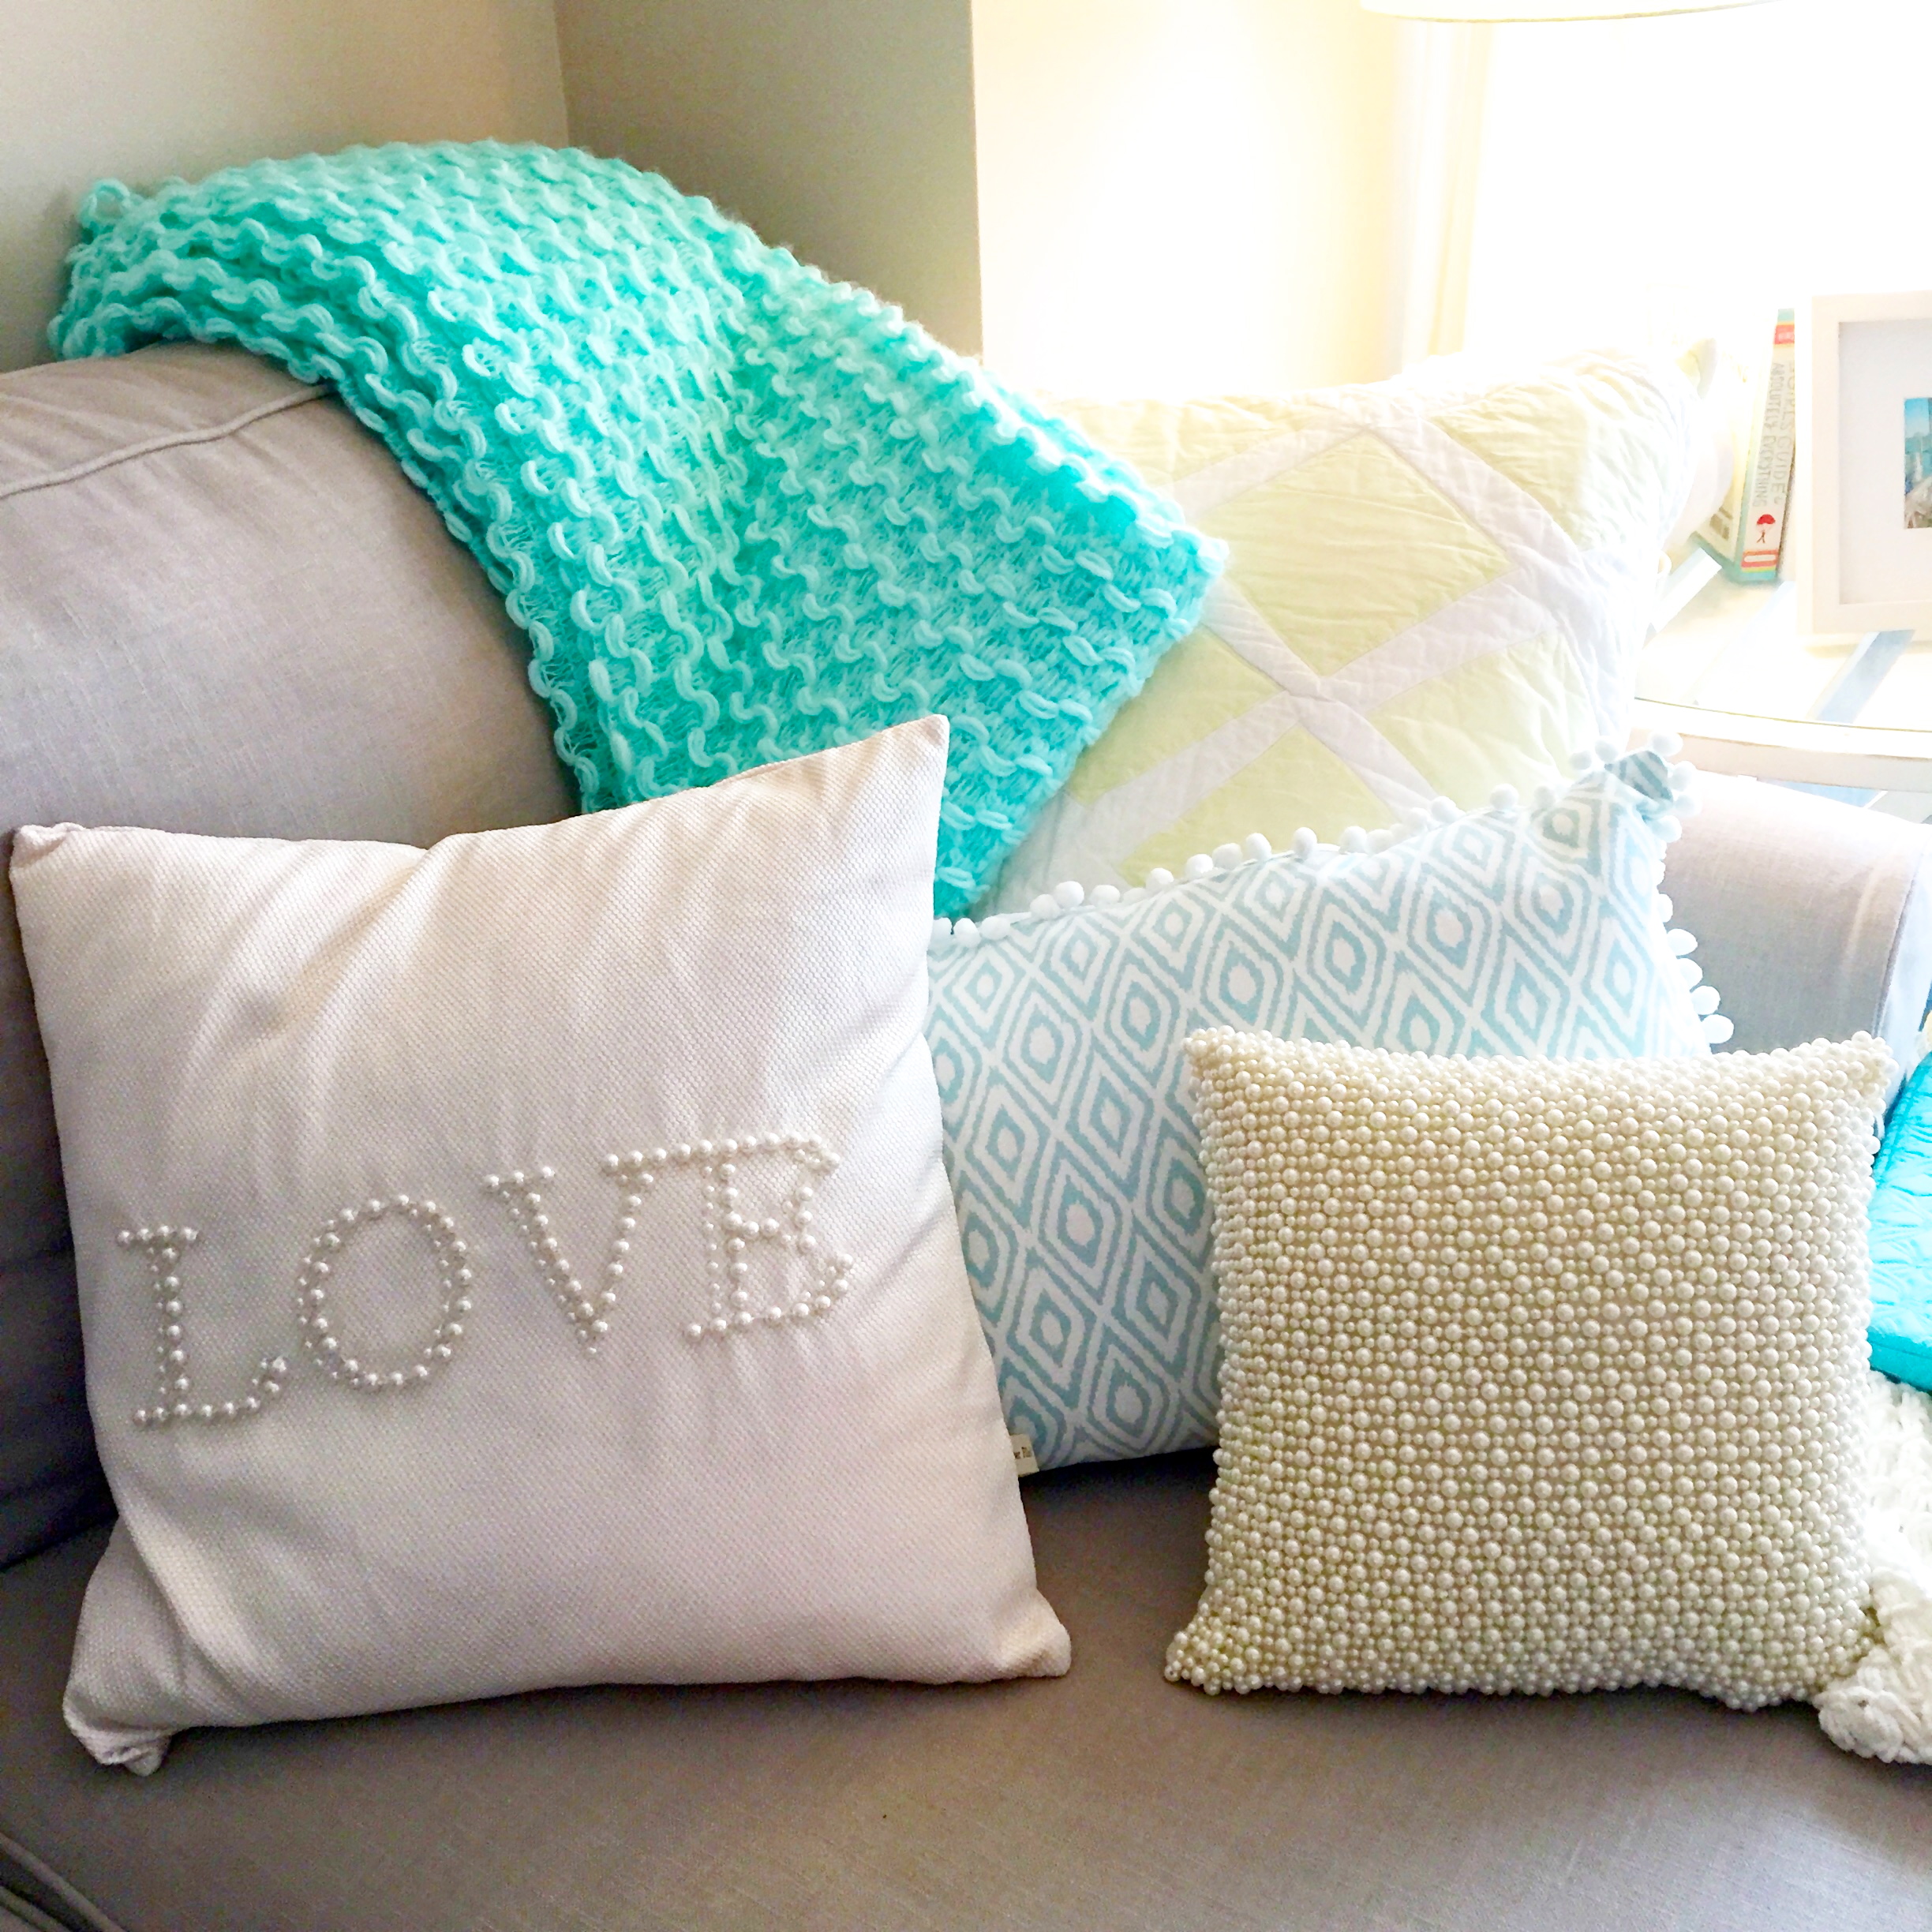
Cynthia Rowley blanket, Serena and Lily diamond quilt pillow, blue diamond, LOVE, and pearl pillows from Home Goods
The post holiday depression kicked in so I’m escaping the Chicago wind for a weekend and jetting down to Florida for a girls trip.
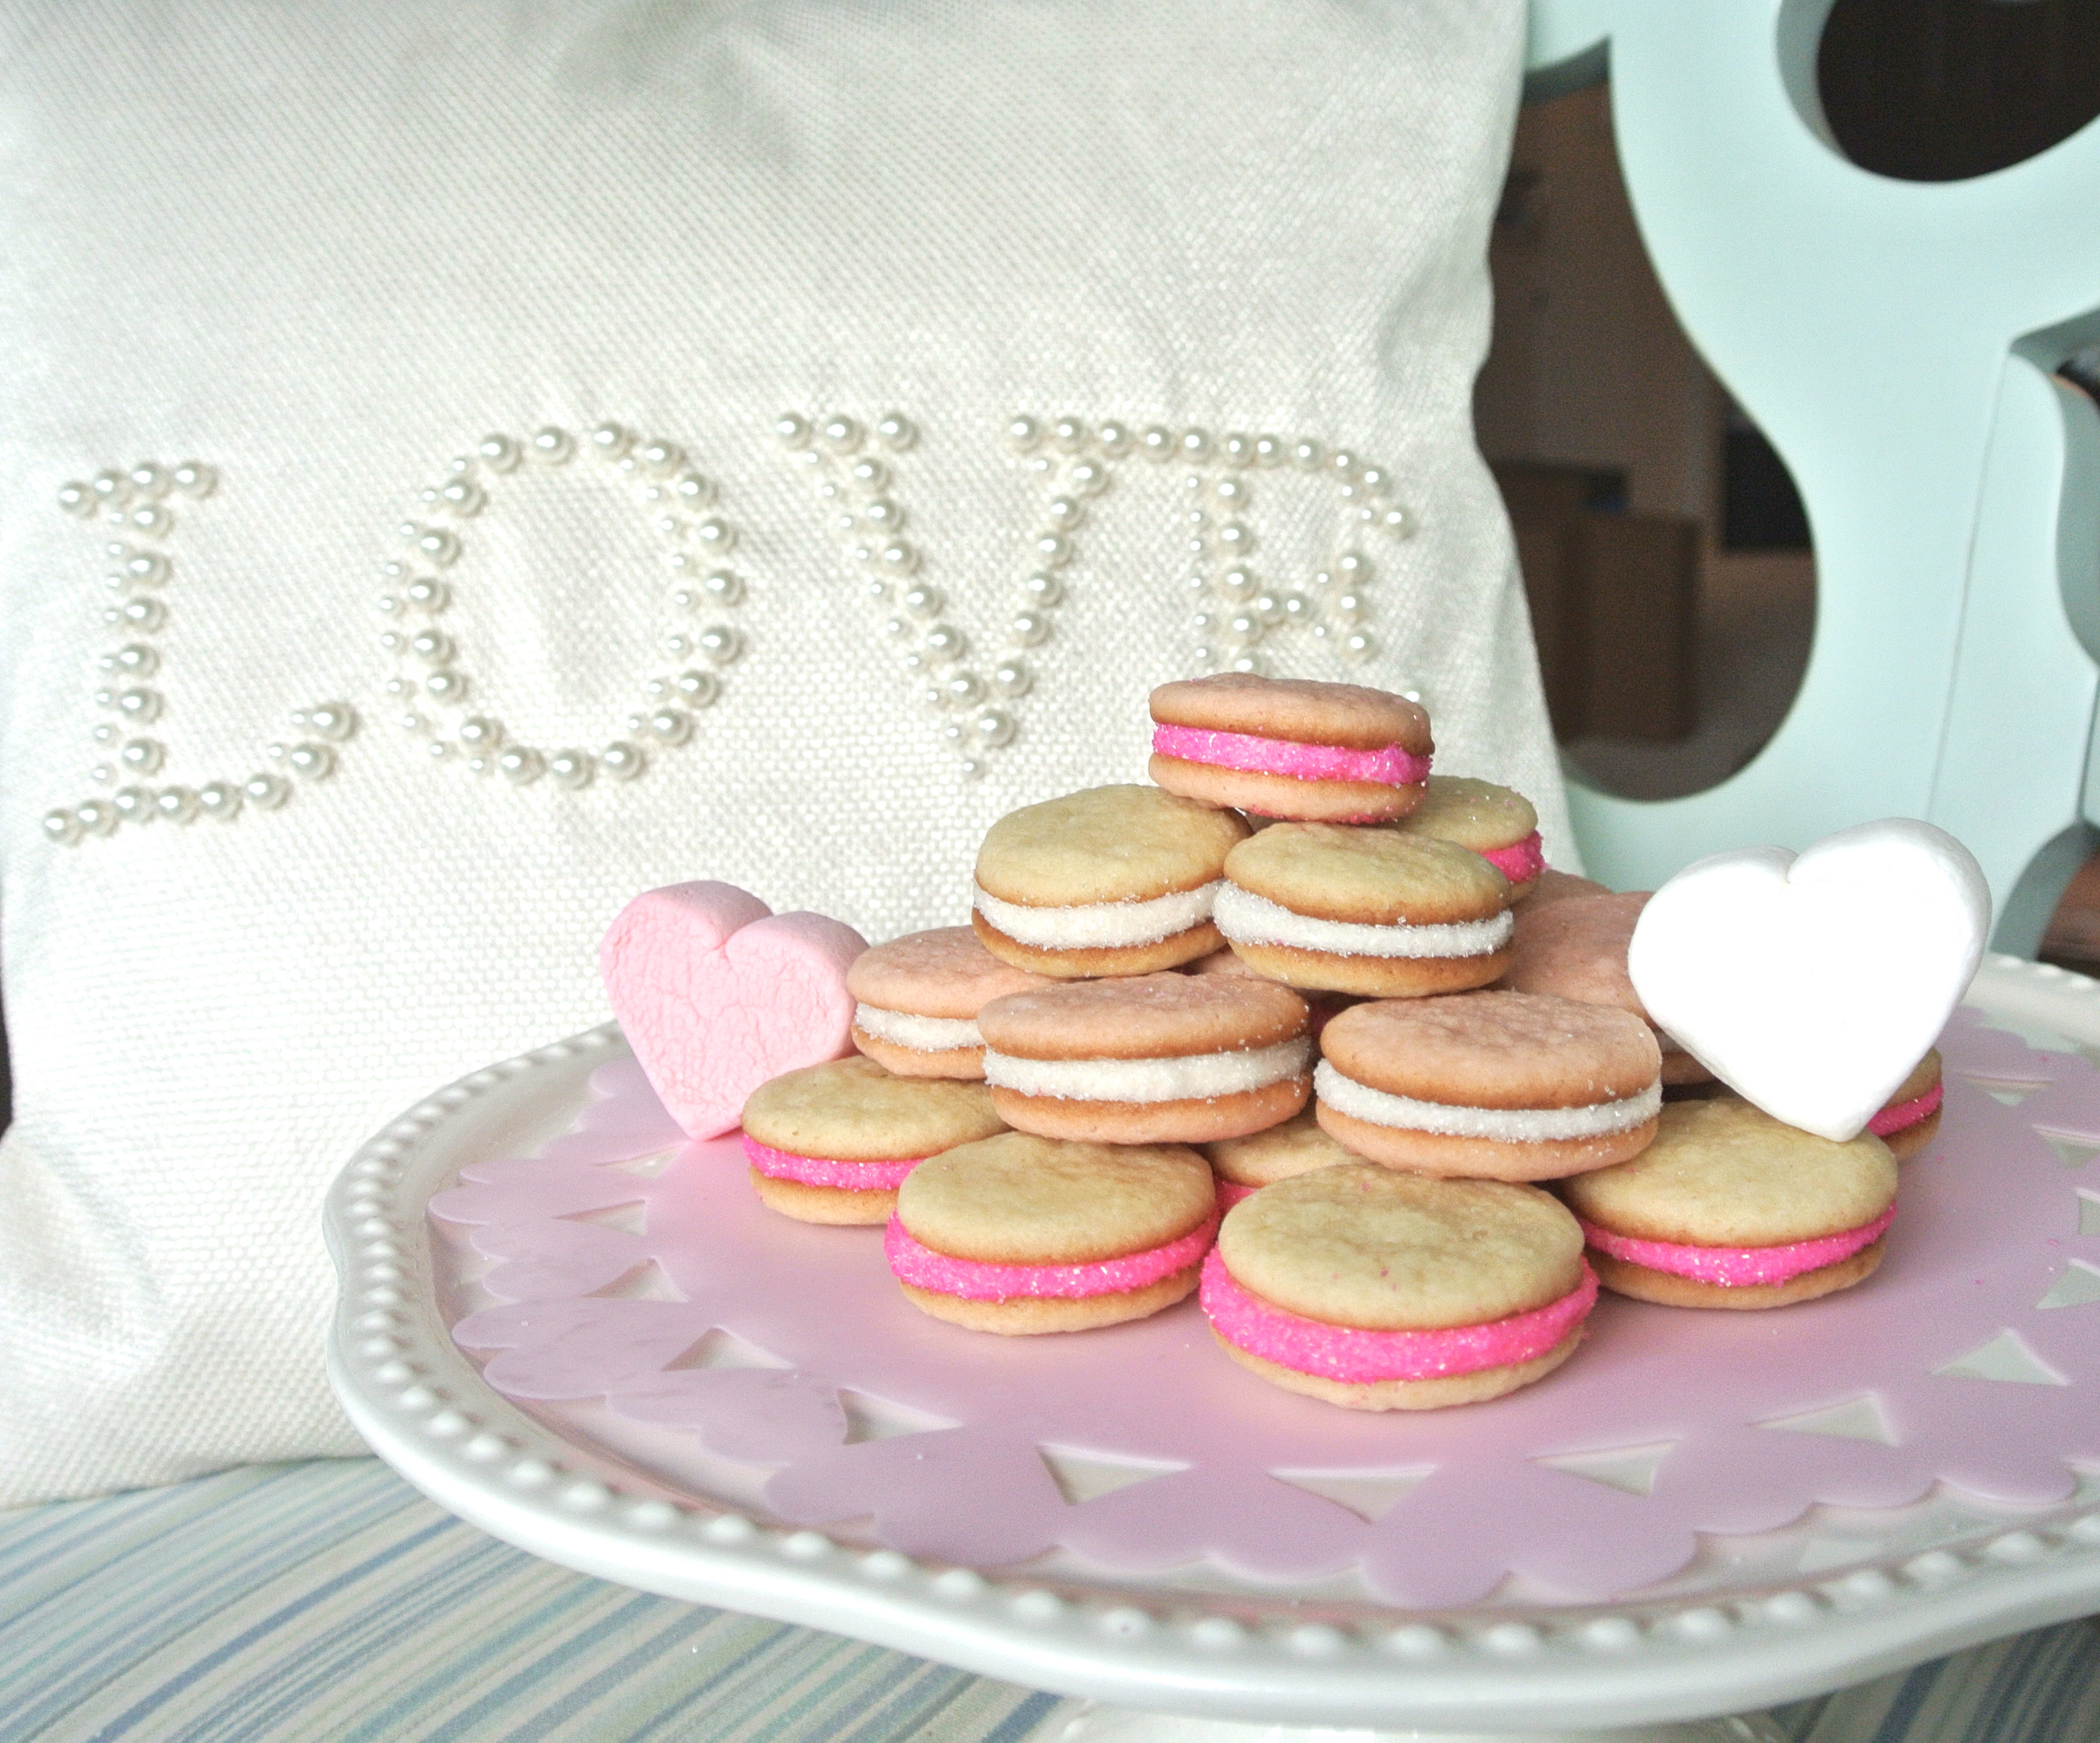
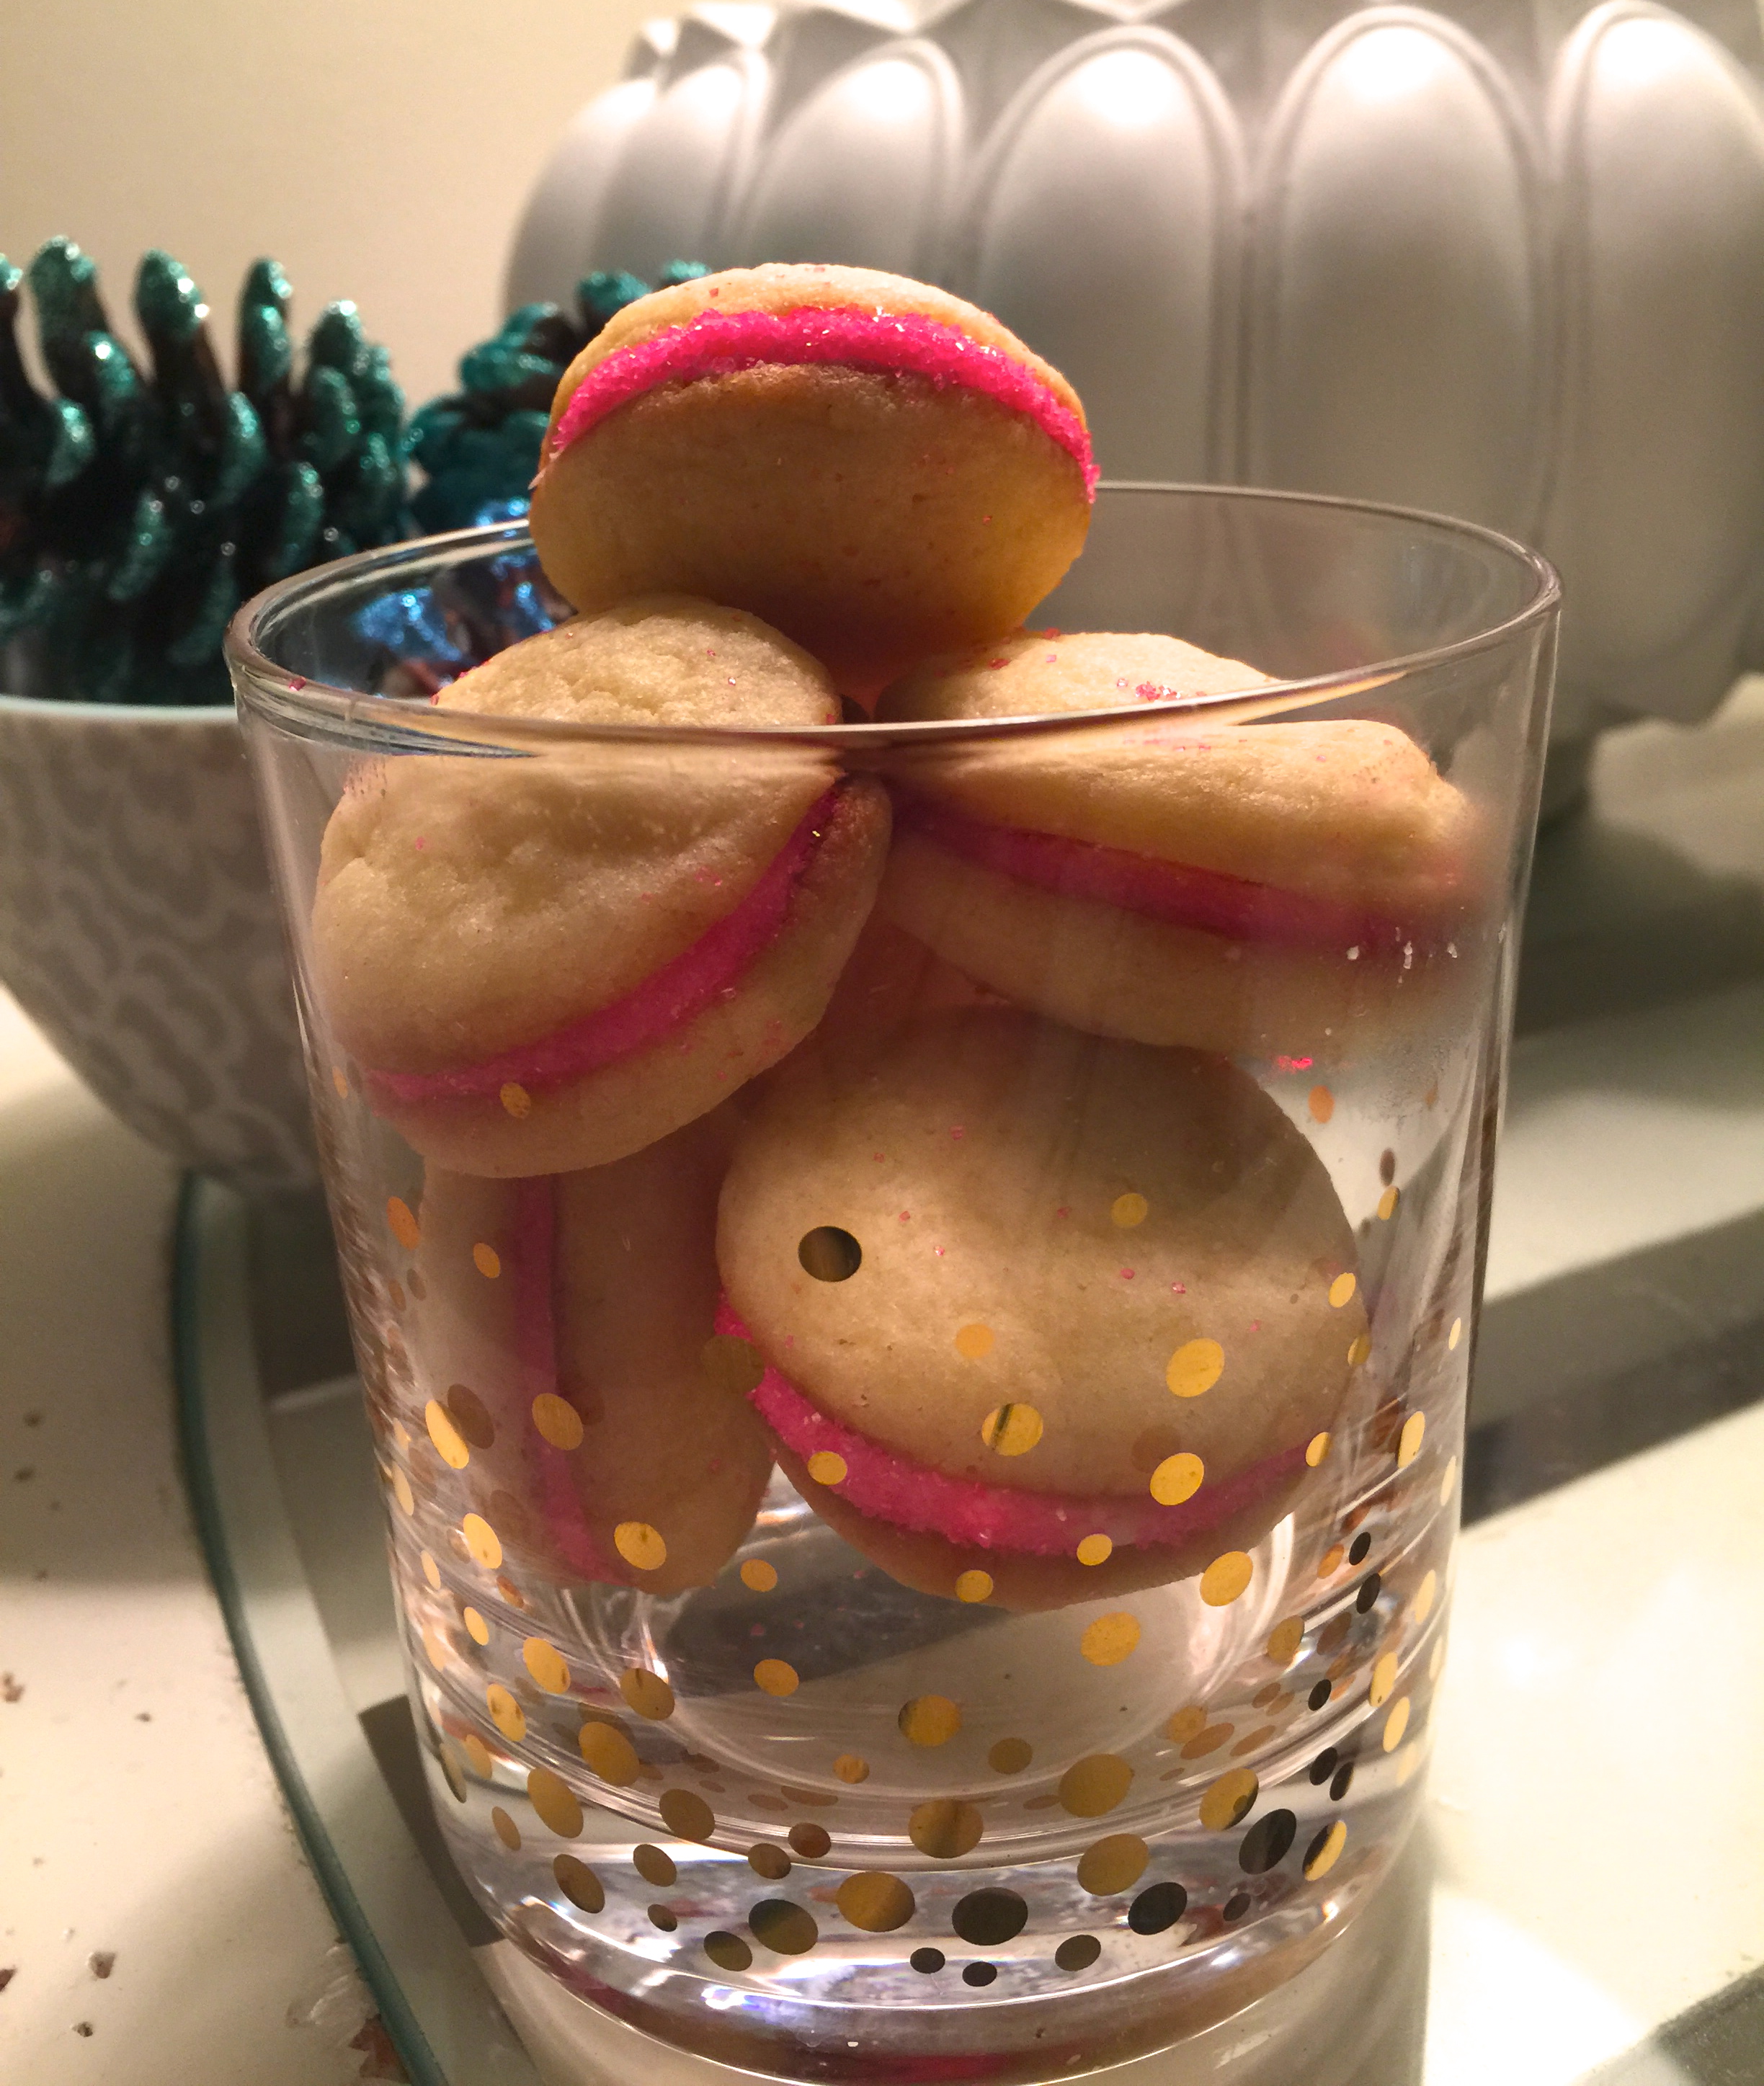
We’re celebrating three birthdays, which was the perfect excuse for me to whip up these delicious, bite-size cookie sandwiches.
I used the Betty Crocker Sugar Cookie mix because it makes super soft cookies and only requires 1 egg + butter (two items always in my fridge).
Follow mixing instructions for your dough and scoop 1 teaspoon of cookie dough and roll into a ball. The cookies will be tiny but remember they will double in size when you sandwich them together with sugary bliss.
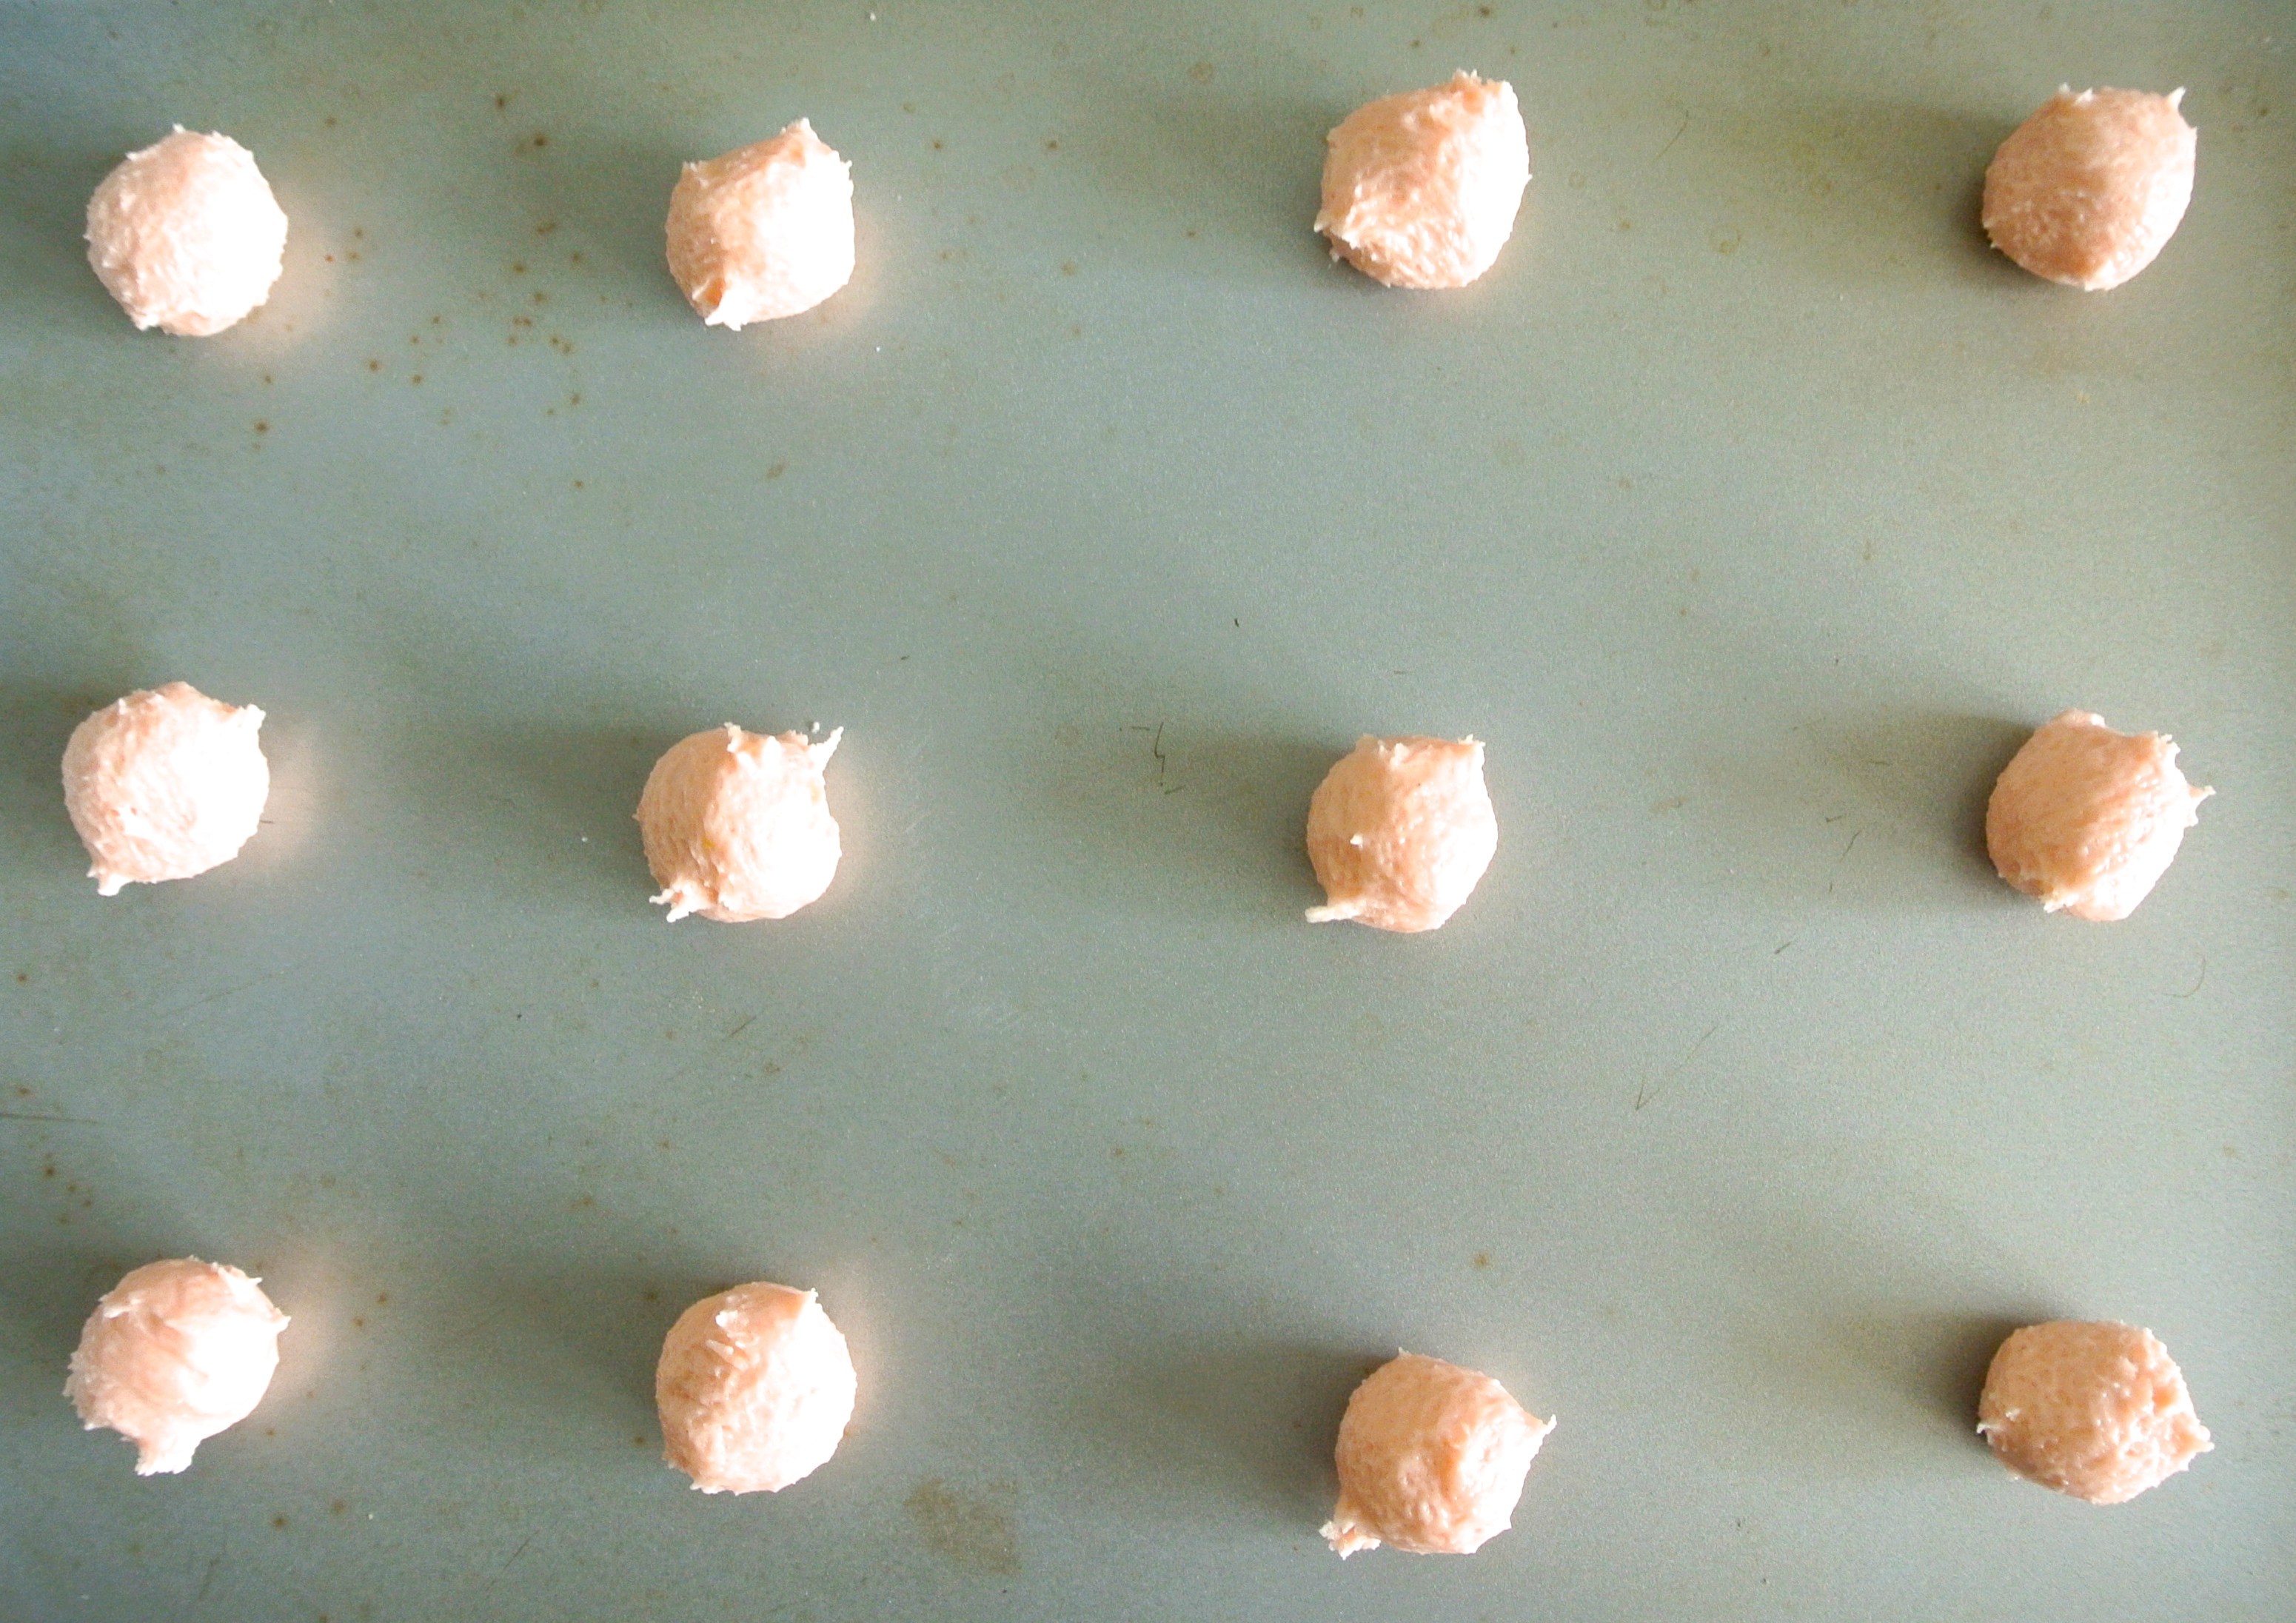
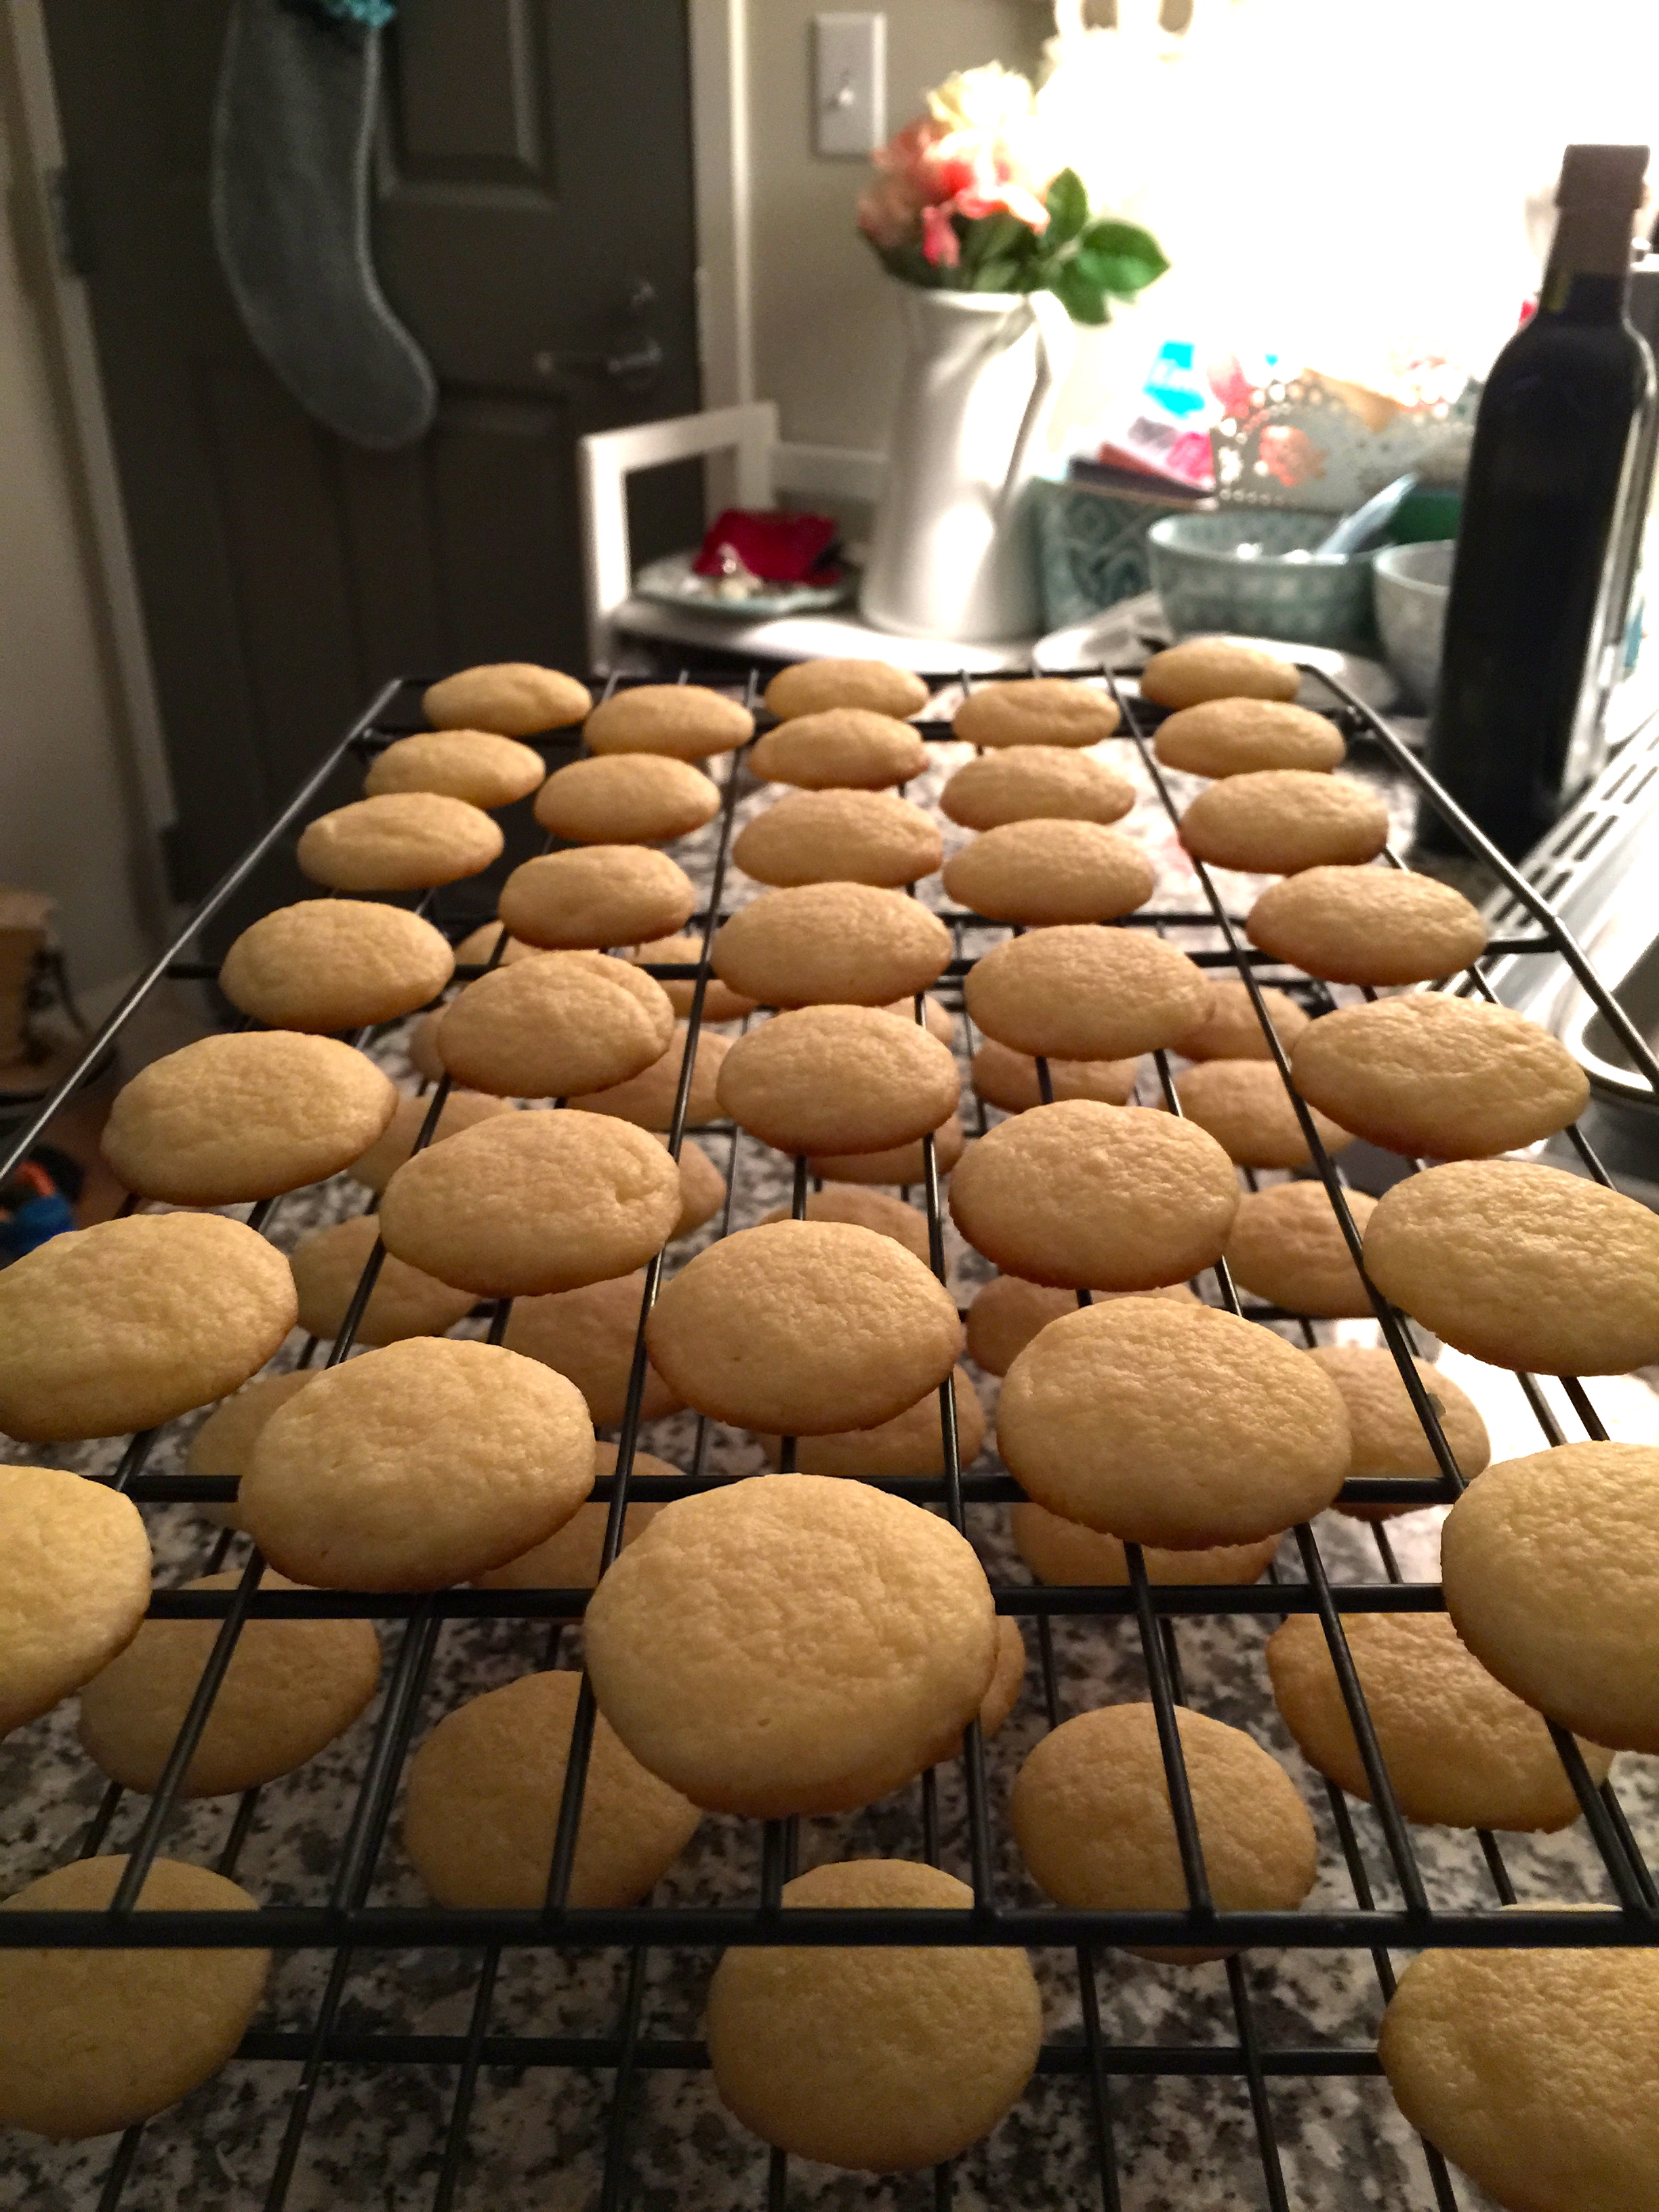
Bake at 350° for no more than 7 minutes. The cookies will not be browned on top but should be slightly darker on bottom. Let them cool on a rack then start pairing cookies similar in size.
 I added a few drops of food coloring to my icing and scooped it into a ziploc bag. Cut the corner of the zip bag and squeeze a generous dollop of icing onto the bottom of one cookie (more or less depending how big your sugar tooth is.)
If you don’t have a ziploc bag/piping bag – not a problem! Use a knife to scoop and spread the icing.
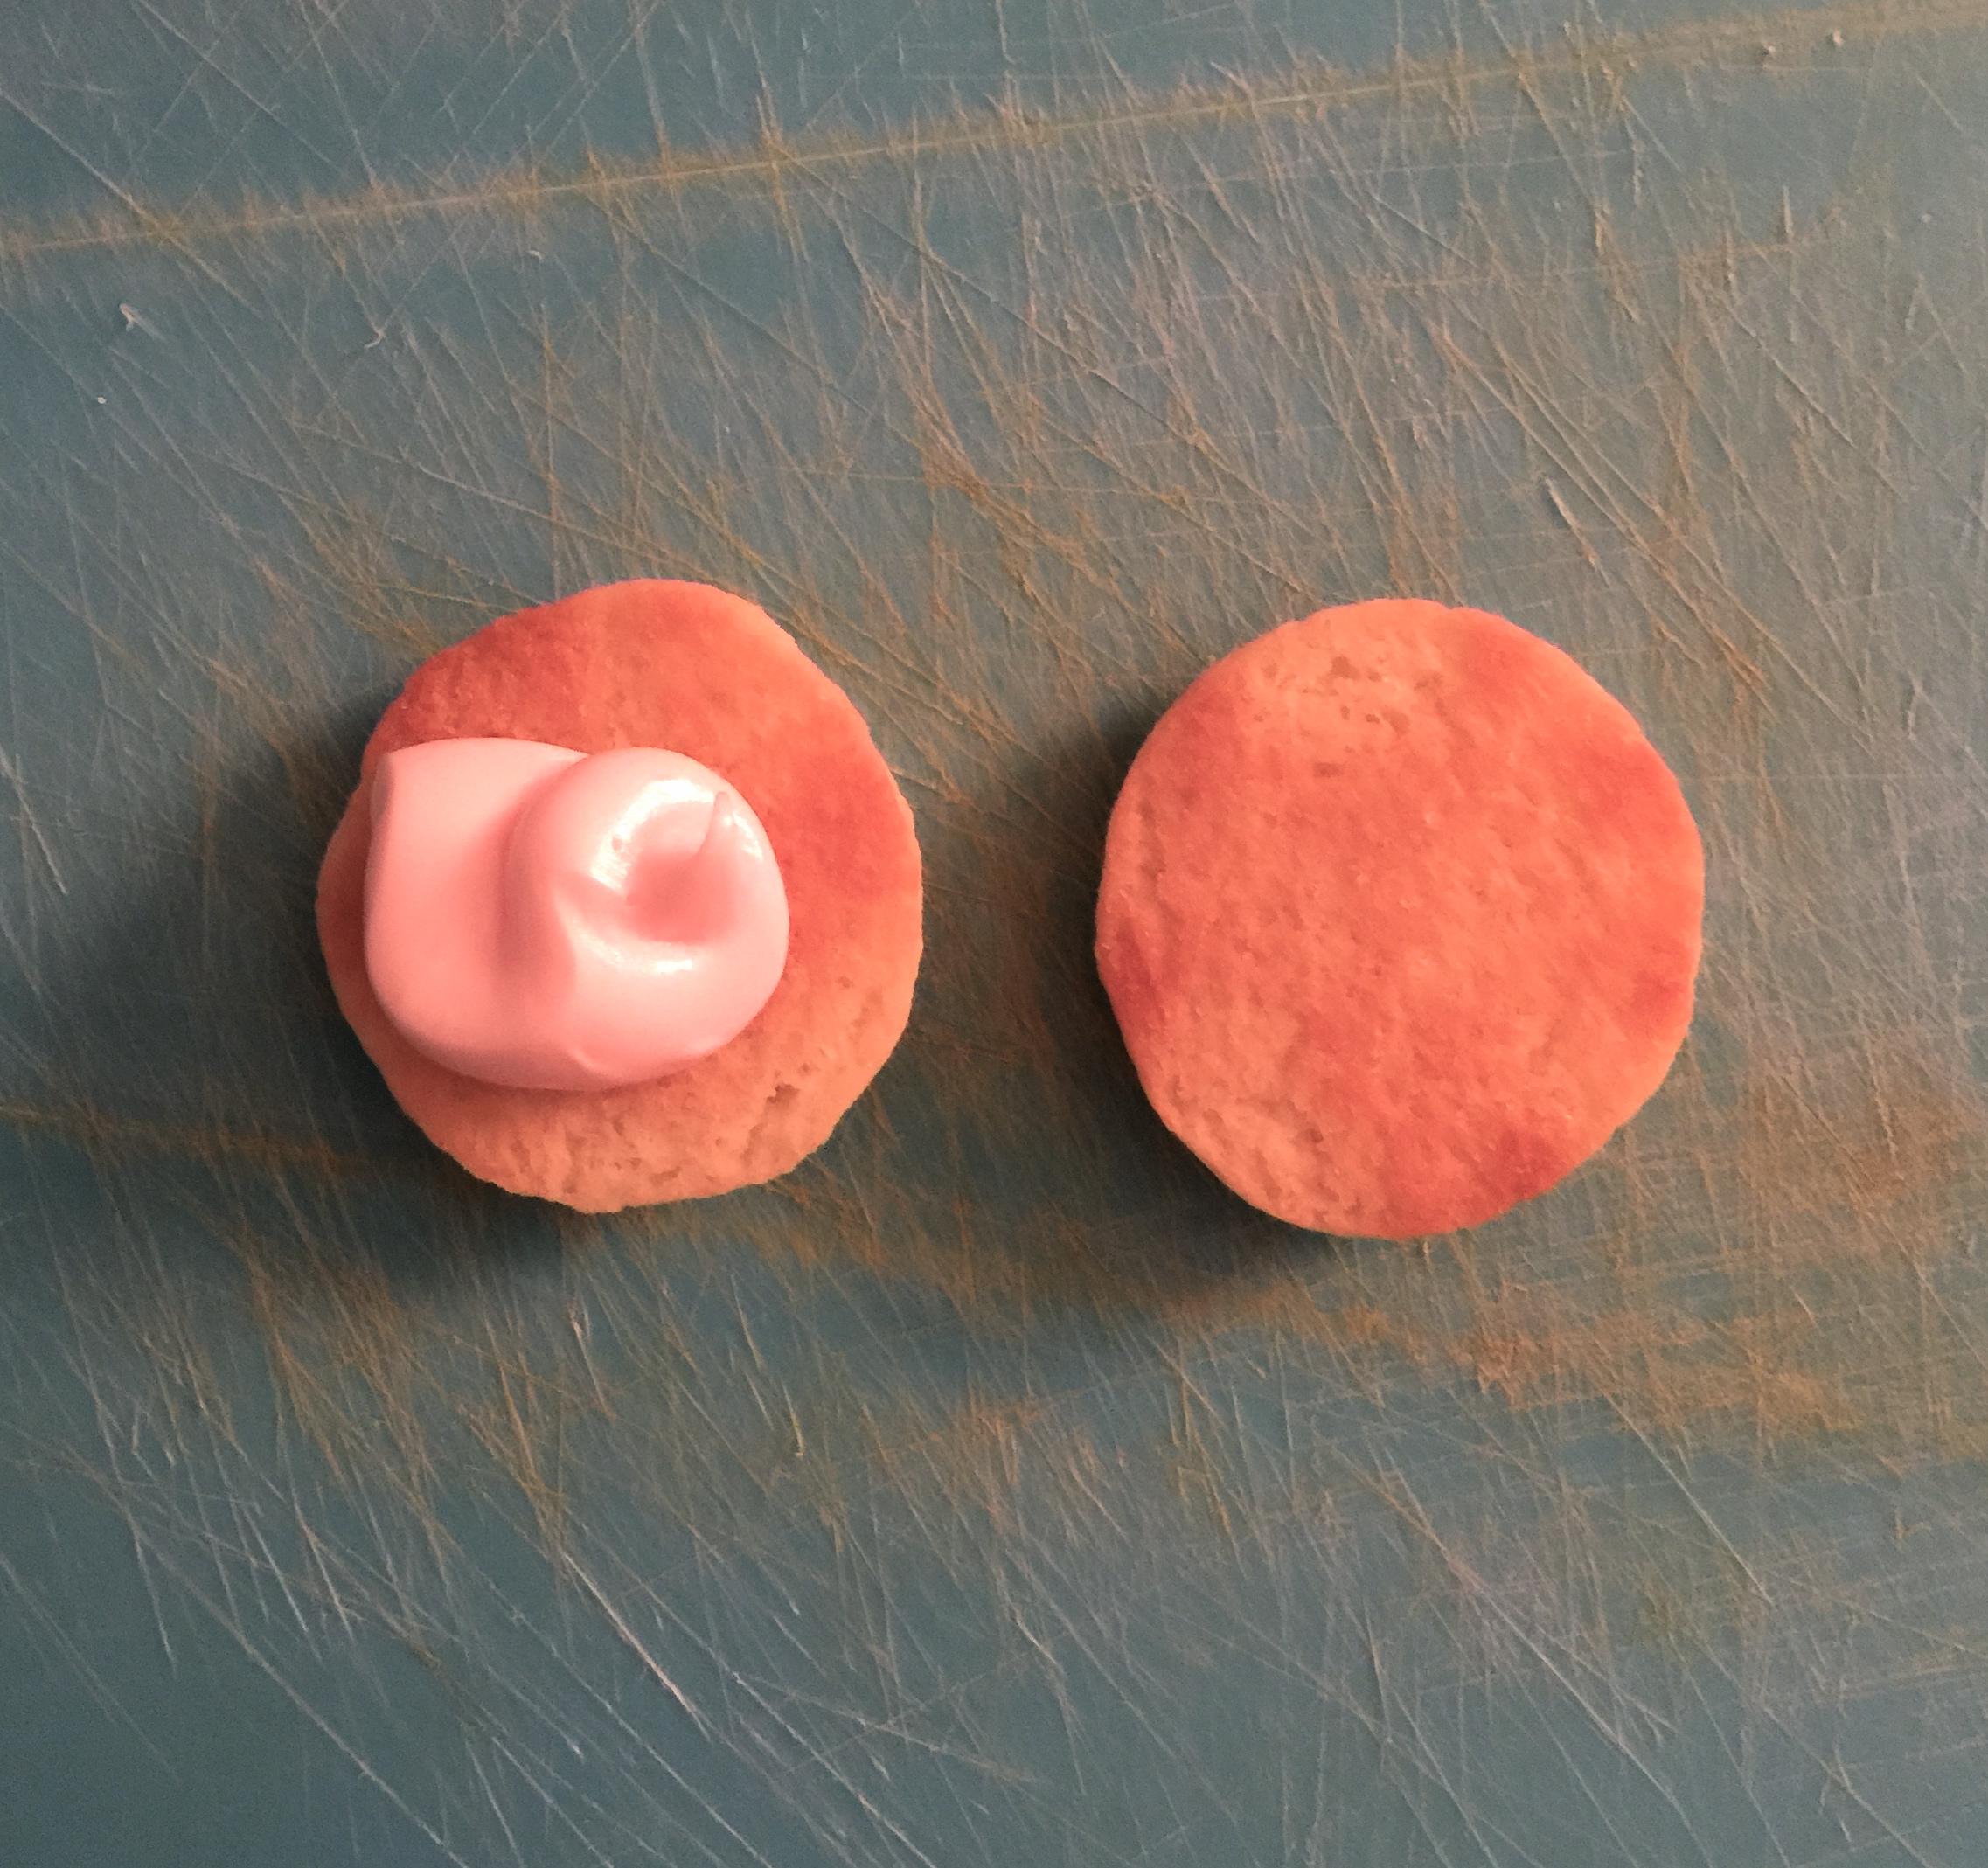
Gently press the the iced cookie against its pair. Sandwich just enough before the icing starts to ooze out the sides.
Have a bowl of sprinkles ready and carefully rotate the cookie in the bowl so that the sprinkles stick to the icing.
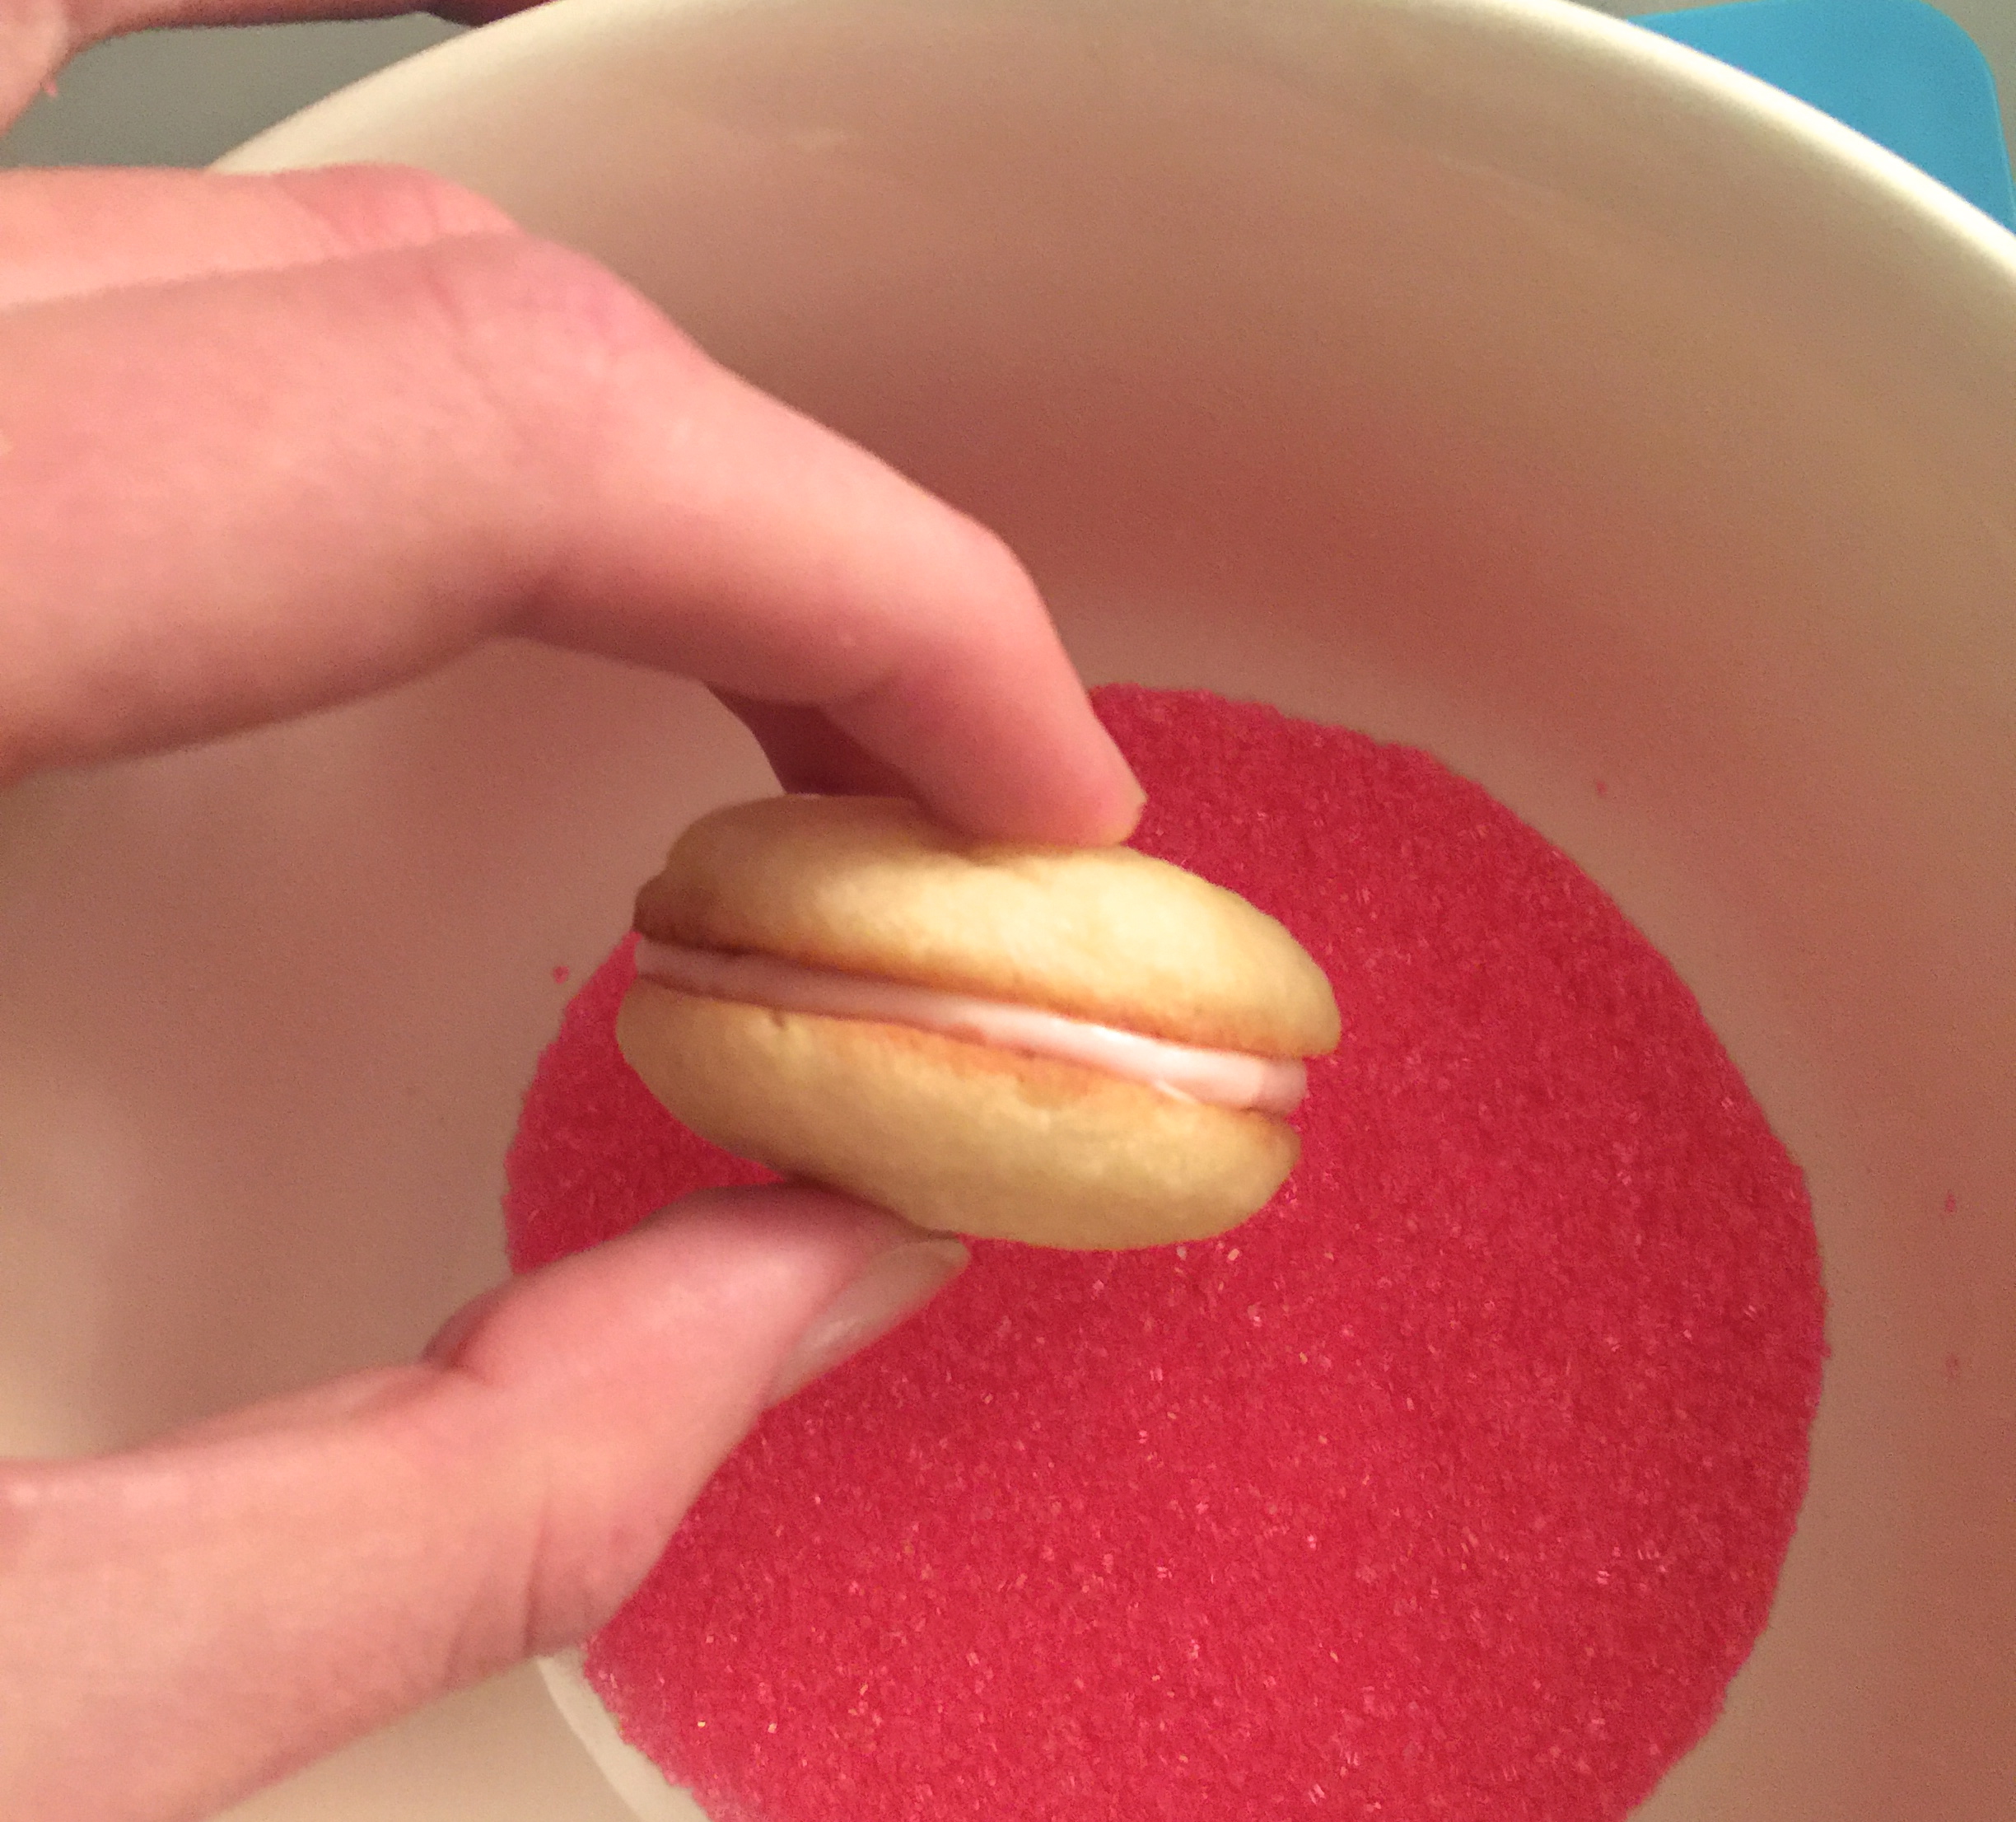
How easy was that?! I love these treats because they stack easily and stay put during travel.
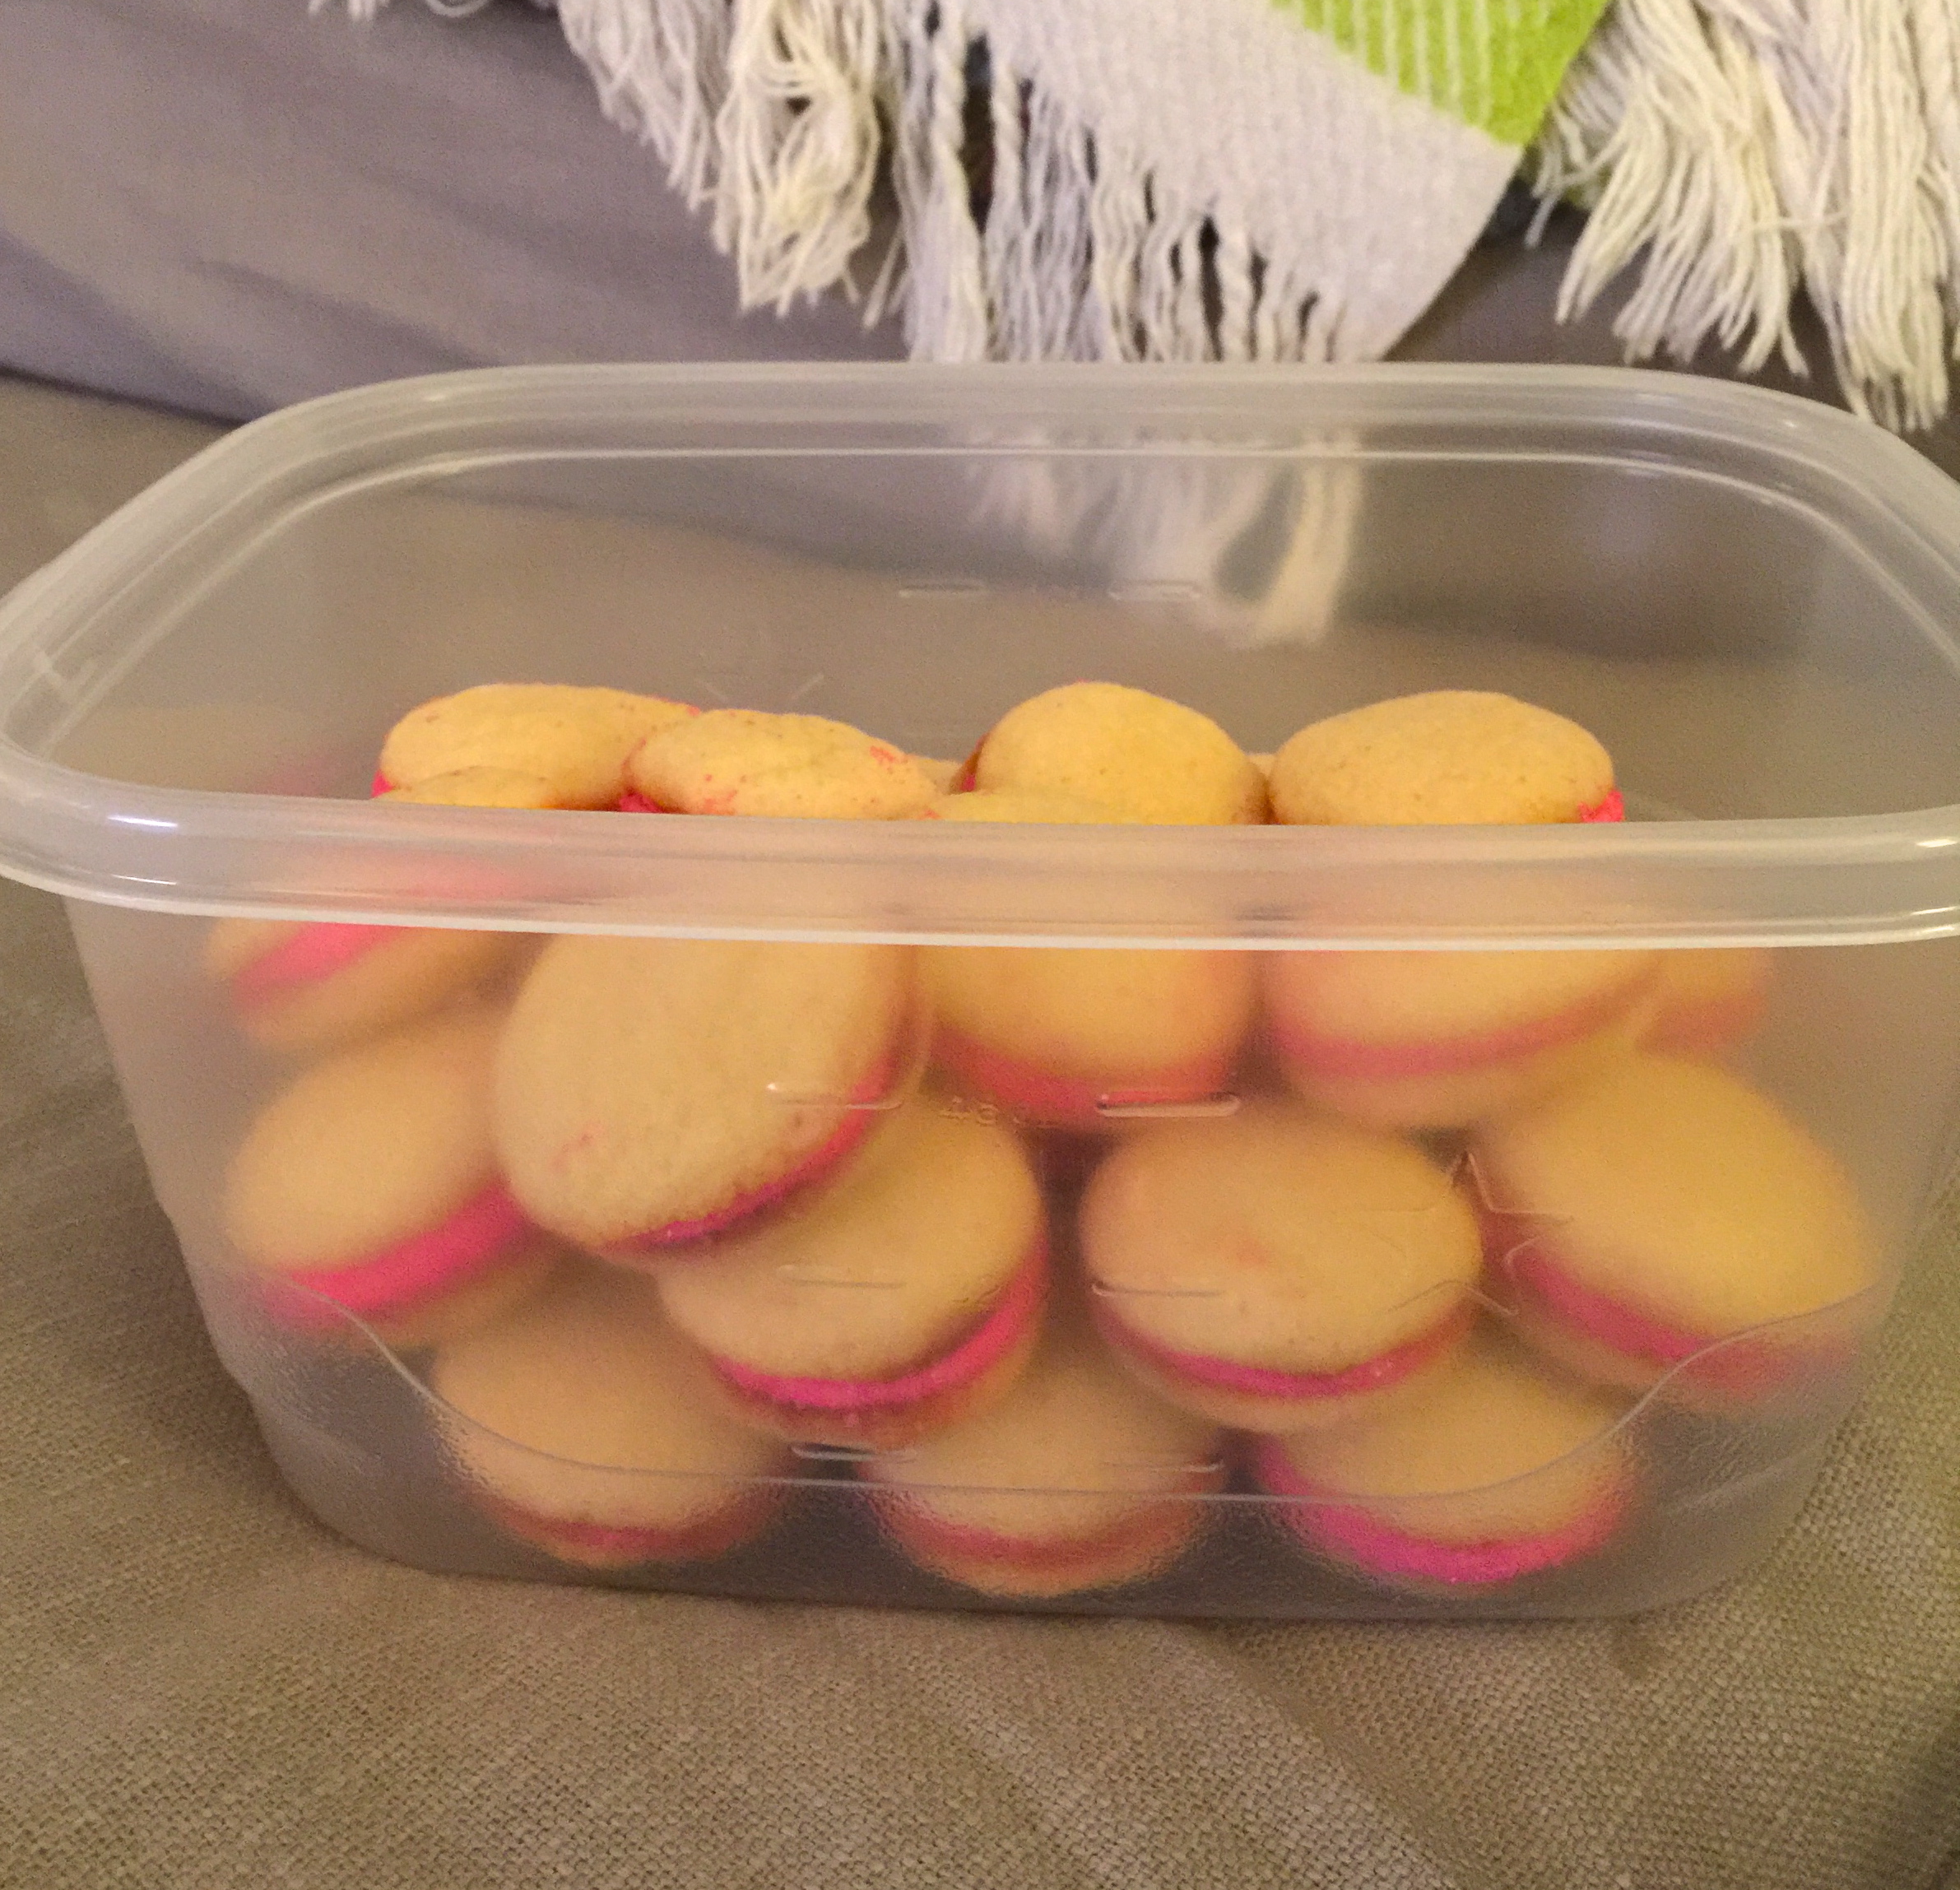
Make sure you hide a few because these guys will get eaten fast!

You will need:
– Sugar cookie mix + ingredients
– Icing (I used Pillsbury)
– Sprinkles
– Food coloring (optional)
This mix will make about 35 sandwiches
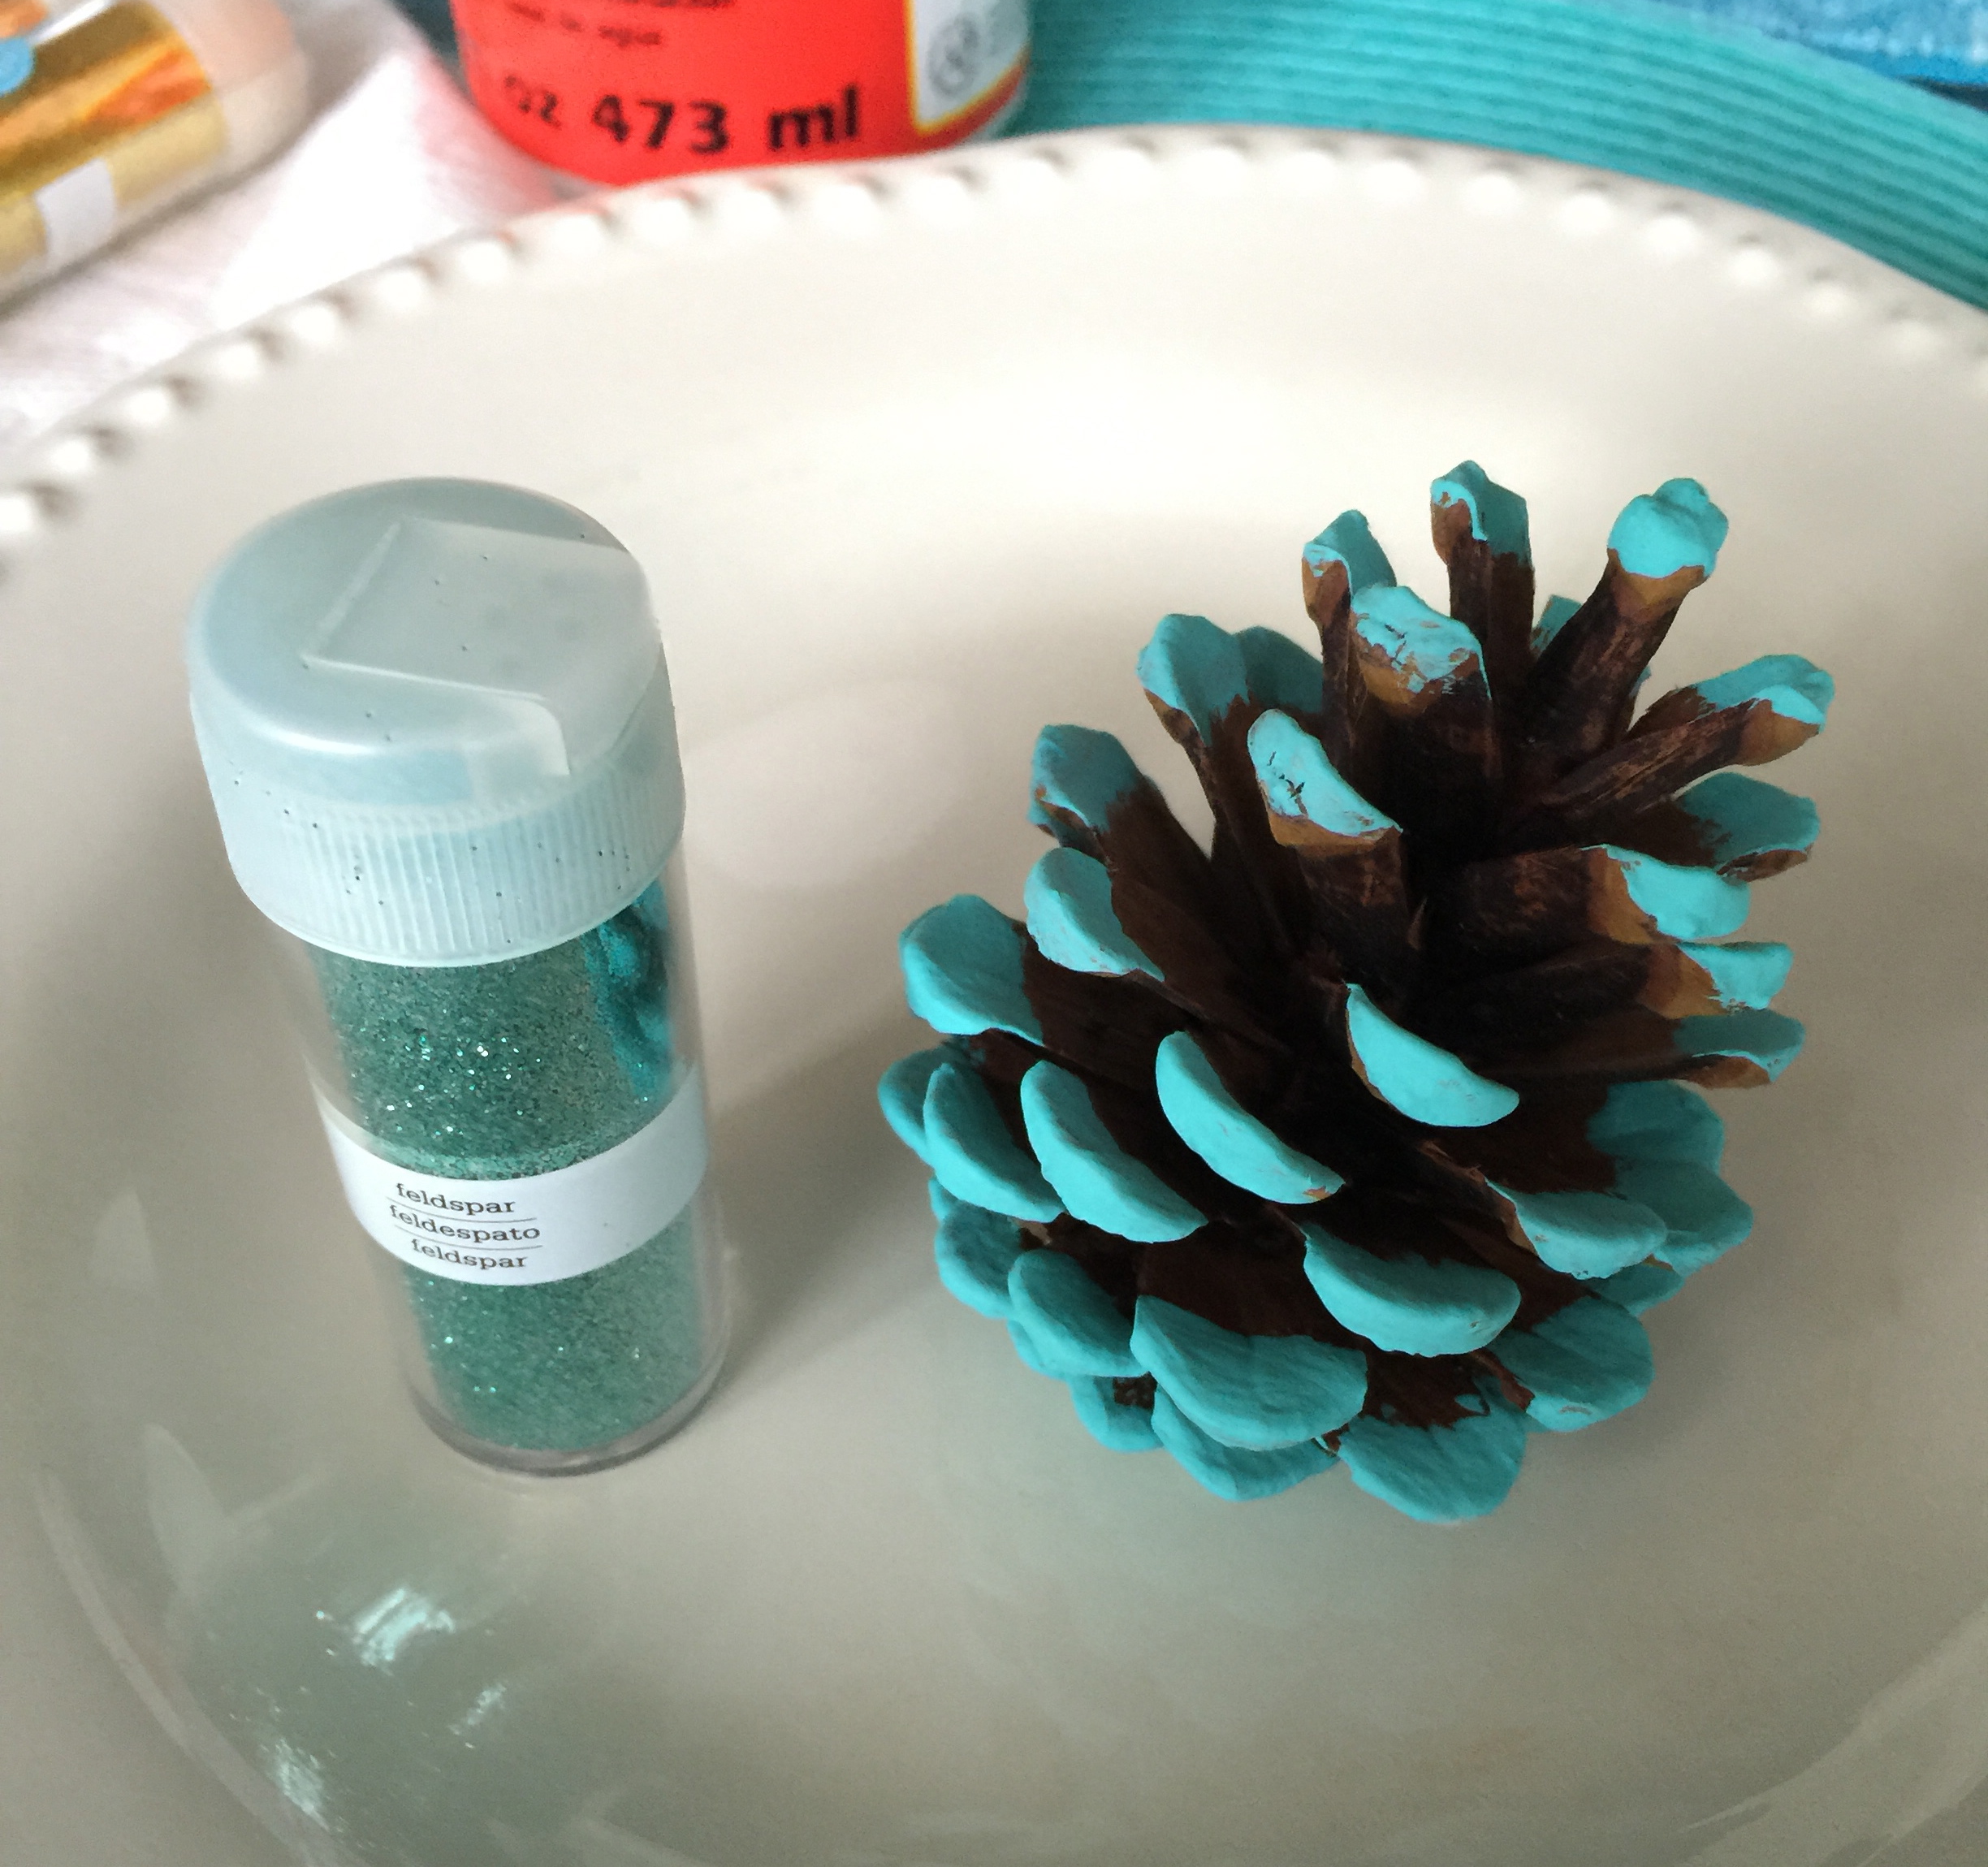
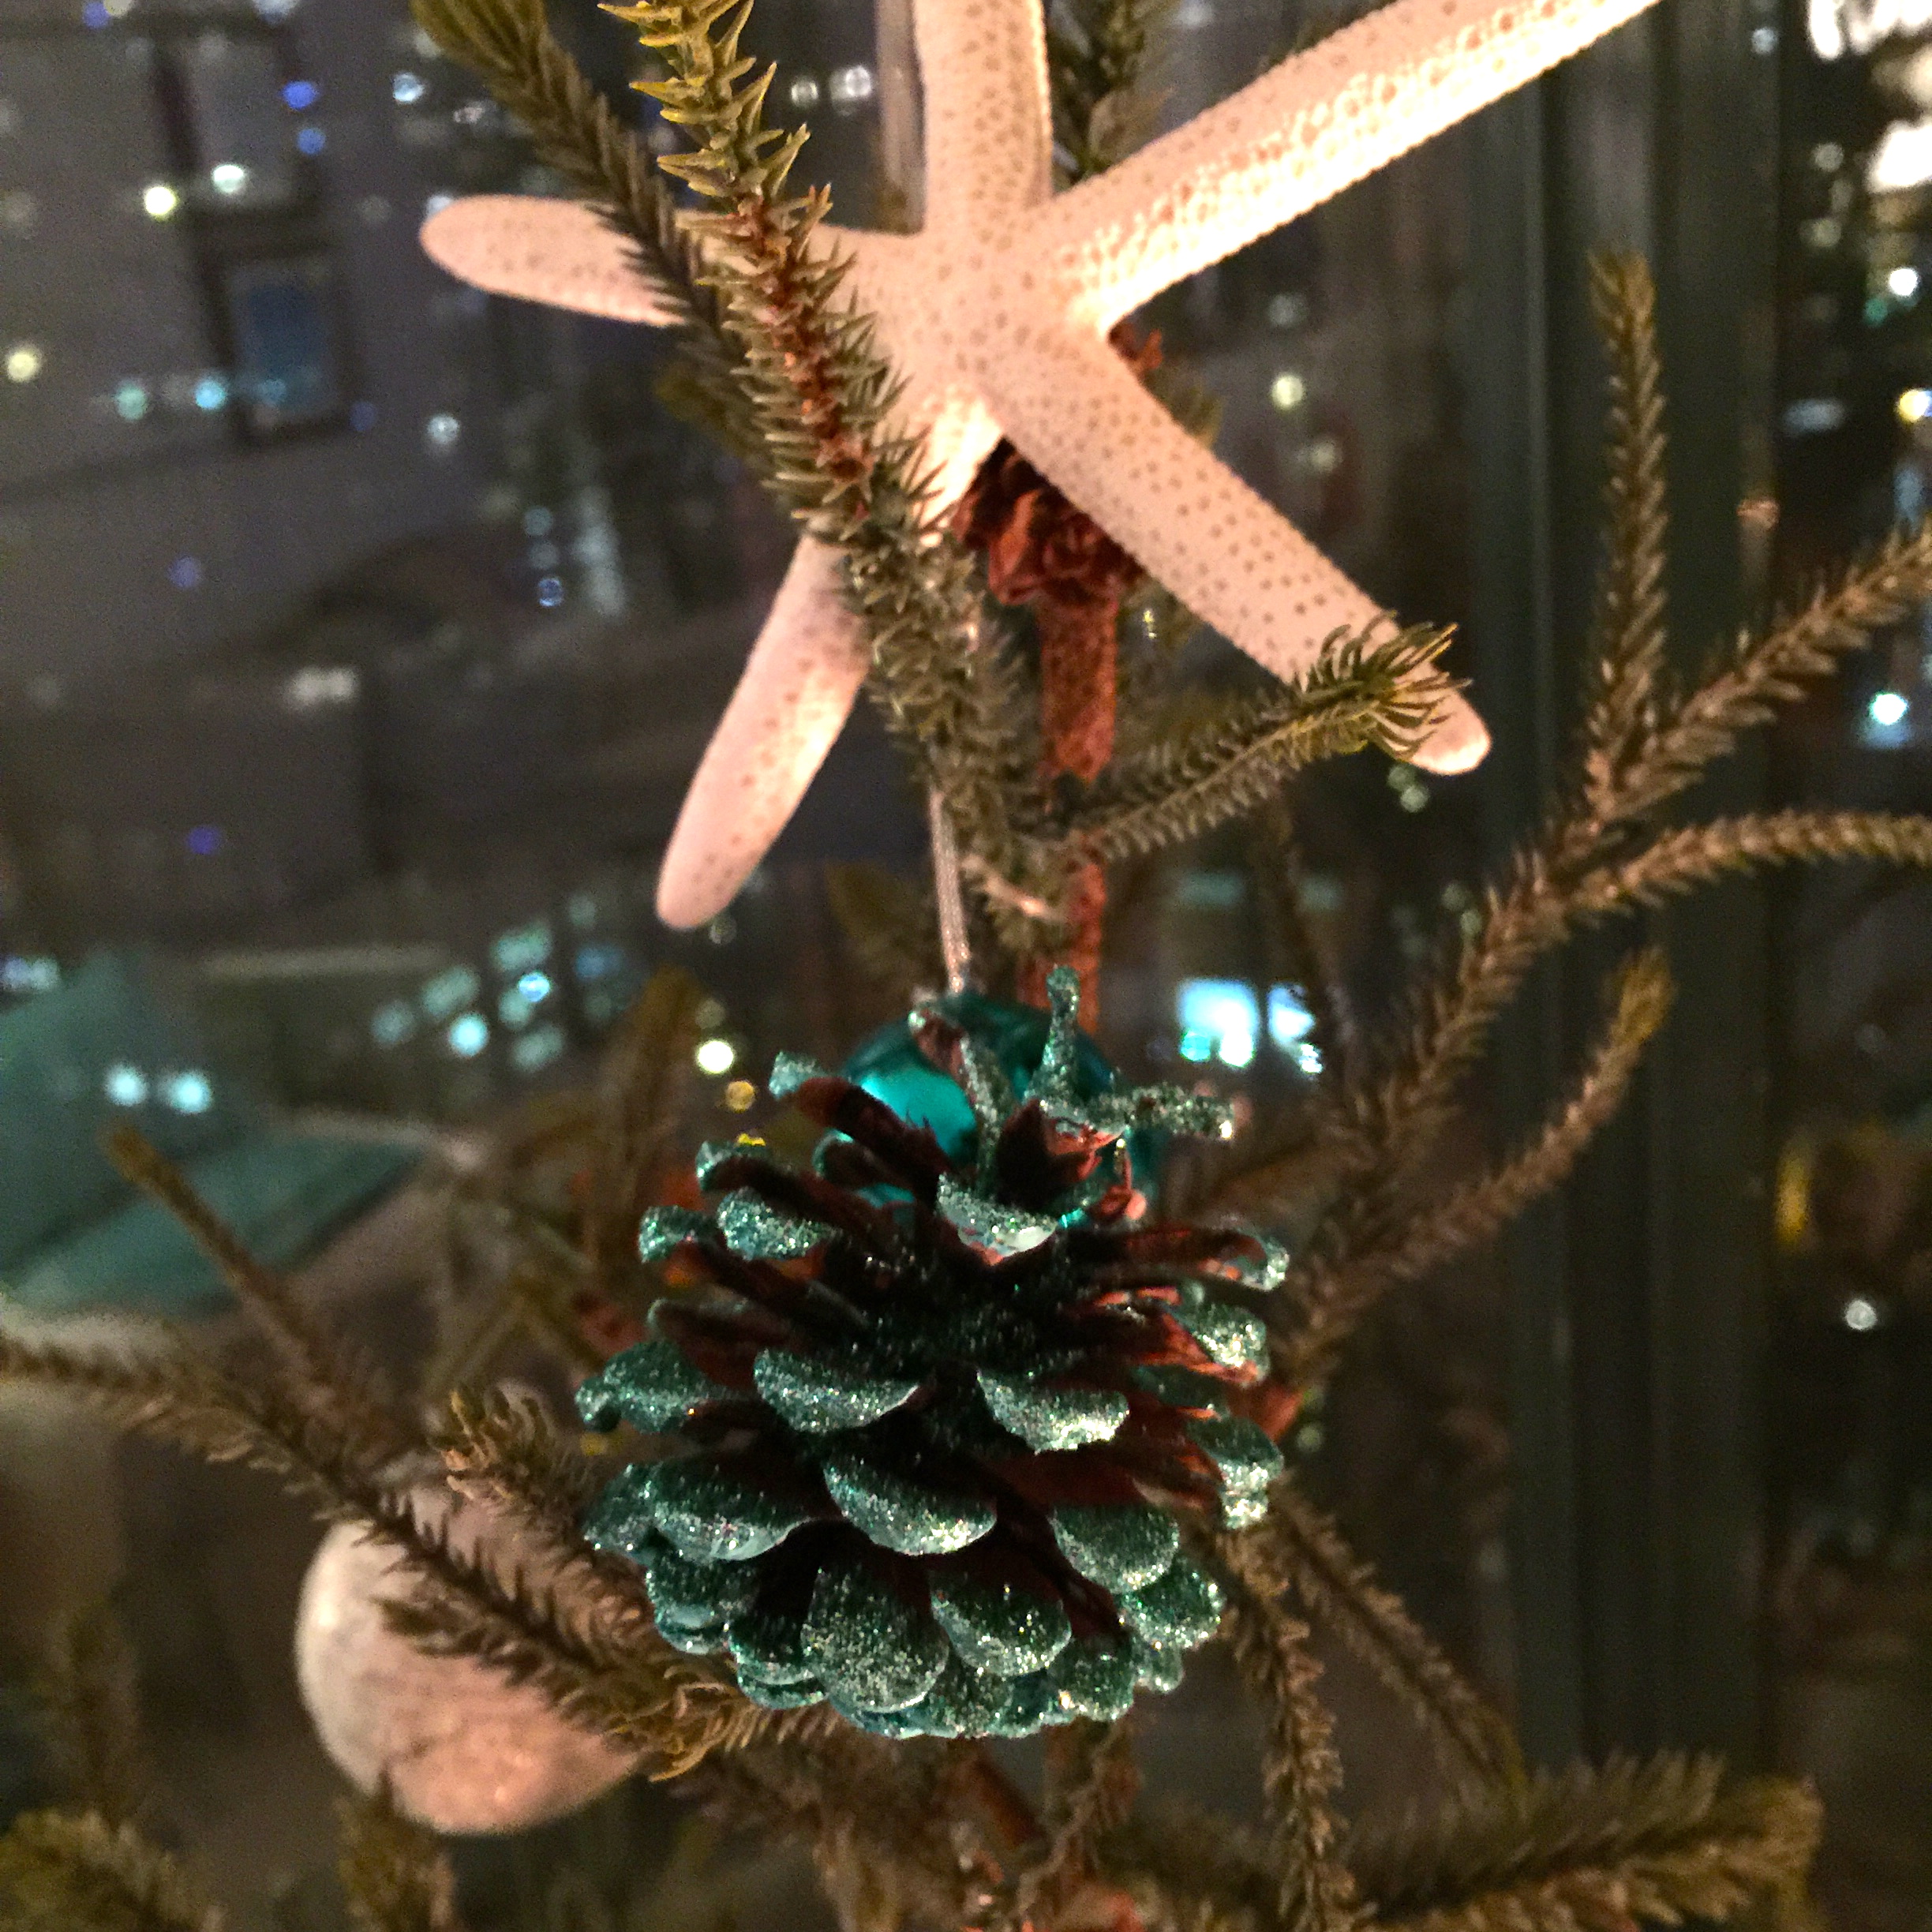
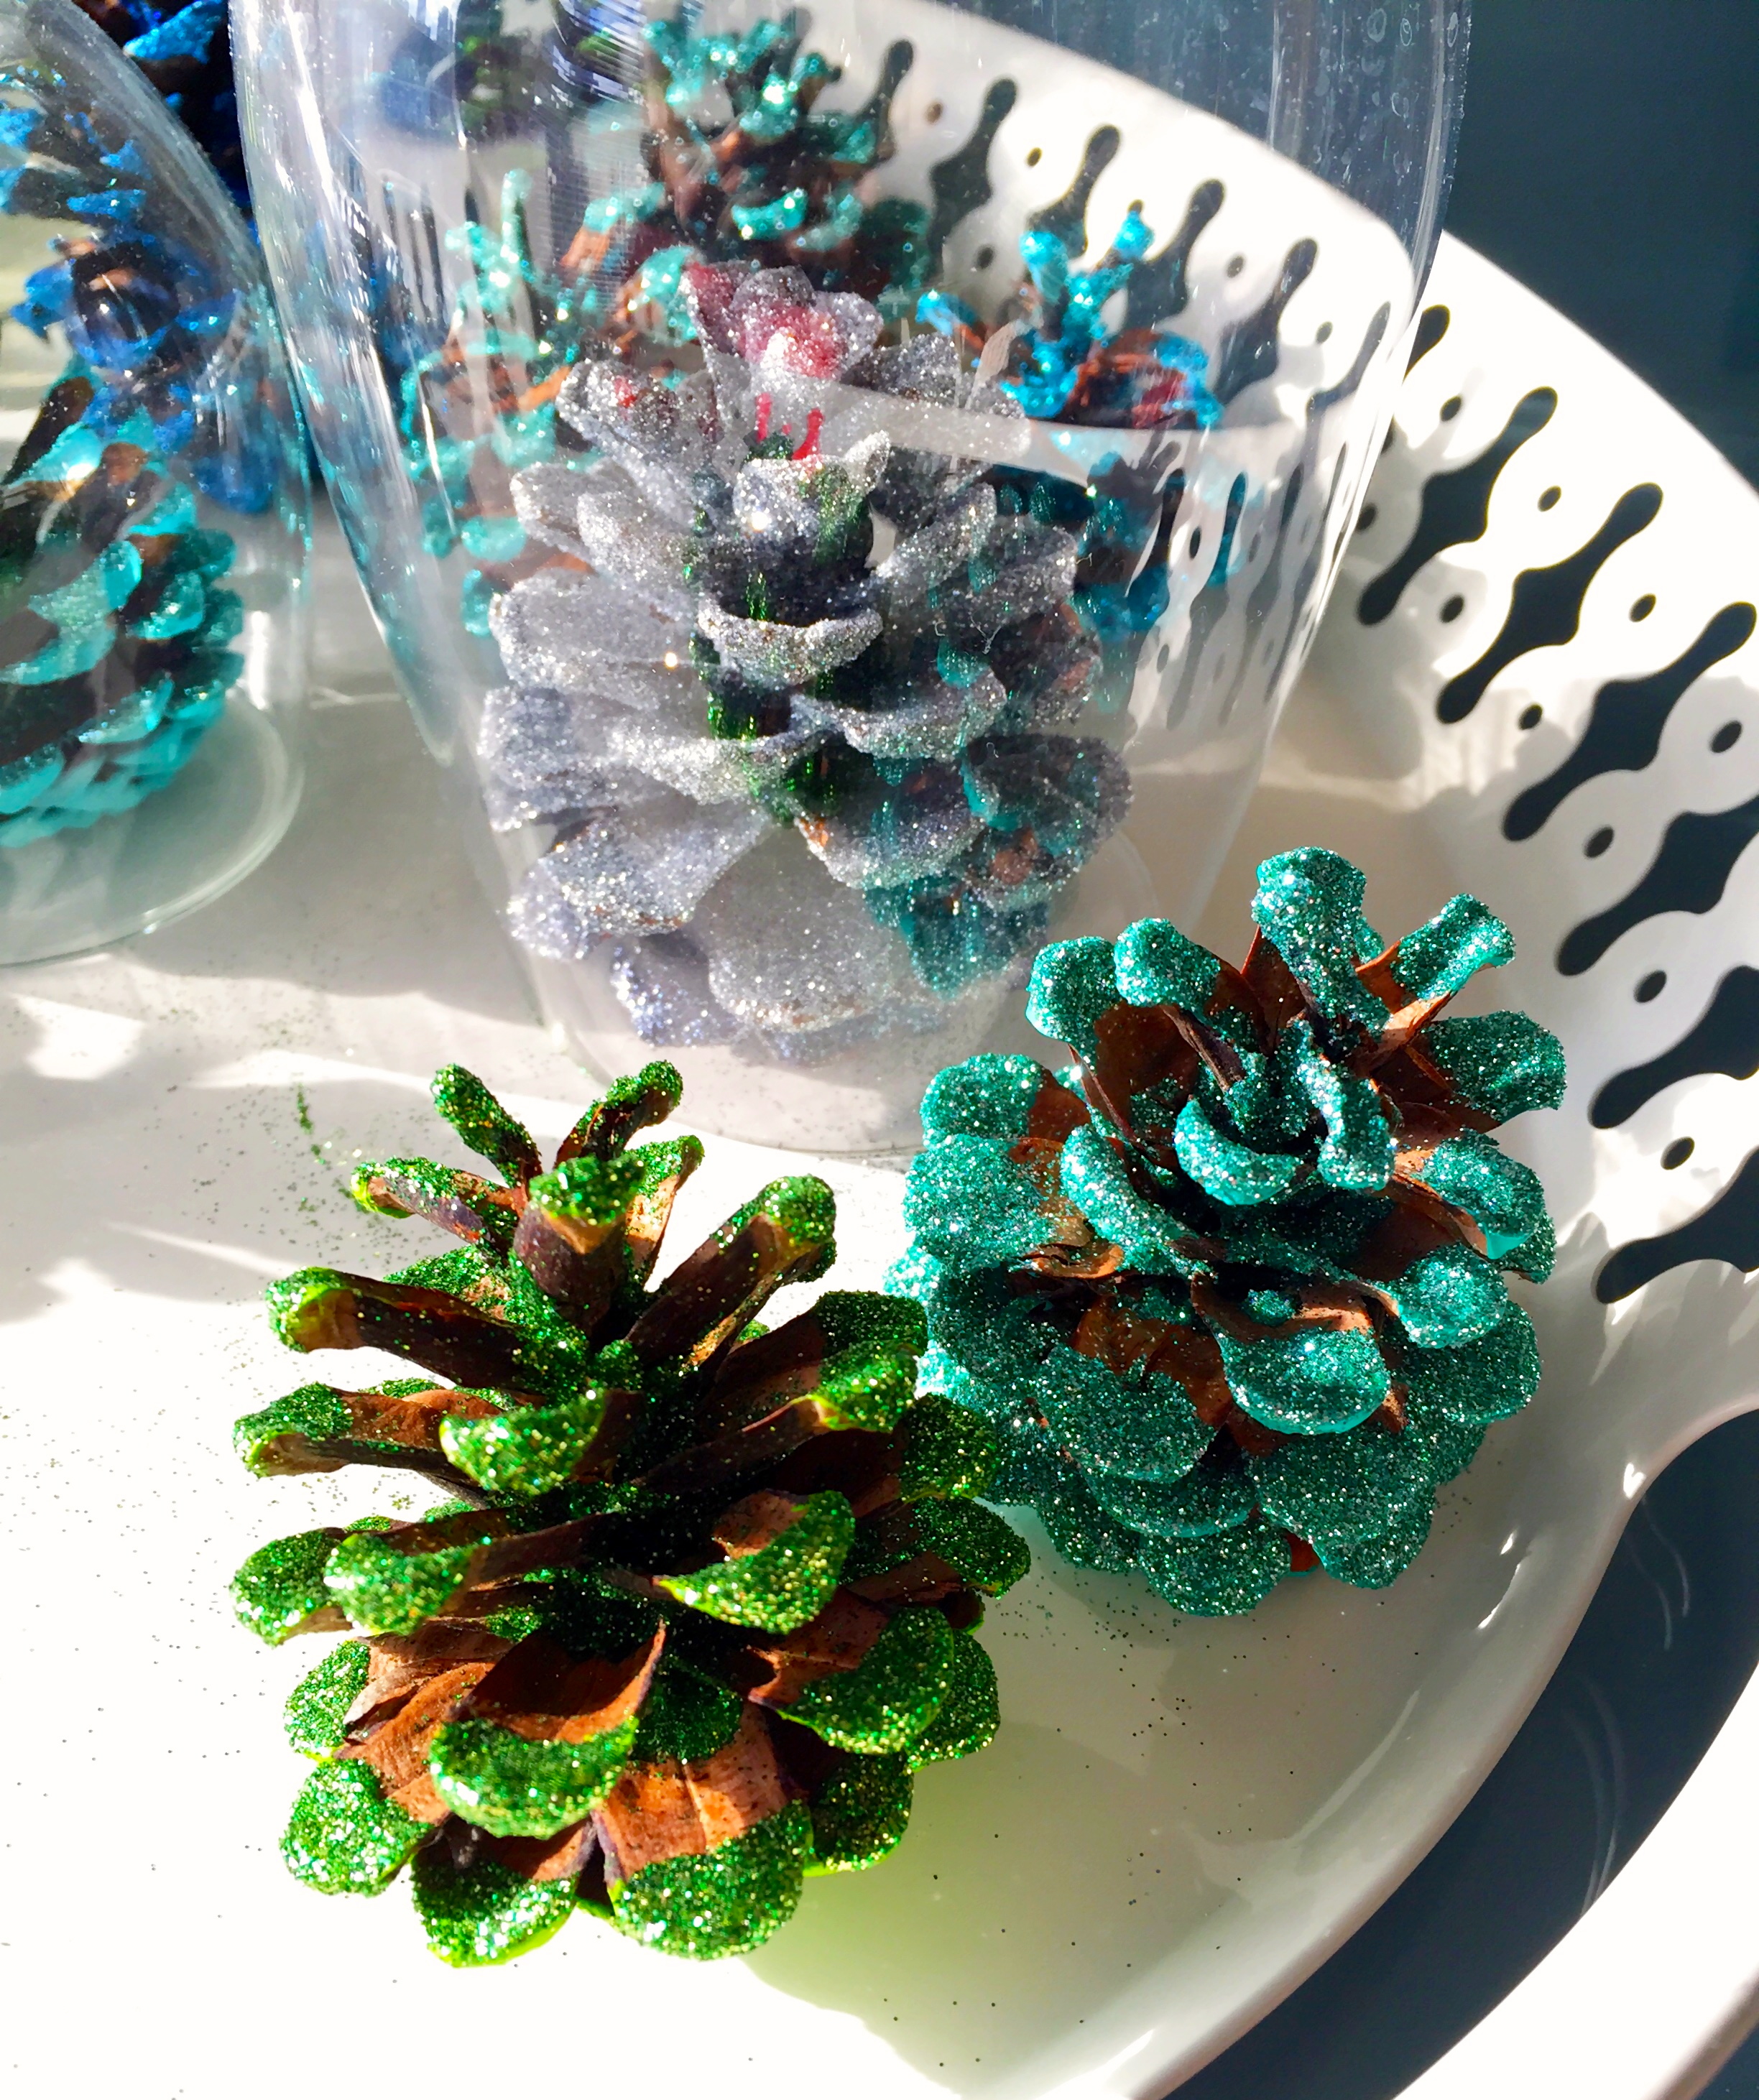
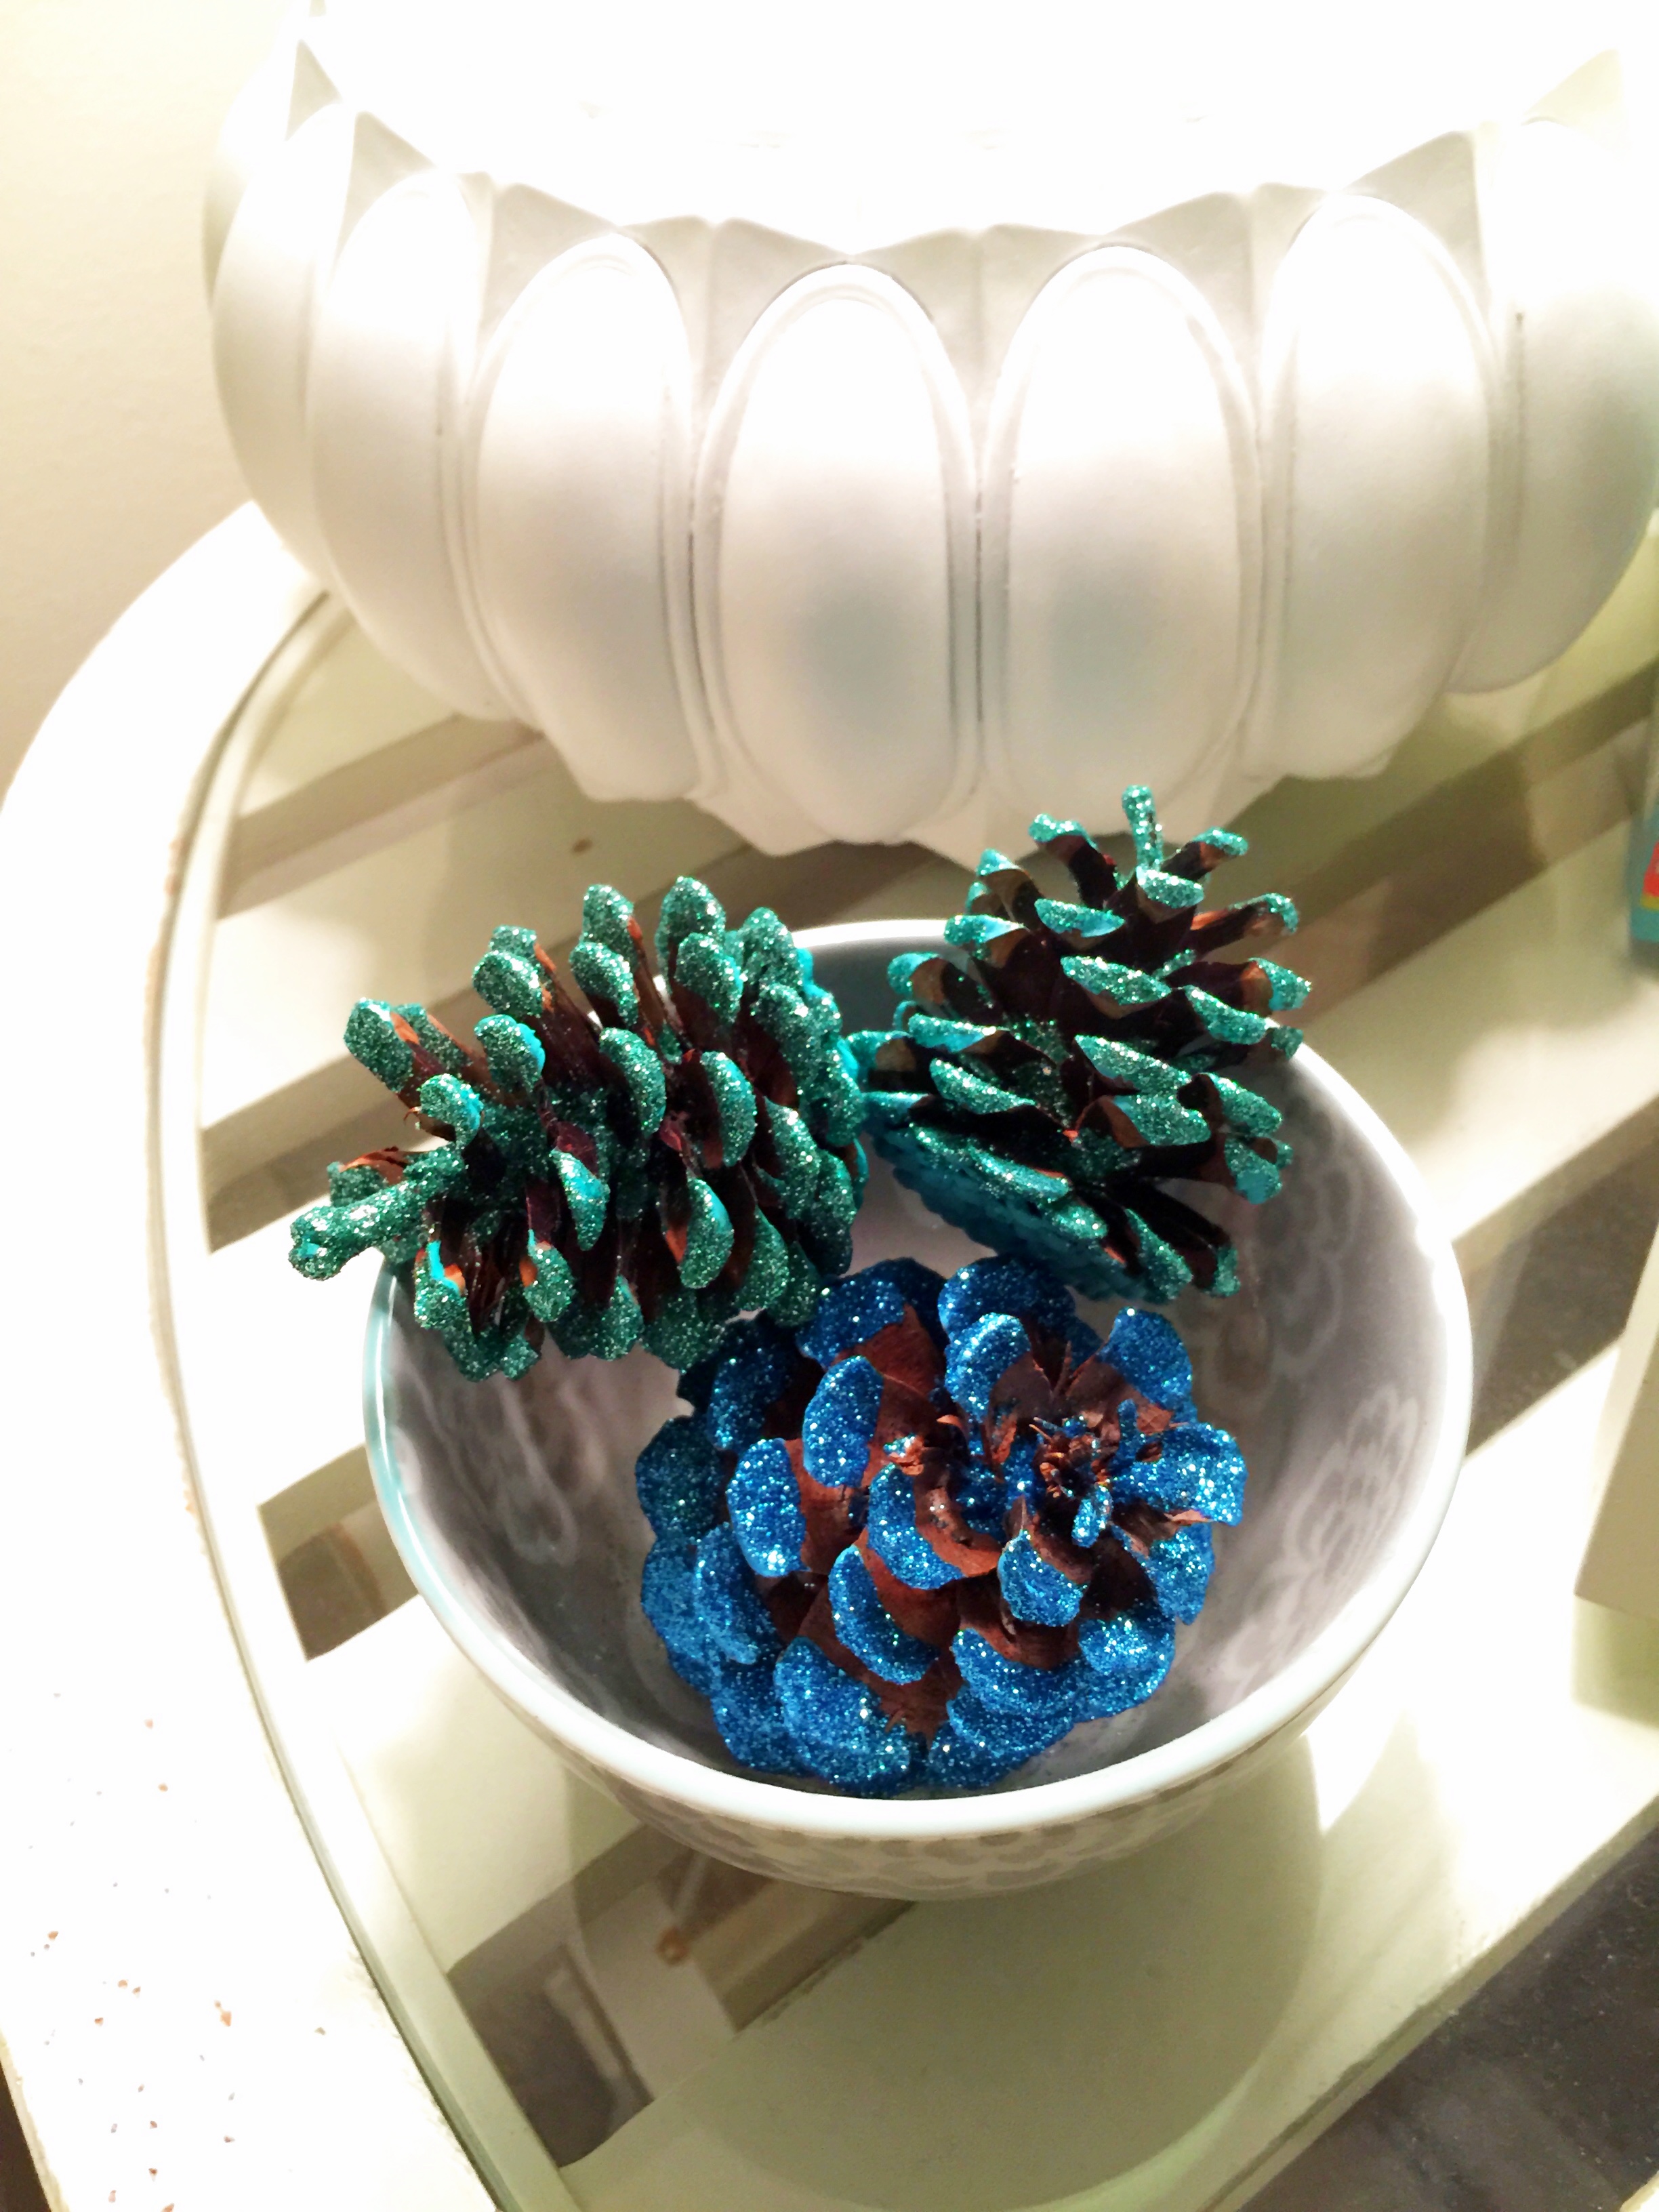
One of my favorite (and cheapest) holiday crafts this year was glitzing up pinecones into beautiful, sparkling decor! I had a large bag of Christmas scented pine cones sitting on the bottom shelf of my apartment. Instead of throwing them out I added a few strokes of paint paint and a dash of glitter to each to fit the color scheme of my apartment.
This DIY is so easy and impossible to mess up!
To half of the pine cones I painted the edges with different shades of blue, green and some white. Wait for them to dry and that’s it! I arranged them in my Christmas tree to add more color.
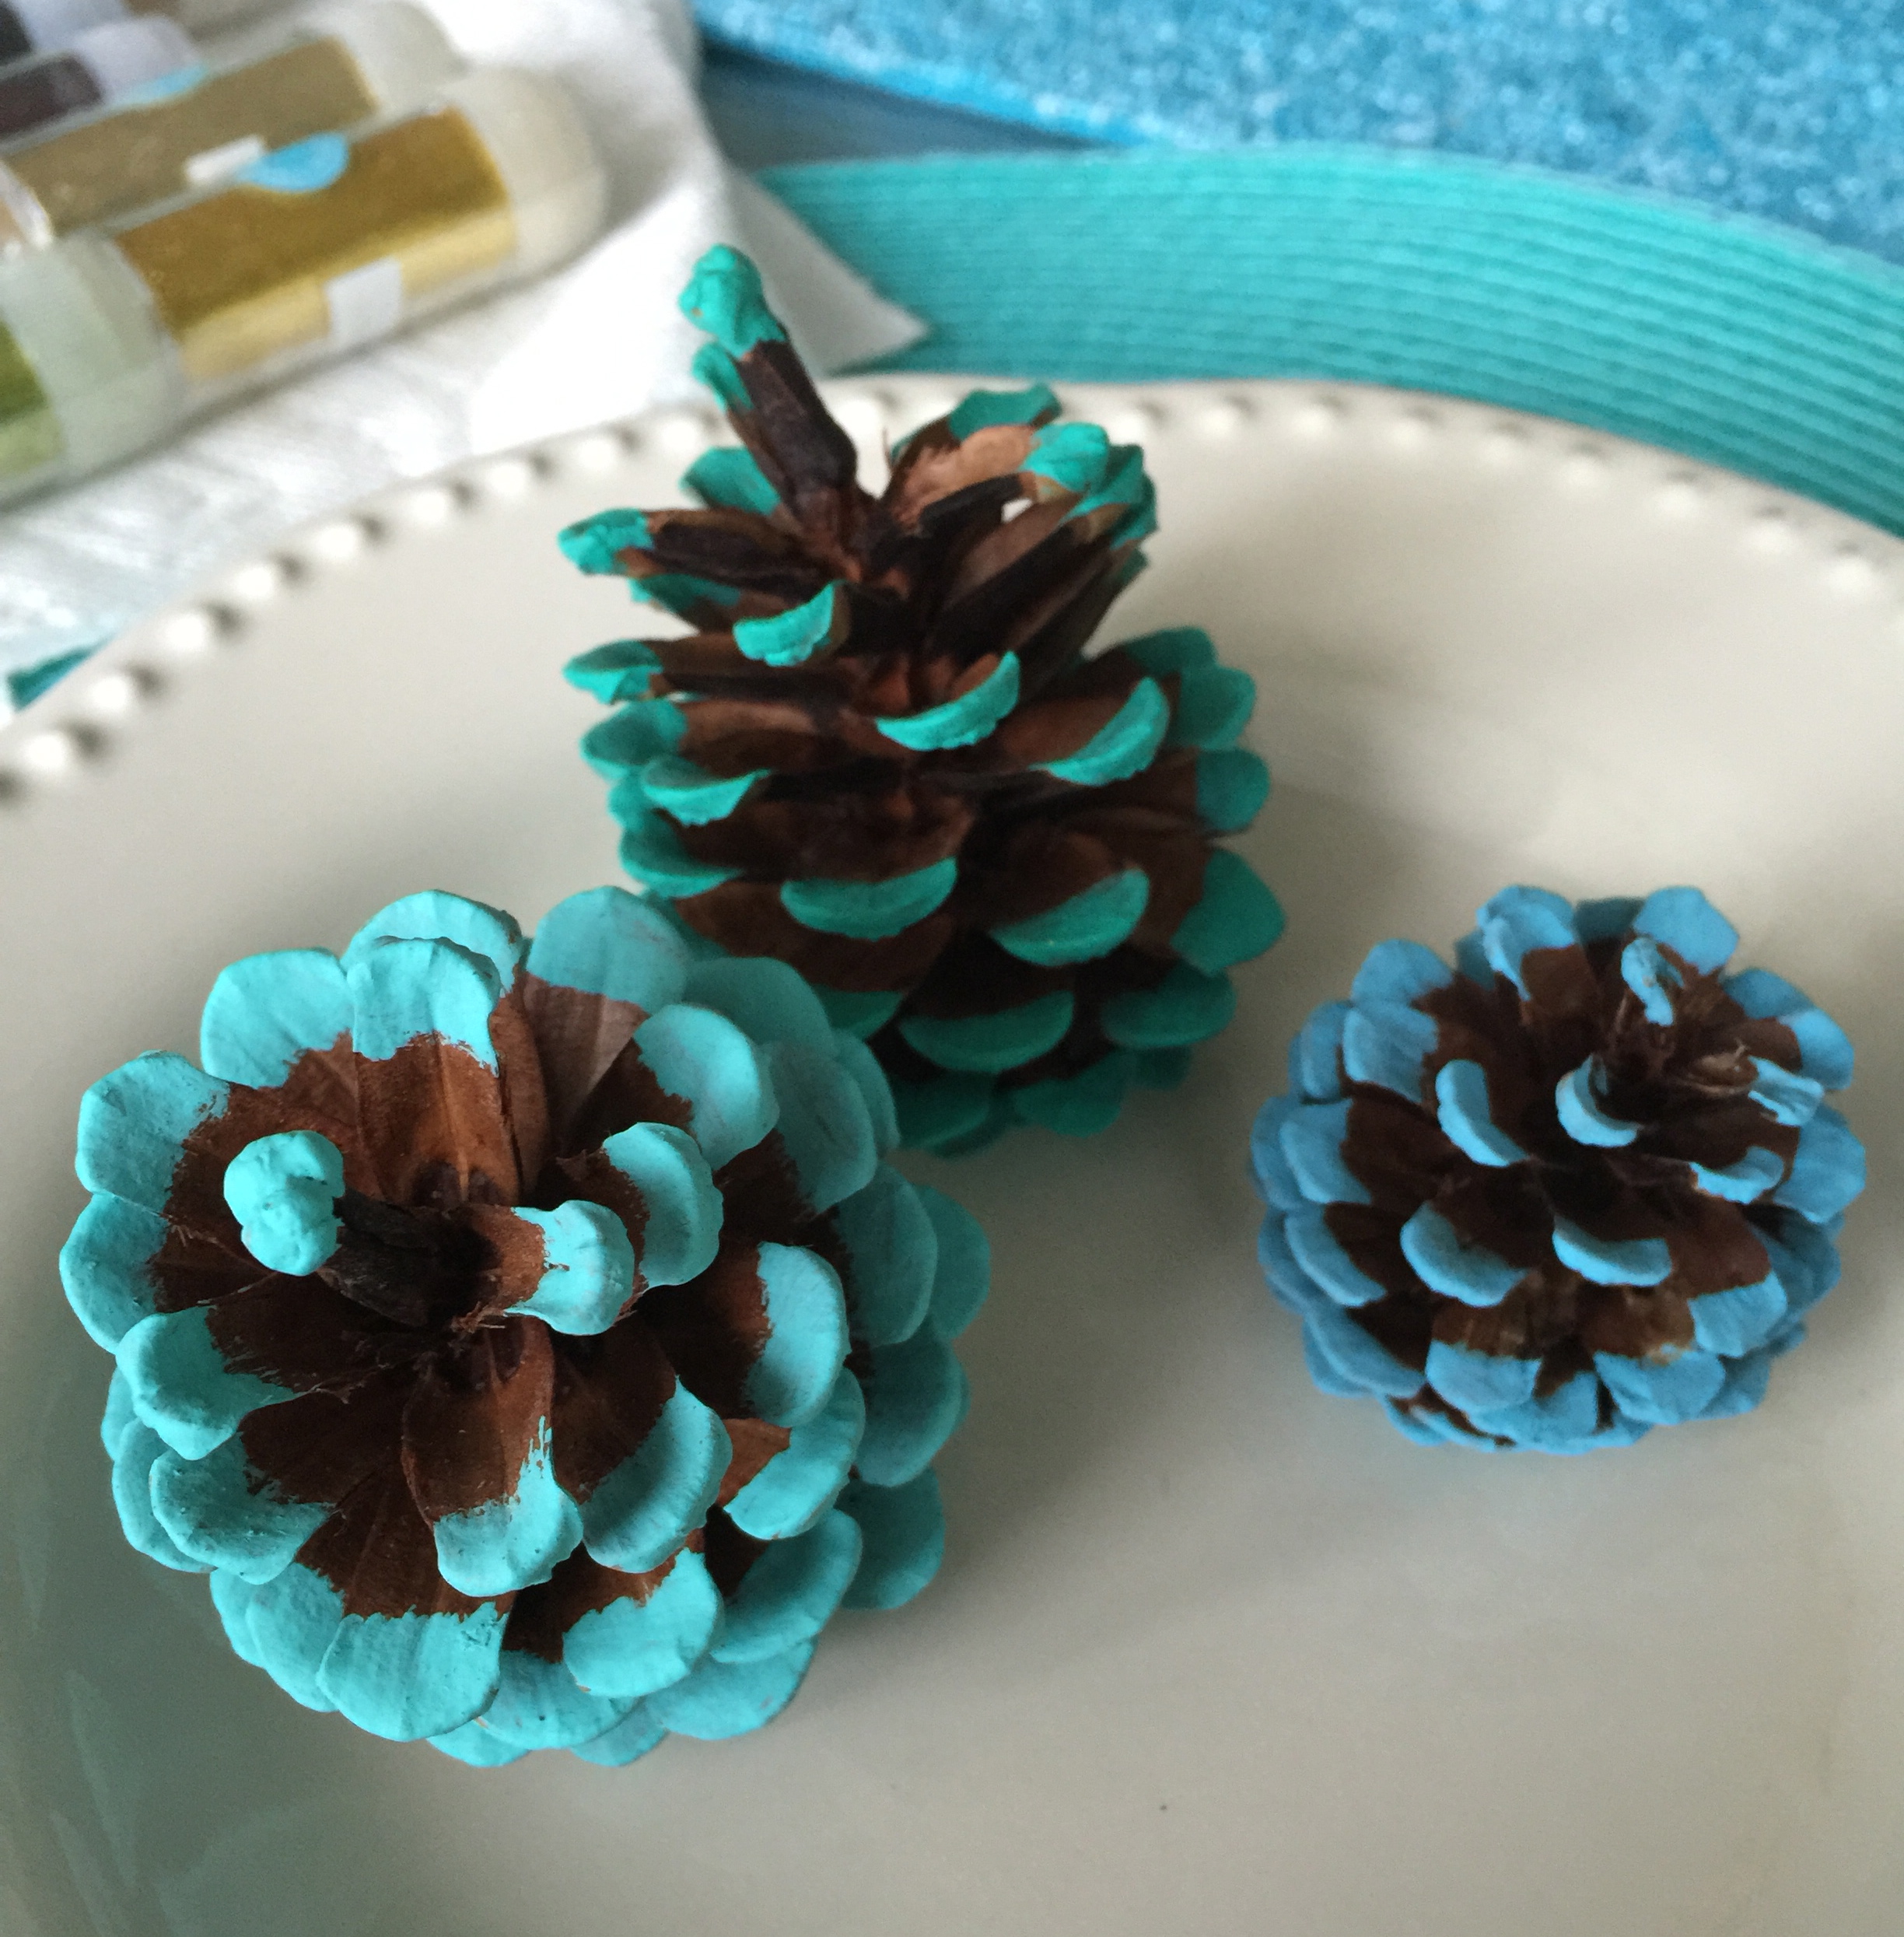
I’m a sucker for anything that sparkles and decided to add glitter to the second half of the bag. With a paintbrush, add a dollop of any type of glue (I used mod podge) to the outer parts of the pine cone. Immediately sprinkle glitter of your choice and repeat until the entire pine cone is covered.
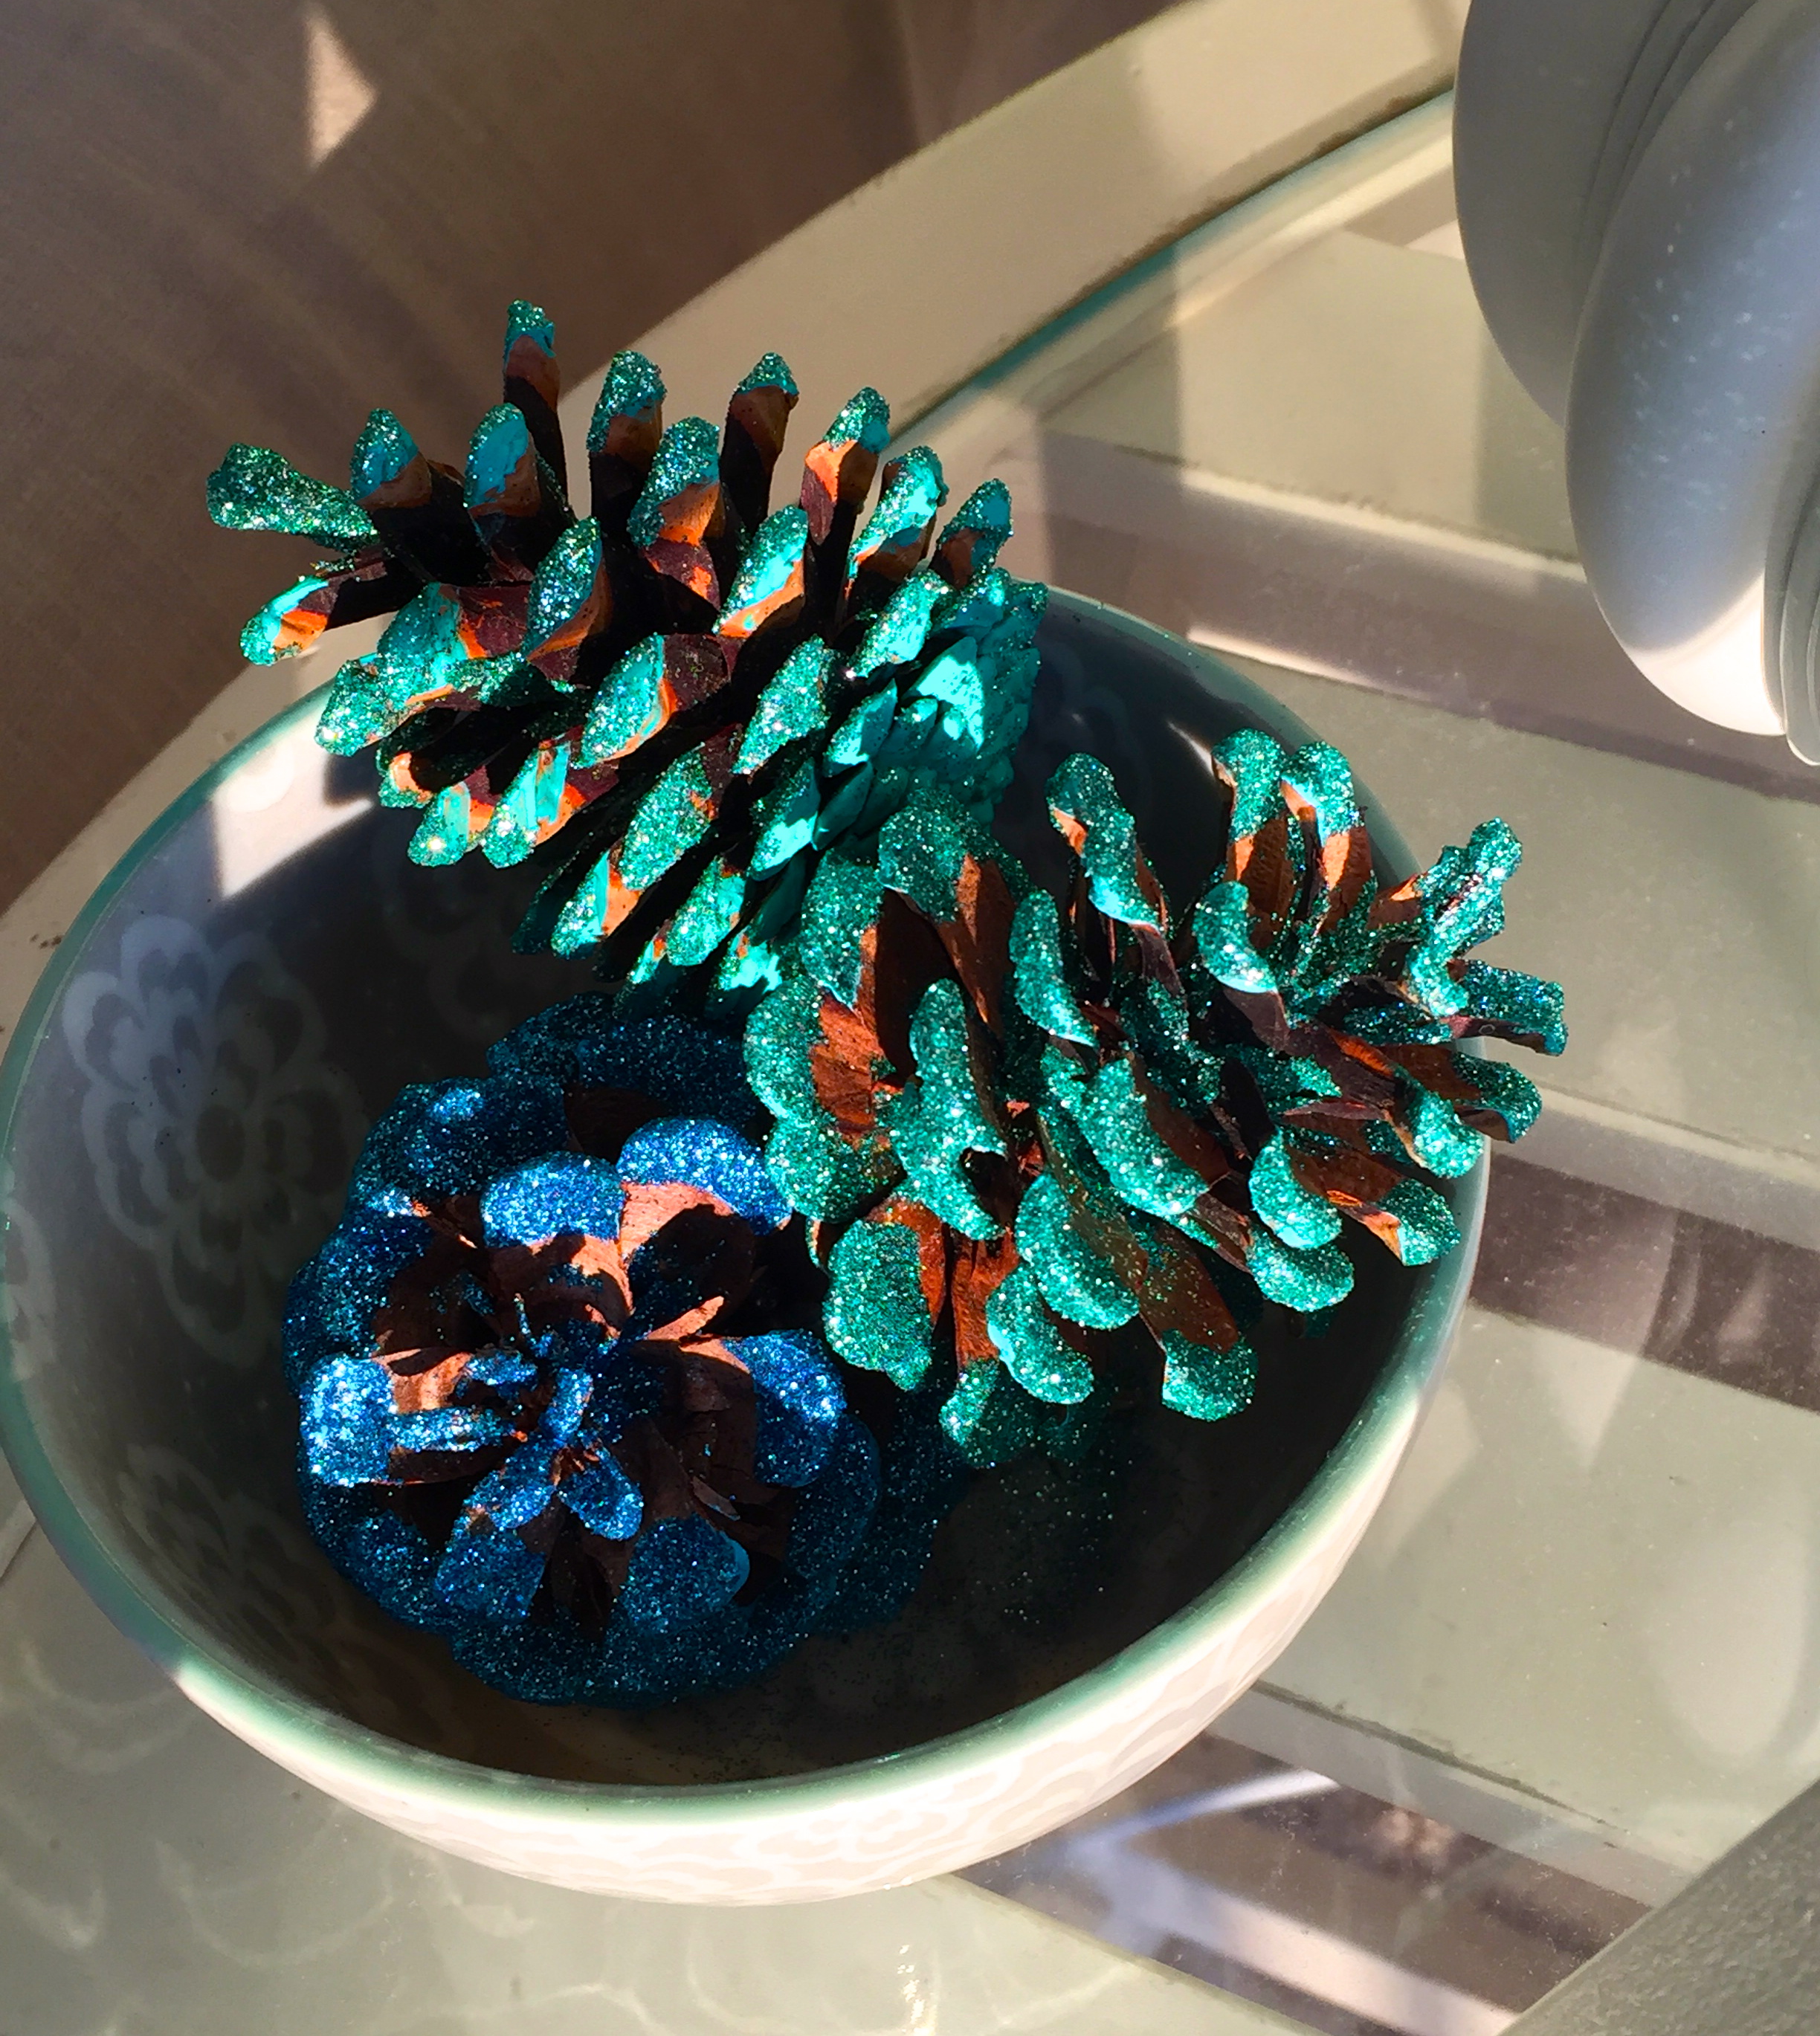
You can customize this DIY for holidays or as an easy fix before a party.

You will need:
– Pine cones
– 2 to 3 paint colors of choice
– Paint brush
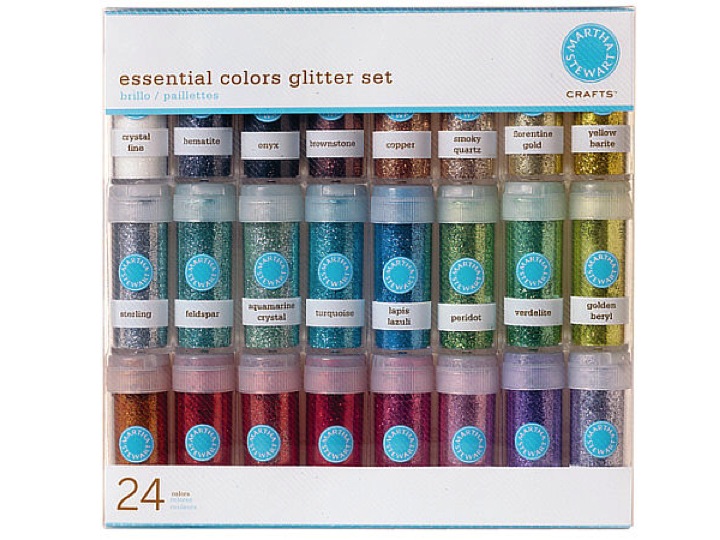
– Glitter (I used the Martha Stewart set because it appears extra shimmery)
– Glue
This 30 degree heat wave in Chicago calls for fresh flowers!
Use wine glasses for a creative table display – turn glass upside down and place a tiny vase or mini (hand painted) jar on top like the one above!

